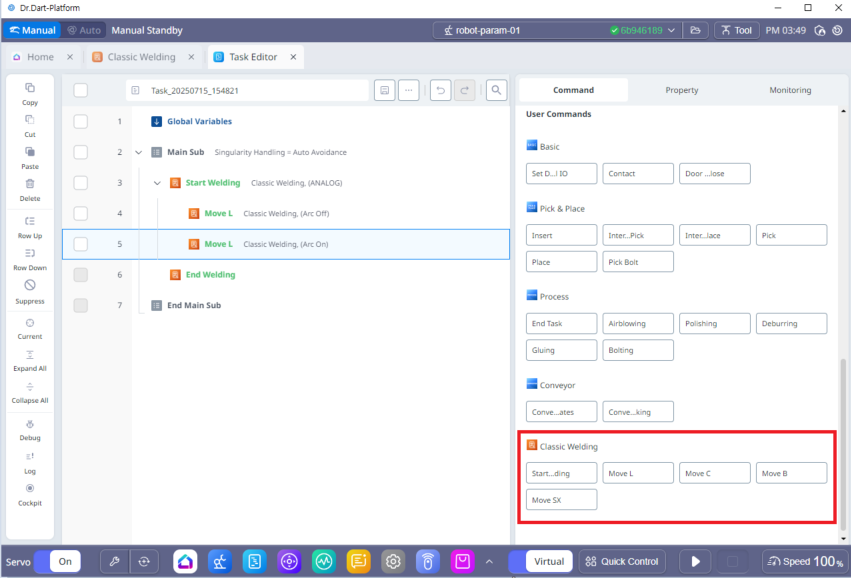
There are a total of 5 commands used in welding, and commands related to robot motion exist separately as shown in the figure below.
1. Welding Command List
|
No |
Category |
Desc |
|---|---|---|
|
1 |
StartWelding(End Welding) |
Create a Block consisting of Start Welding – End Welding in the Task List. |
|
2 |
Move L |
Create a Block in the Task List consisting of Start Welding – End Welding. The Block contains Motion commands to perform the Approach, Arc Start, Arc End, and Retract commands. The Arc Start – Arc End welding path motion is added as MoveL. |
|
3 |
Move C |
Create a Block in the Task List consisting of Start Welding – End Welding. The Block contains Motion commands to perform the Approach, Arc Start, Arc End, and Retract commands. The Arc Start - Arc End welding path motion is added as MoveC. |
|
4 |
Move B |
Create a Block in the Task List consisting of Start Welding – End Welding. The Block contains Motion commands to perform the Approach, Arc Start, Arc End, and Retract commands. The Arc Start – Arc End welding path motion is added as MoveB. |
|
5 |
Move SX |
Create a Block in the Task List consisting of Start Welding – End Welding. The Block contains Motion commands to perform the Approach, Arc Start, Arc End, and Retract commands. The Arc Start - Arc End welding path motion is added as a task spline motion (MoveSX). |
-
When you select a command, a welding block consisting of Start Welding and End Welding is created in the Task List.
-
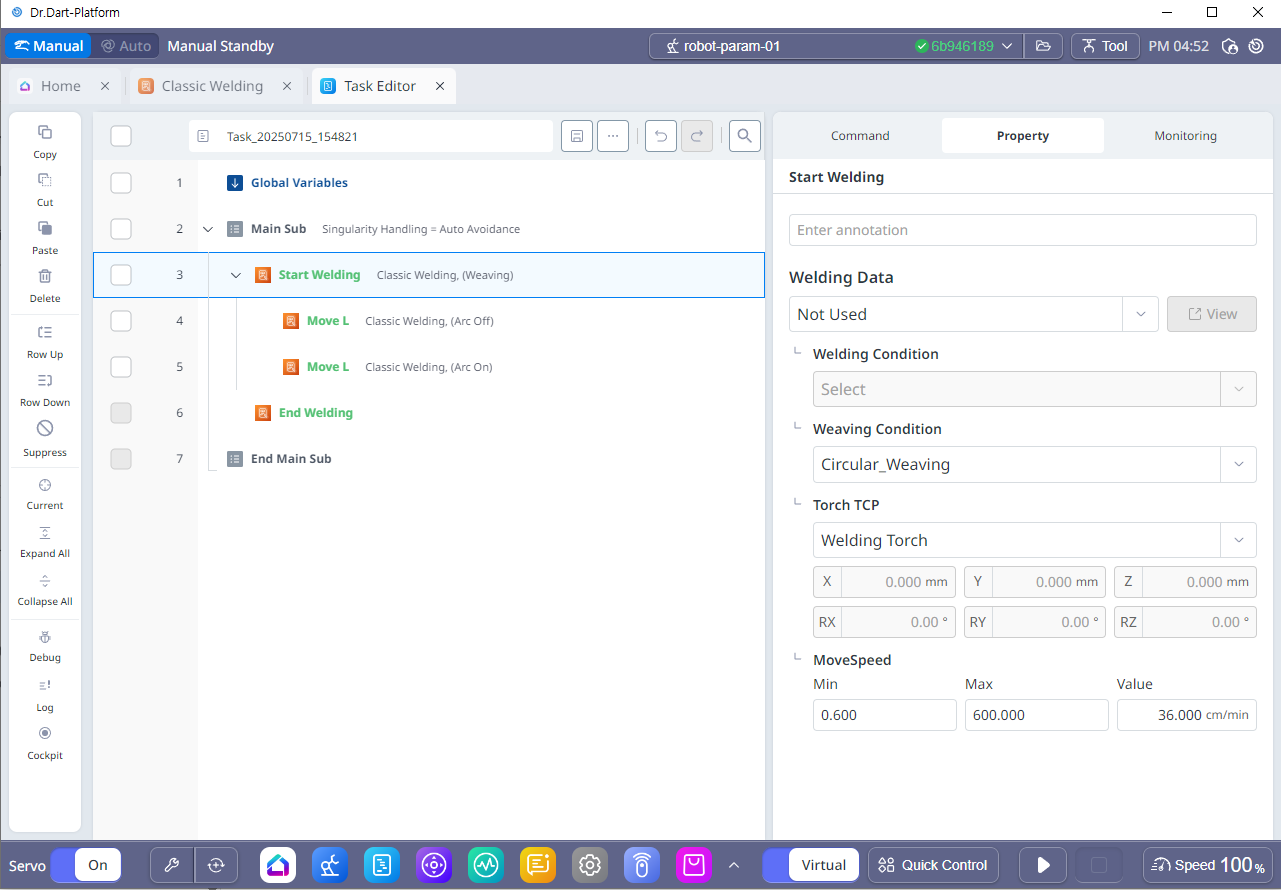
You can add motion commands within the weld area to interact with the Weld function during motion. Click on the Start Welding task line to begin setting up the task in the Property tab.
Warning
The robot motion commands used in welding must use the motion commands provided in welding. The motion commands provided by default cannot be used in welding and may cause malfunctions.
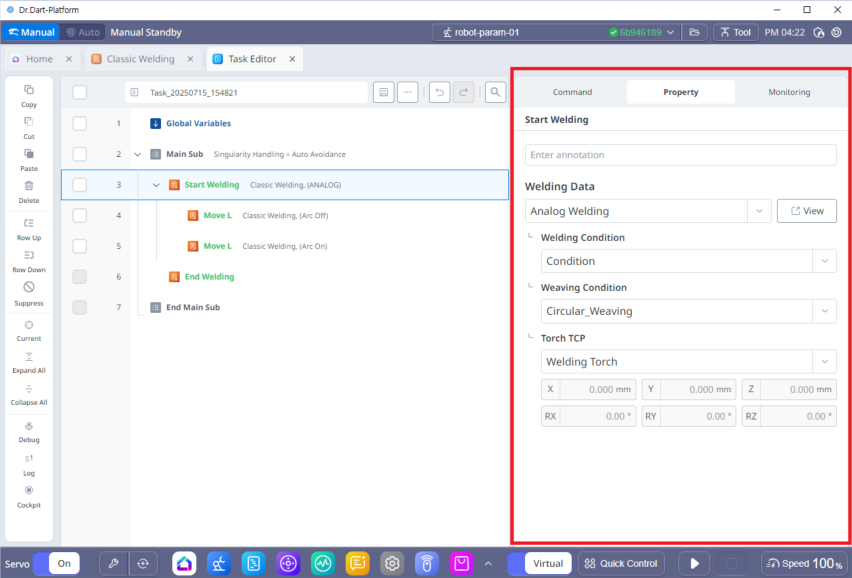
2. Welding Command (Start Welding) Property
|
No |
Category |
Desc |
|---|---|---|
|
1 |
Weding Data |
Select the welder you want to use in the task. The welding machine list shows the list of analog or digital welding settings set in the welding module. You can also set the Weaving motion task if you do not select a welder. At this time, you must set the movement speed as shown below. 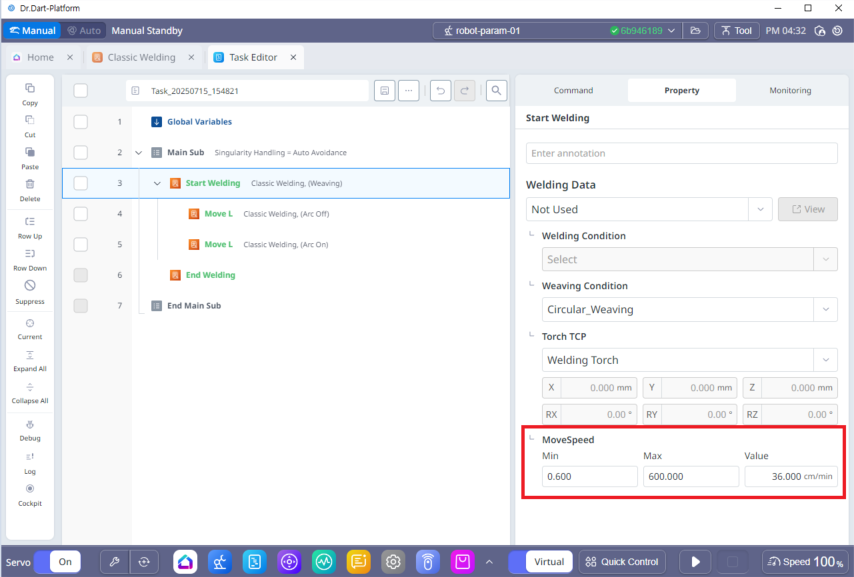
|
|
2 |
Welding Condition |
After selecting welding data, a list of welding conditions set in the selected welding data is displayed, and one of them is selected. |
|
3 |
Weaving Condition |
Select the condition to use from the list of weaving conditions. If you do not need a weaving condition, you can select “Not Used”. However, if you want to use a path offset, you must select a weaving condition to use the function. |
|
4 |
Torch TCP |
Select the welding torch mounted on the robot tip. Be careful, if you select the wrong torch, the welding path may not be generated as expected. For the welding torch, TCP must be registered in the Robot Parameter module to appear in the list. |
Info
-
If you do not want to use the weaving motion, but only want to use the offset, set both P1 and P2 of the trapezoidal profile to (0,0) and both the weaving time/rest time to 0, and you can use only the offset function.
-
If you do not want to interface with the welder and apply welding conditions, or if you want to use only the weaving function by writing it separately in the task program and linking it with the welder, you can do so by specifying the weaving conditions in the work cell manager without activating the welder (check that the welding data is in the “Not Used” state).
3. Welding motion commands and section-specific work condition specifications
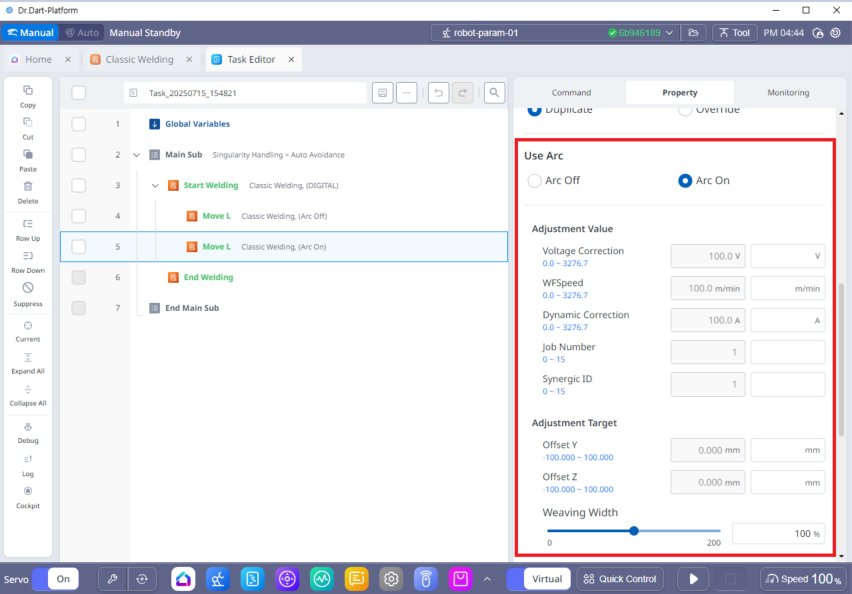
The teaching for welding tasks is the same as general teaching. The MoveL, MoveC, MoveB, and MoveSX motion commands can be used in conjunction with the welding function. When adding a motion command in the welding area, there are selection boxes for “Arc On” and “Arc Off” in the “Arc Use” field. When “Arc On” is activated, welding is performed during the motion, and when “Arc Off” is activated, general motion is performed without being linked to the welding function.
If multiple motions are entered in a welding block, the motion selected as “Arc On” can change the welding conditions for each motion. However, only one welding/weaving/torch information is valid and can be saved in one welding block, so the separately specified welding/weaving conditions are applied while the motion section with the changed conditions is being performed, but the conditions cannot be adjusted in real time in welding monitoring.

|
번호 |
항목 |
설명 |
|
|---|---|---|---|
|
1 |
Use Arc |
Select whether the command will be used as a welding motion. |
|
|
2 |
Adjustment Value |
Adjustment Value |
You can change the item values of the selected welding condition. |
|
Adjustment Target |
You can change the item values of the selected weaving condition. |
||
|
3 |
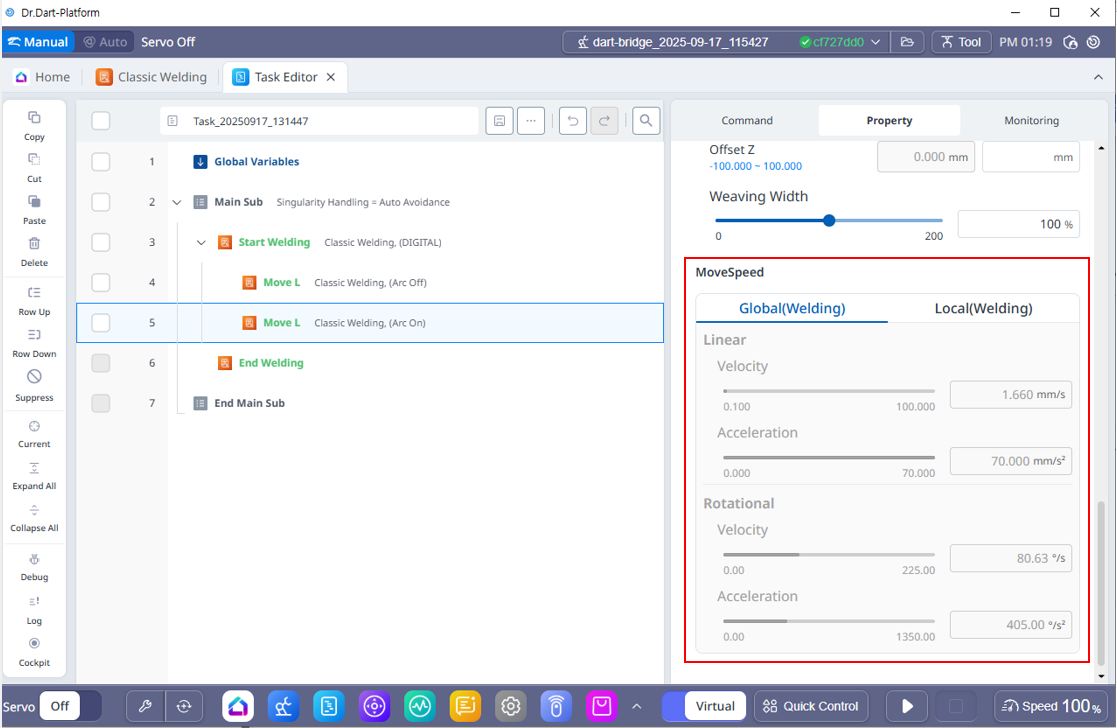
MoveSpeed |
If you want to change the welding speed, select the Local tab and enter the speed you want to change. The units are mm/sec. Acceleration and Rotation Speed/Acceleration settings can be changed in both the Global and Local tabs. |
|
4. Use Only Weaving
It is possible to build an interface with the welder using a user program without setting up the welding machine interface and welding conditions, and utilize only the weaving function.
If you do not select a welder in the StartWelding command (select “Not Used”), you can use only the weaving motion by adding only the weaving conditions you want to use and then using the Welding command in the Task Editor.