|
No. |
Item |
Description |
|---|---|---|
|
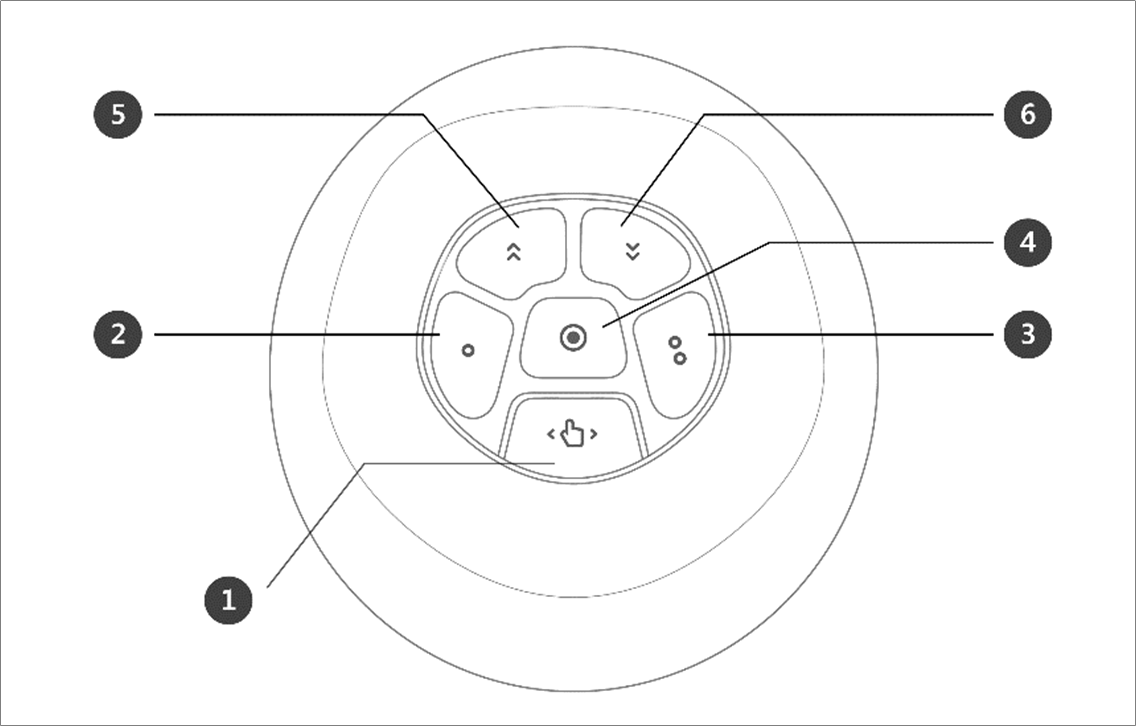
1 |
Hand-Guiding Button |
This button can be used to adjust or change the robot’s pose. |
|
2, 3 |
User Setting Button |
This button can modify the robot’s pose by entering a pose according to a lock condition corresponding to a mode.
|
|
4 |
Save Pose Button |
Saves the current robot pose. |
|
5 |
One Line Up |
Moves the Focus displayed on the screen one line up |
|
6 |
One Line Down |
Moves the Focus displayed on the screen one line down |
Direct teaching (Hand-guiding)
Hand-guiding is used to hold the robot end with one’s hands to push and pull the robot to the desired pose, and apply the pose to the currently selected motion.
There are two direct teaching methods.
-
Freedrive: Each joint moves in the direction the user applied force
-
Constrained Motion: The robot end moves or rotates only in the direction set in the constrained motion even when force is applied from a random direction
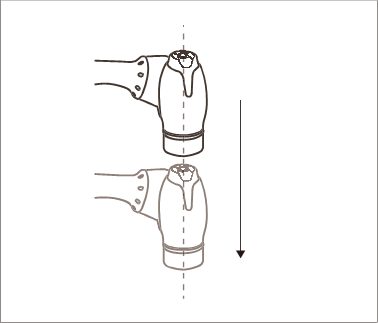
Freedrive
When Button 1 is pressed, the Freedrive mode is activated, allowing the robot to be moved freely. Each joint moves in the direction the user applied force. The robot cannot be moved by hand once the button is released.
-
During direct teaching, the robot LED blinks cyan.
-
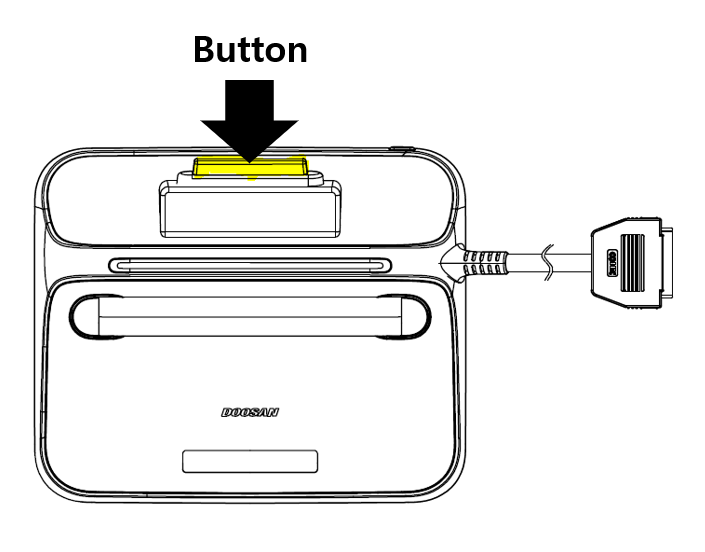
Pressing the hand guide button on the back of the teach pendant will activate the Freedrive mode, just like pressing Button 1, and the robot can be moved freely.
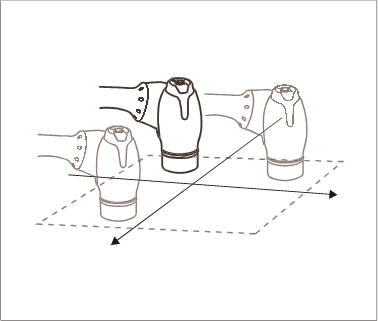
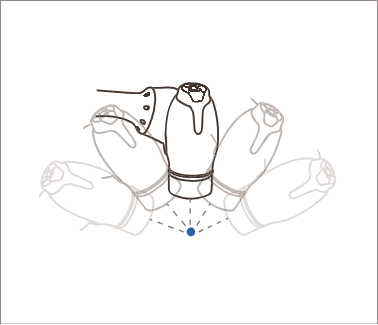
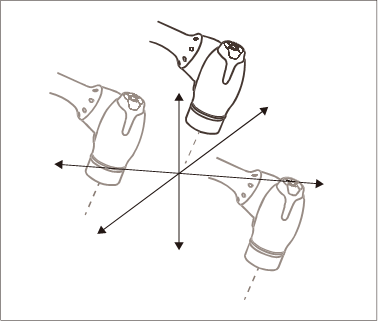
Constrained Motion
When Button 2 and Button 3 are pressed, the robot end moves only in the direction matching the constraint condition even when force is applied from a random direction. The constraint condition can be set with 2 of 4 of the conditions in the following figure: Z-axis constrained, plane fix constrained, surface constrained and direction constrained.
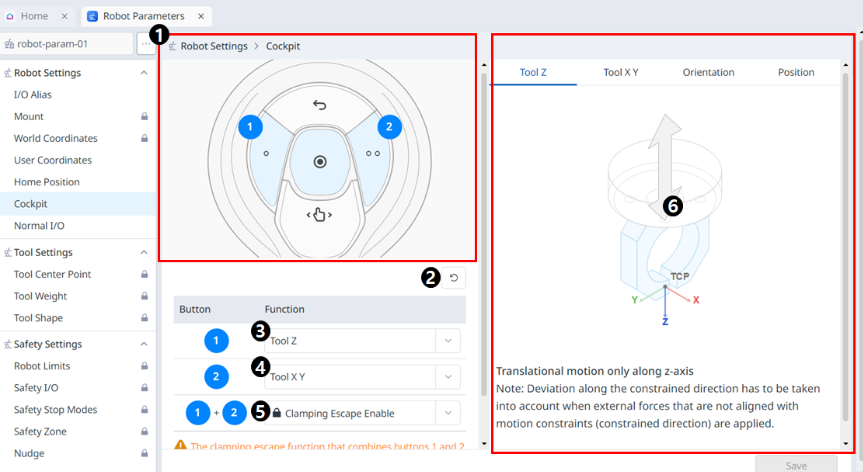
Cockpit buttons setting
Menu
|
Items |
Description |
|
|---|---|---|
|
1 |
Cockpit Image |
This is an image for Cockpit settings. |
|
2 |
Reset |
This button allows you to initialize the set values. |
|
3 |
1 Button Setting |
This is the section where you can select the function to be set for the button 1. |
|
4 |
2 Button Setting |
This is the section where you can select the function to be set for the button 2. |
|
5 |
1+2 Buttons Setting |
This is the section where you can select whether to enable clamping for the buttons 1+2. |
|
6 |
Guide Image |
An guiding image for Cockpit setting items. |
Obtaining Cockpit Button Status
User can obtain information about whether the Cockpit Button is pressed or released.
The robot provides the function to control the Cockpit Button, allowing it to be utilized in various applications.
-
The "Monitoring Data" in the communication API provides information on Cockpit Button.
-
If you press the robot's Cockpit Button or vice versa, you can detect it through the DRL API.
-
DRL API: get_cockpit_input (Please refer to the Programming Manual.)
-
Params: (int) index
-
Returns: (int) 1: Pressed (The button is pressed), 0: Released (The button isn’t pressed)
-