Software Recovery Mode
Menu Items
|
|
Item |
Description |
|---|---|---|
|
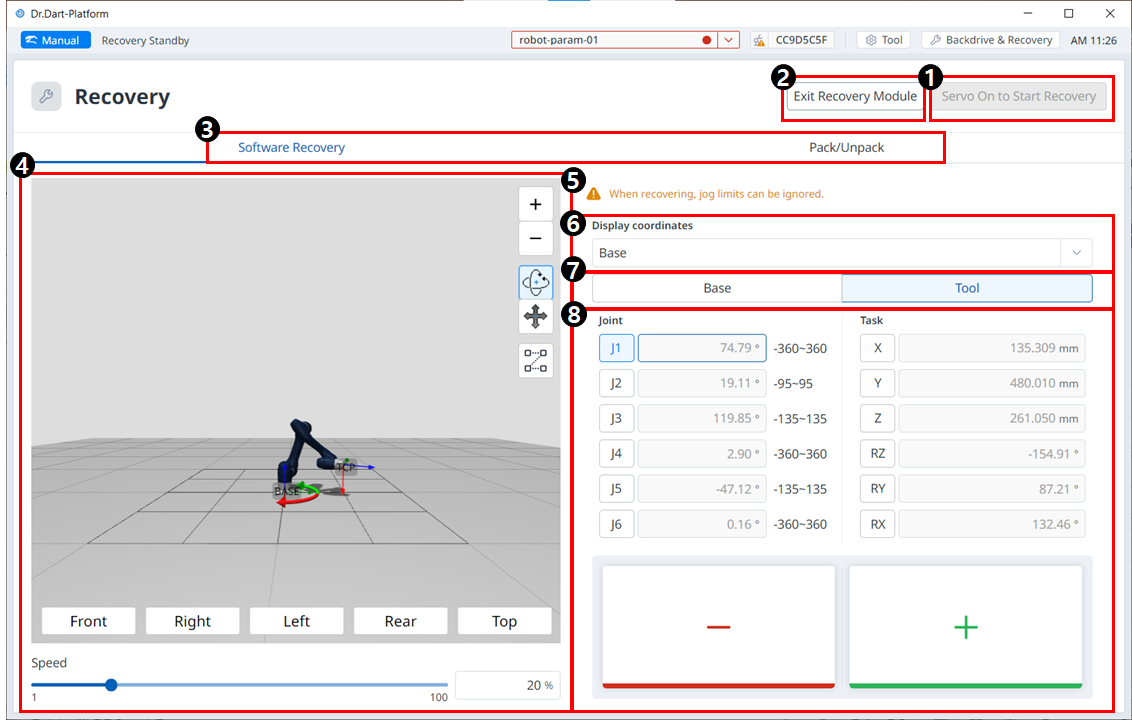
1 |
Servo On to Start Recovery |
This is a button to enable the servo before entering Recovery mode. |
|
2 |
Exit Recovery |
This button allows you to exit the Recovery module. |
|
3 |
Header |
This section allows you to select either Software Recovery mode or pack/unpack mode. |
|
4 |
3D Simulation |
This area allows you to preview a 3D simulation of the set values. |
|
5 |
Warning Message |
This explains the precautions. |
|
6 |
Display Coordinates |
This is where you can set the coordinate based on Base or World. |
|
7 |
Base/Tool Button |
This is where you can set the value based on Base or Tool. |
|
8 |
Joint/Task |
This section allows you to enter the desired values to make the robot move. |
To use the software recovery mode, follow these steps:
-
Tap the Recovery menu in the Main Menu window. The Software Recovery screen appears automatically in the Recovery window.
-
Tap each joint button on the right side of the Software Recovery screen, and use


-
For definitions of the buttons in the cockpit, see Cockpit
-
Changes made to the setting are reflected on the simulation window on the left in real time.
-
-
When the setting is complete, tap the X button on the top left to close the window.
Software repair mode is not available when the joint angle limit is exceeded by 3 degrees.