Try Force command samples
Caution
Before trying the sample, make sure to read and follow Precautions. For more information, refer to PART 1. Safety Manual.
Note
This sample requires the Task Writer file created in Try Compliance command samples
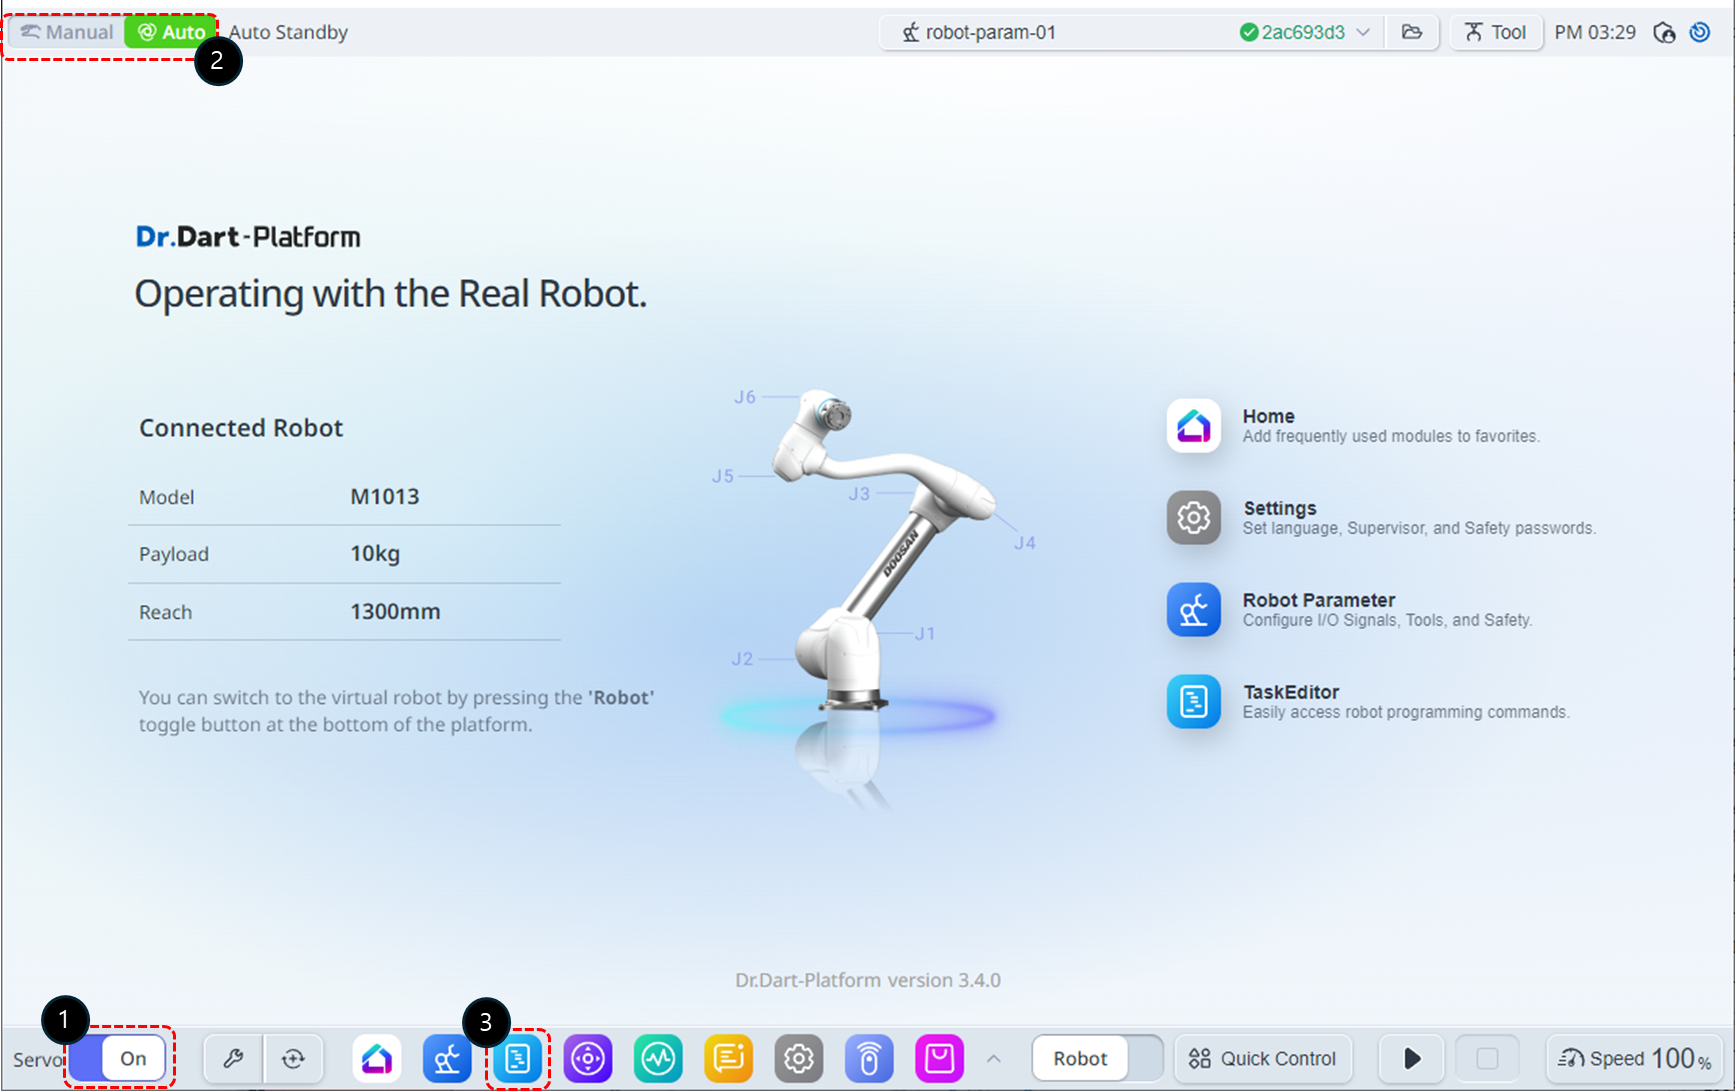
Change the Servo state to On.
Switch the operation Mode to Manual.
Select the Task Editor module from the bottom menu.
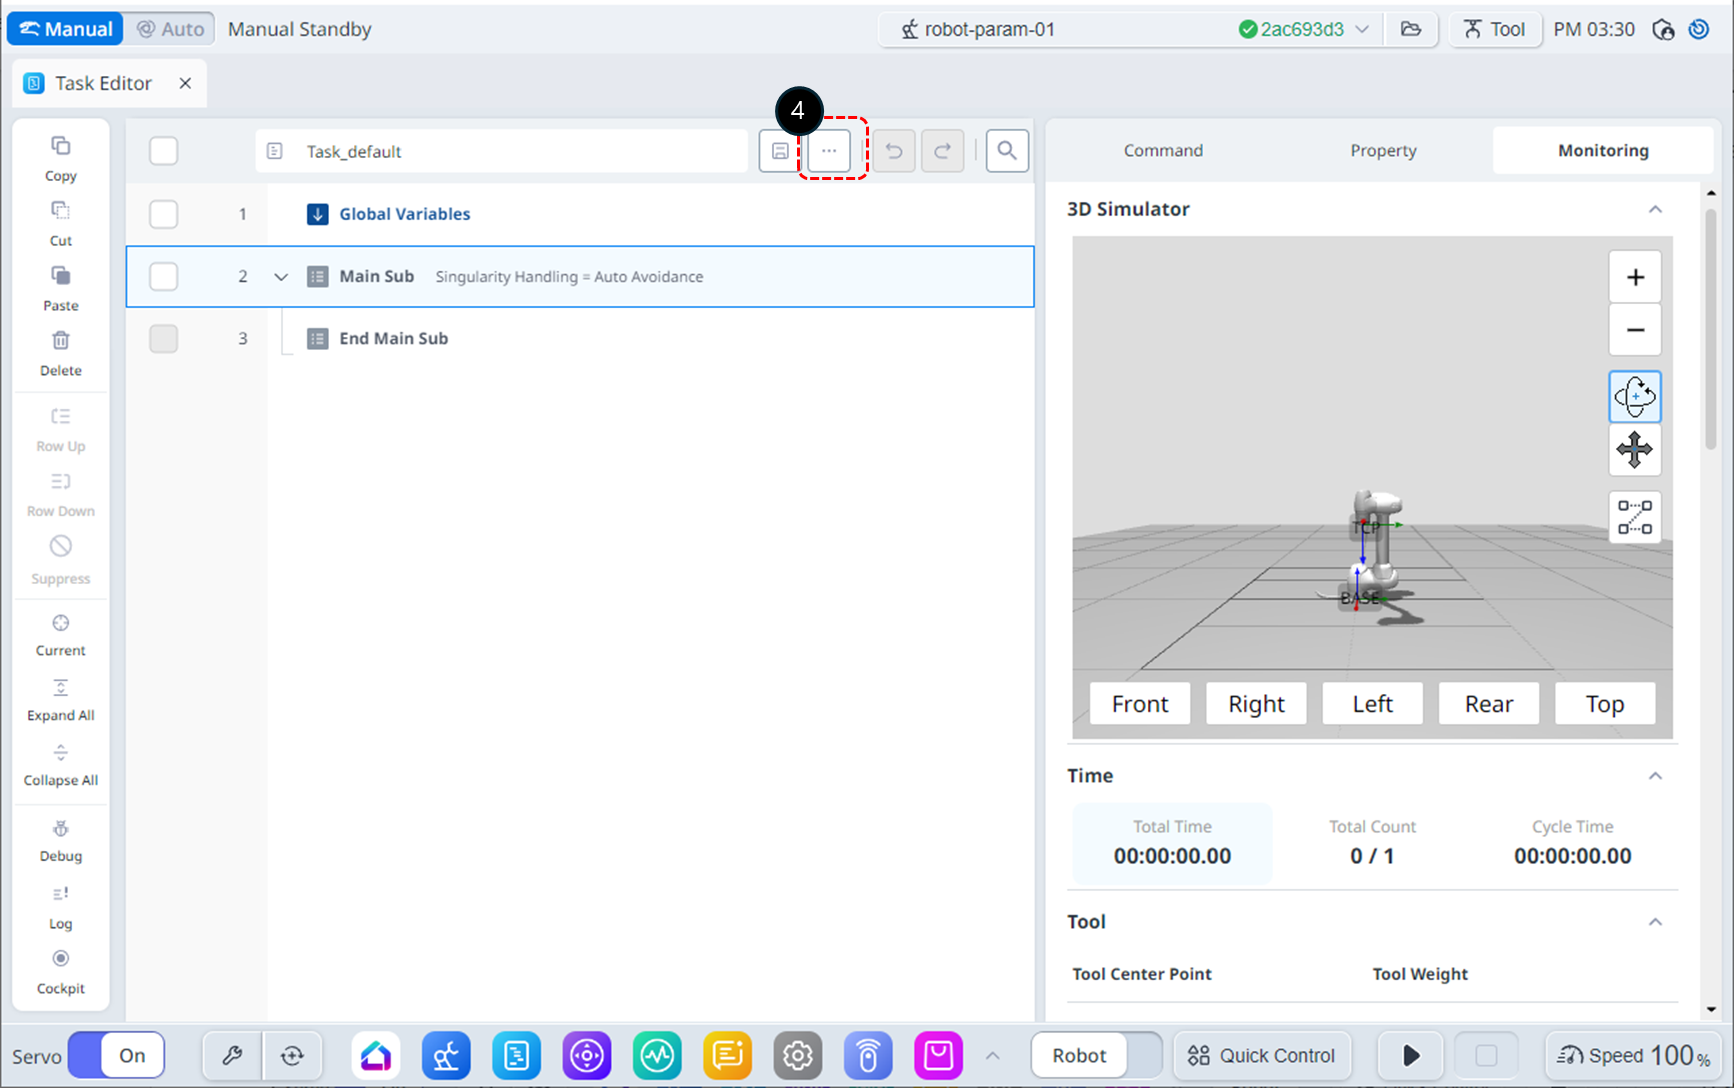
Click the File button.
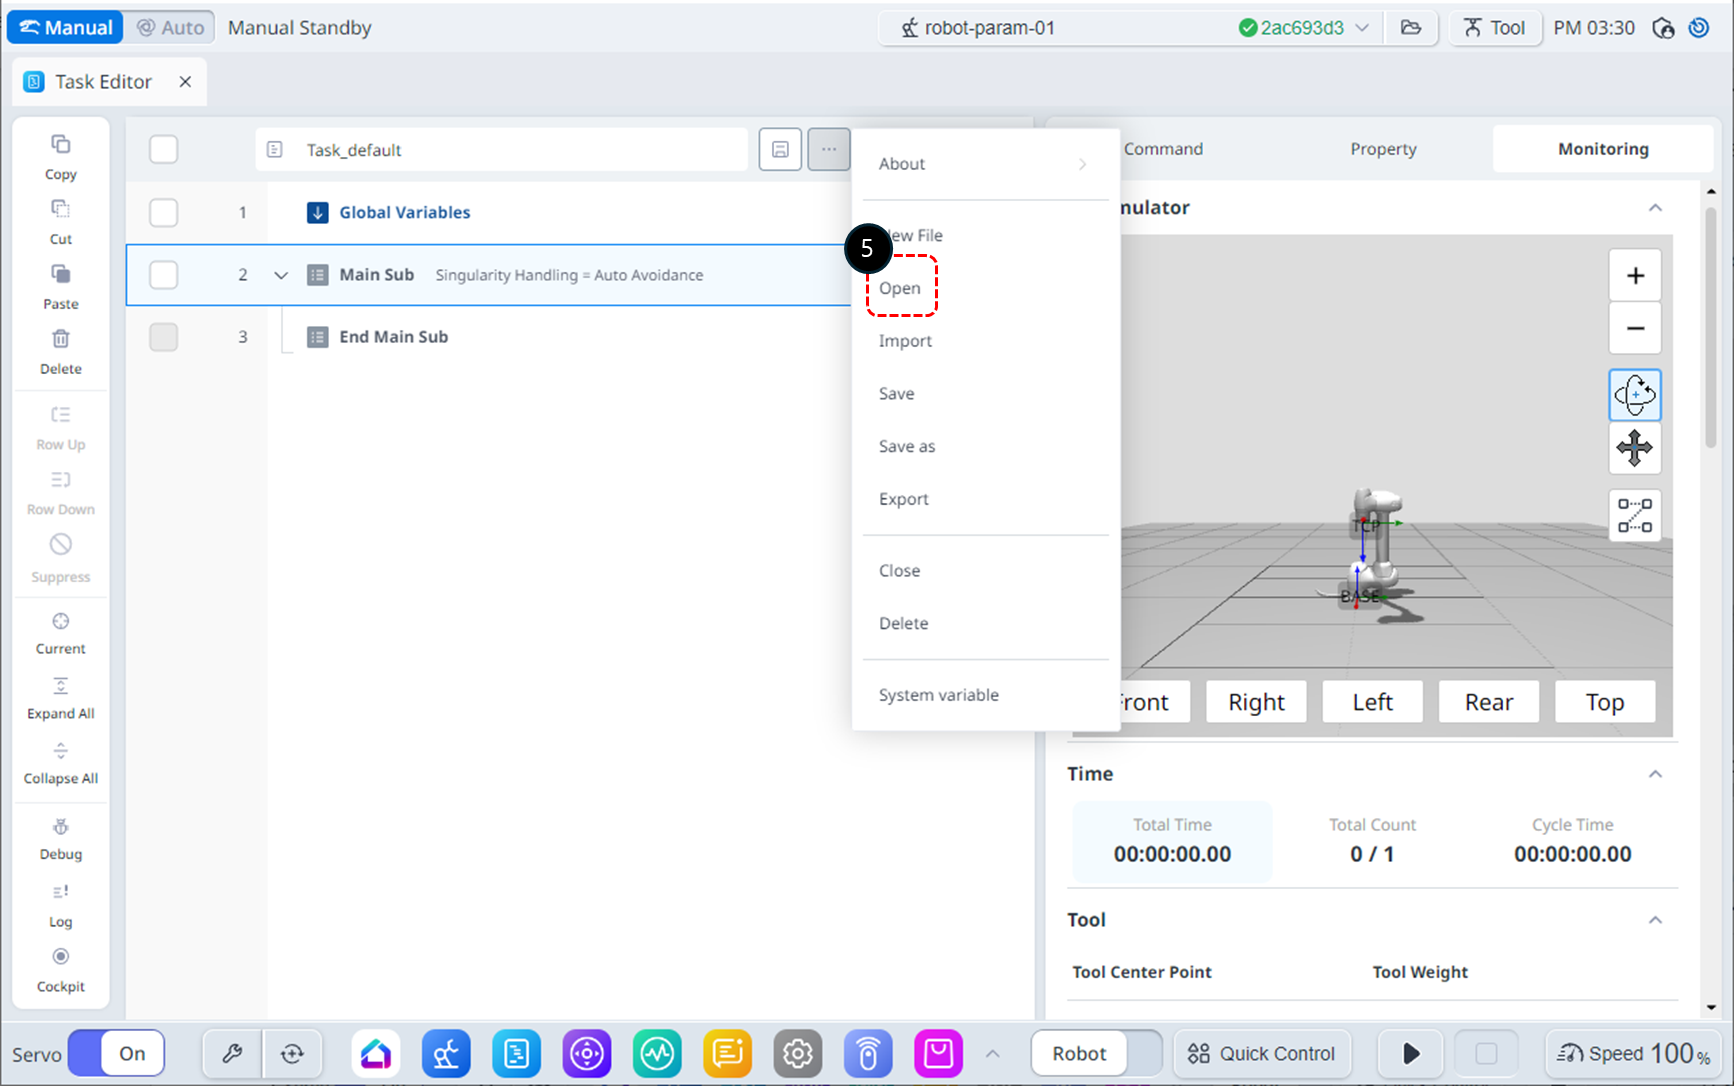
Click the Open button.
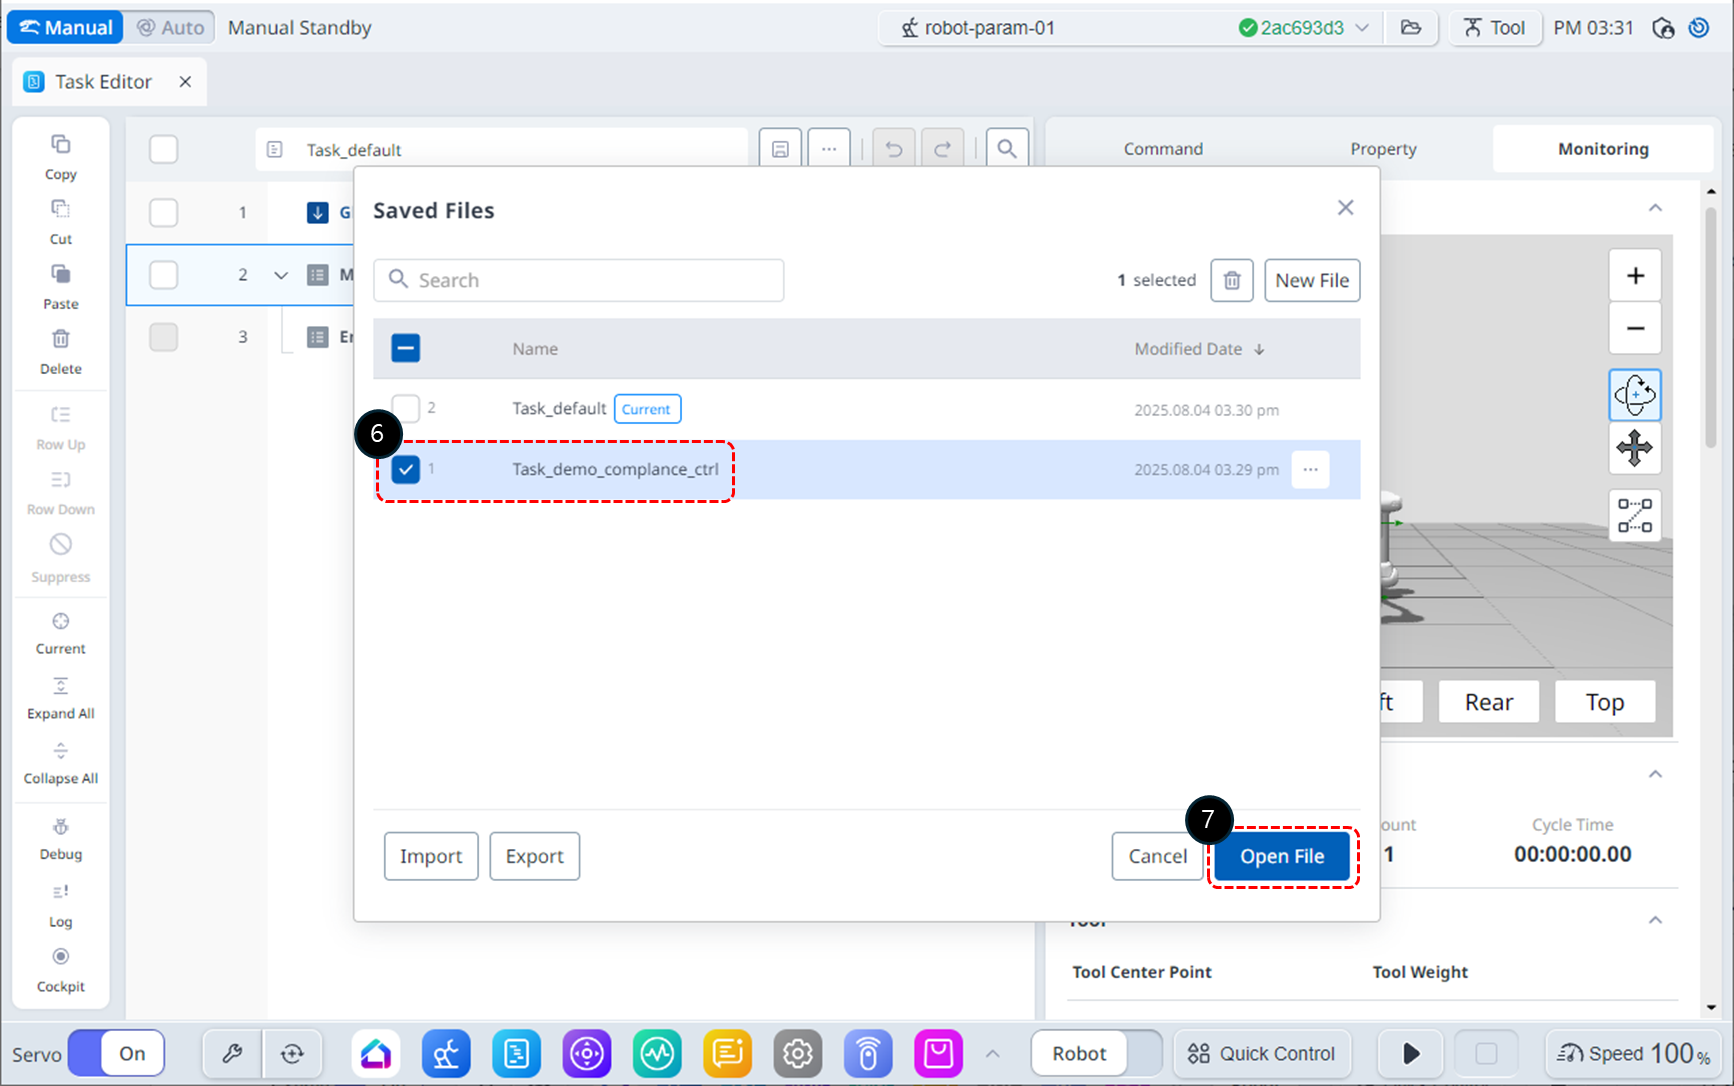
Select the Task_demo_compliance_ctrl file created in Try Compliance command samples.
Click the Open File button.
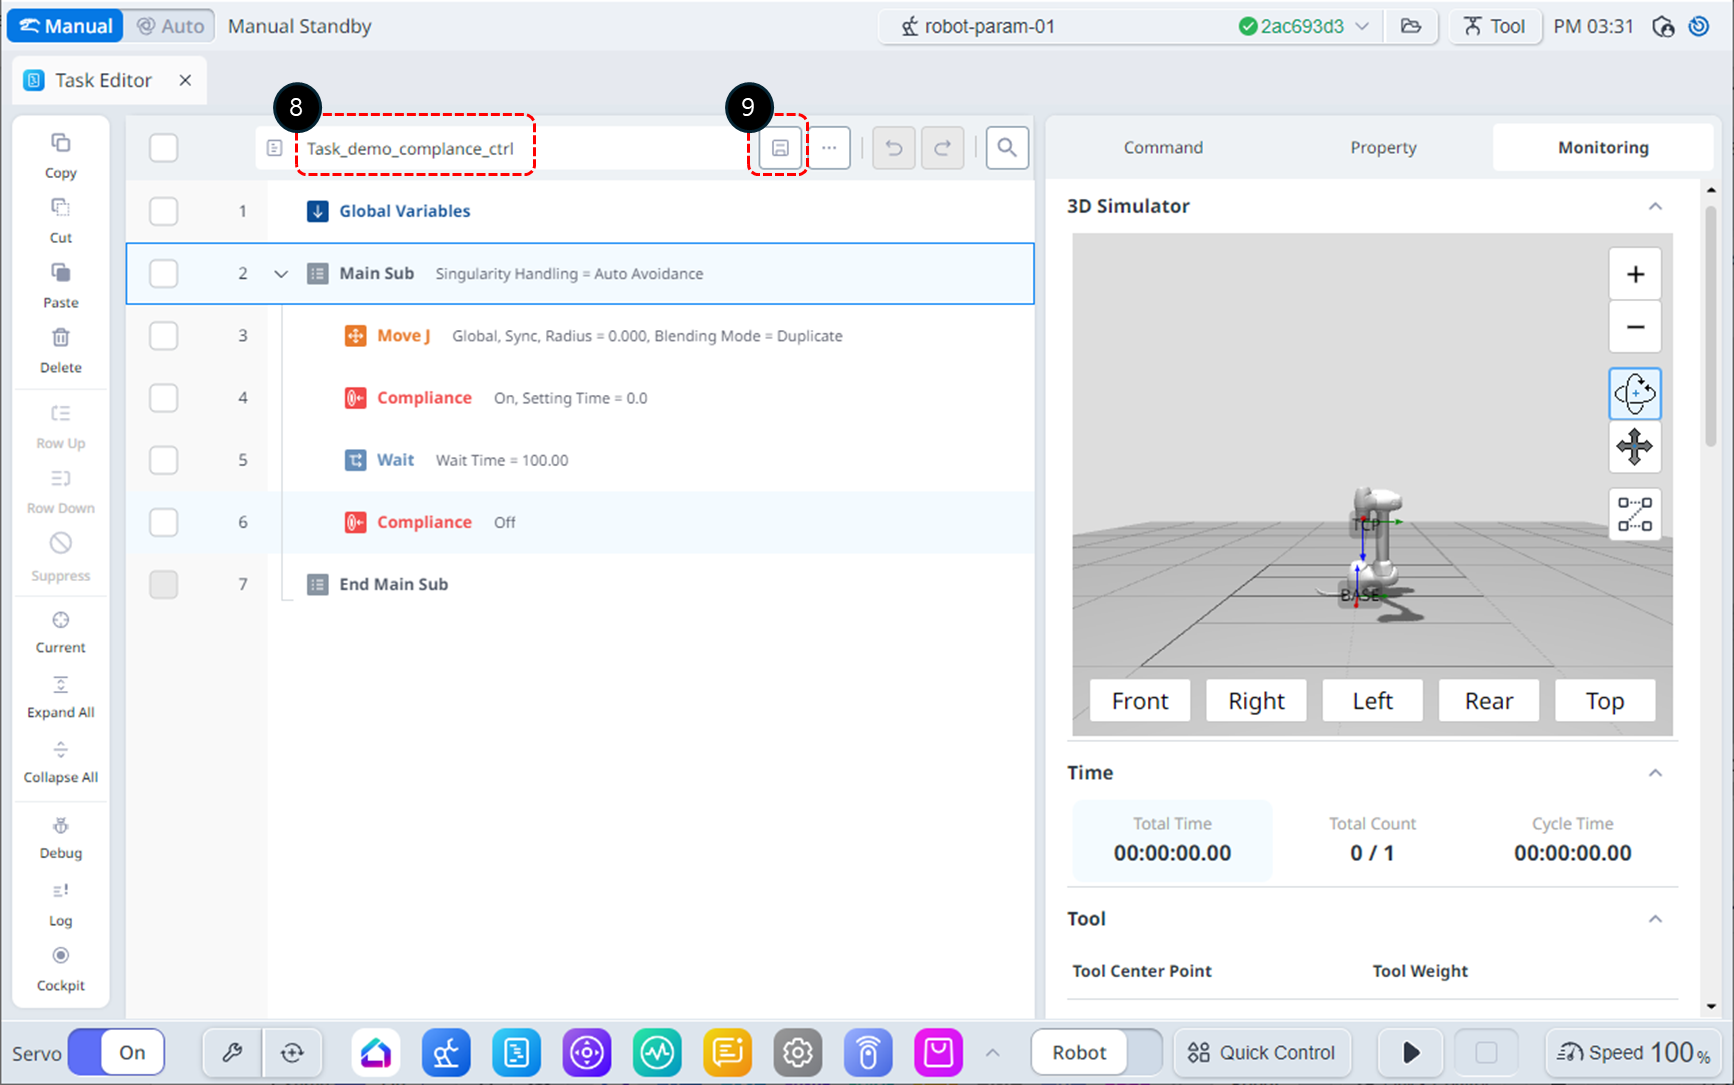
Rename the file to Task_demo_force_ctrl.
Click the Save button to save the file name.
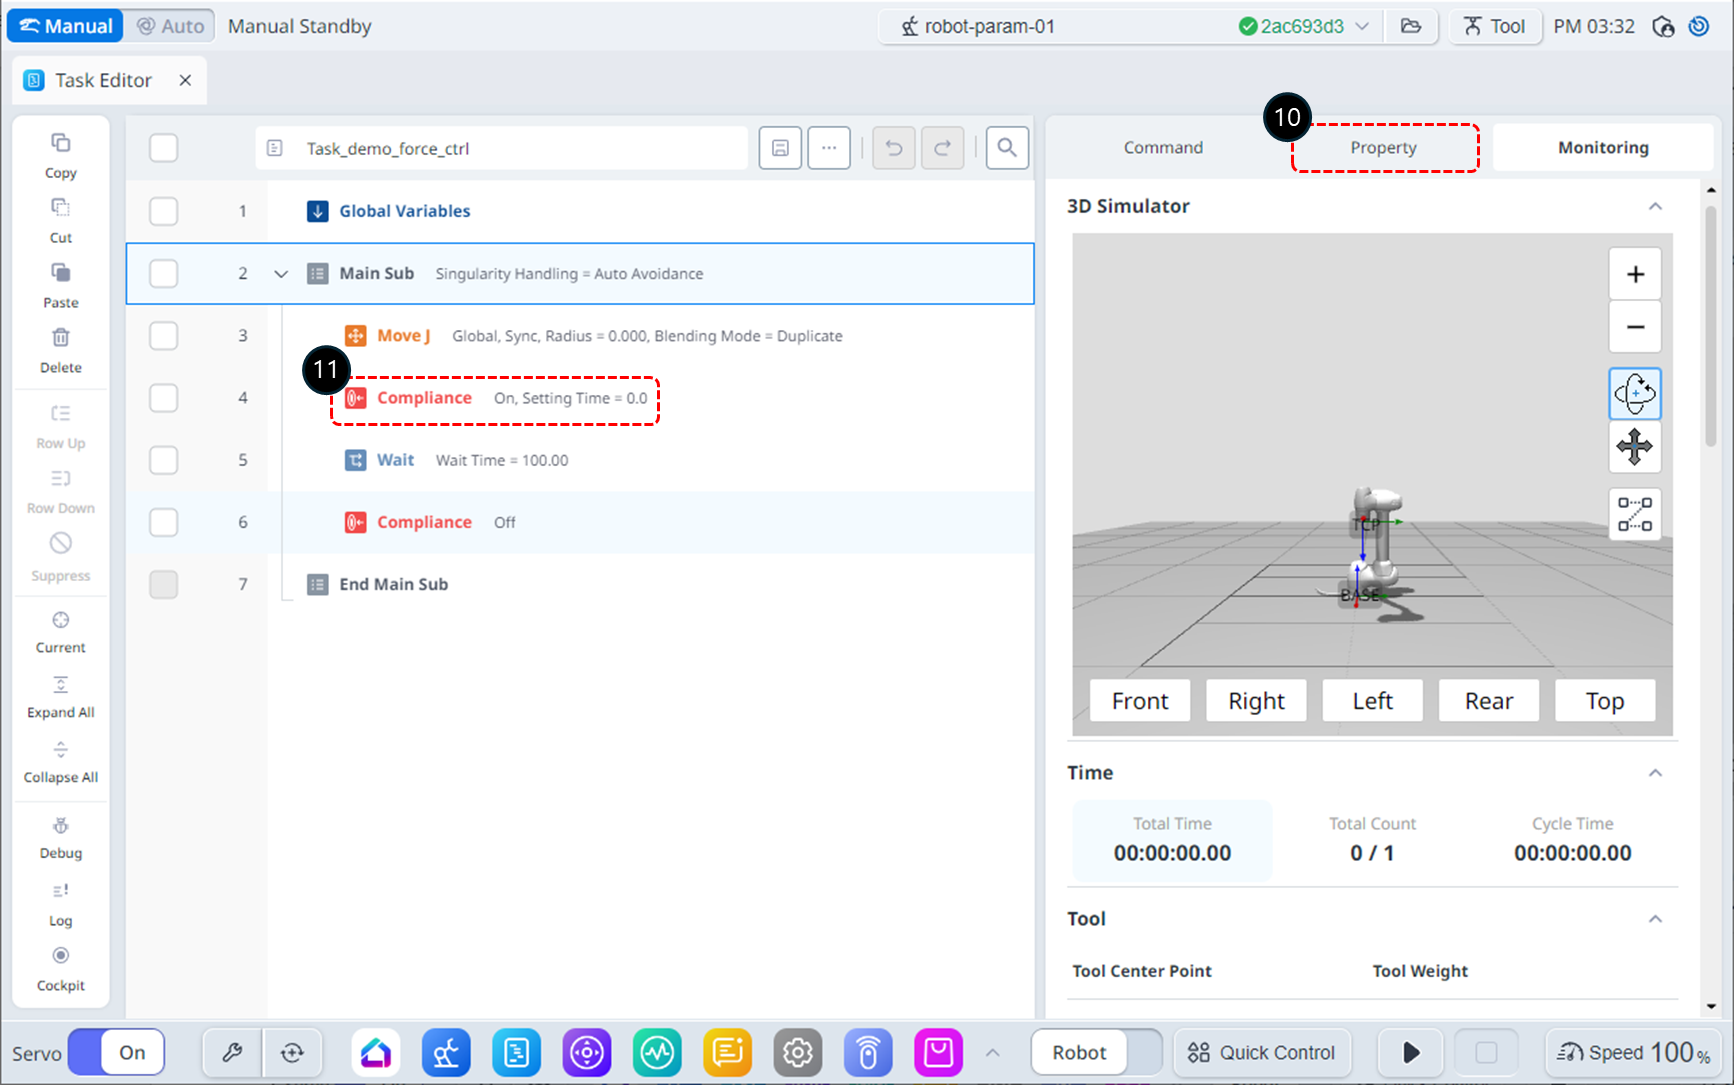
Select the Property tab.
Choose the Compliance command on the 4th line.
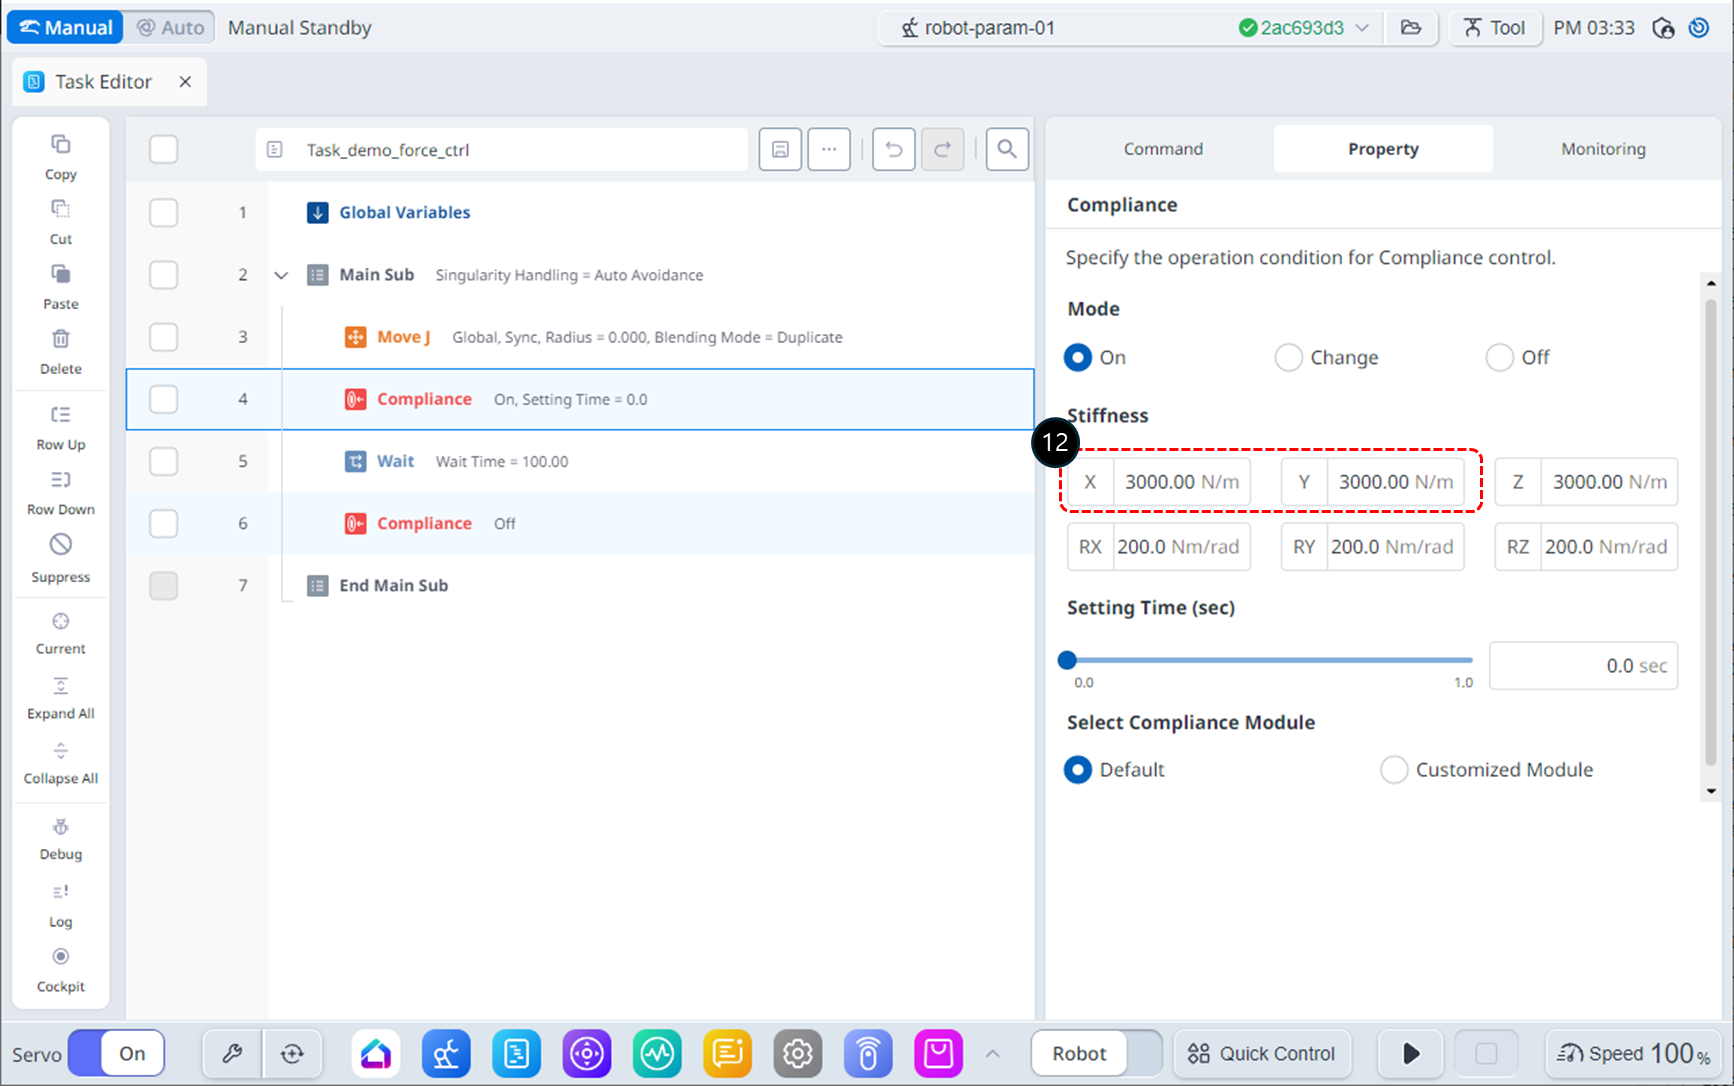
Set the Stiffness to its default values as follows.
X, Y, Z : 3000 N/m (default)
Rx, Ry, Rz : 200 Nm/rad (default)
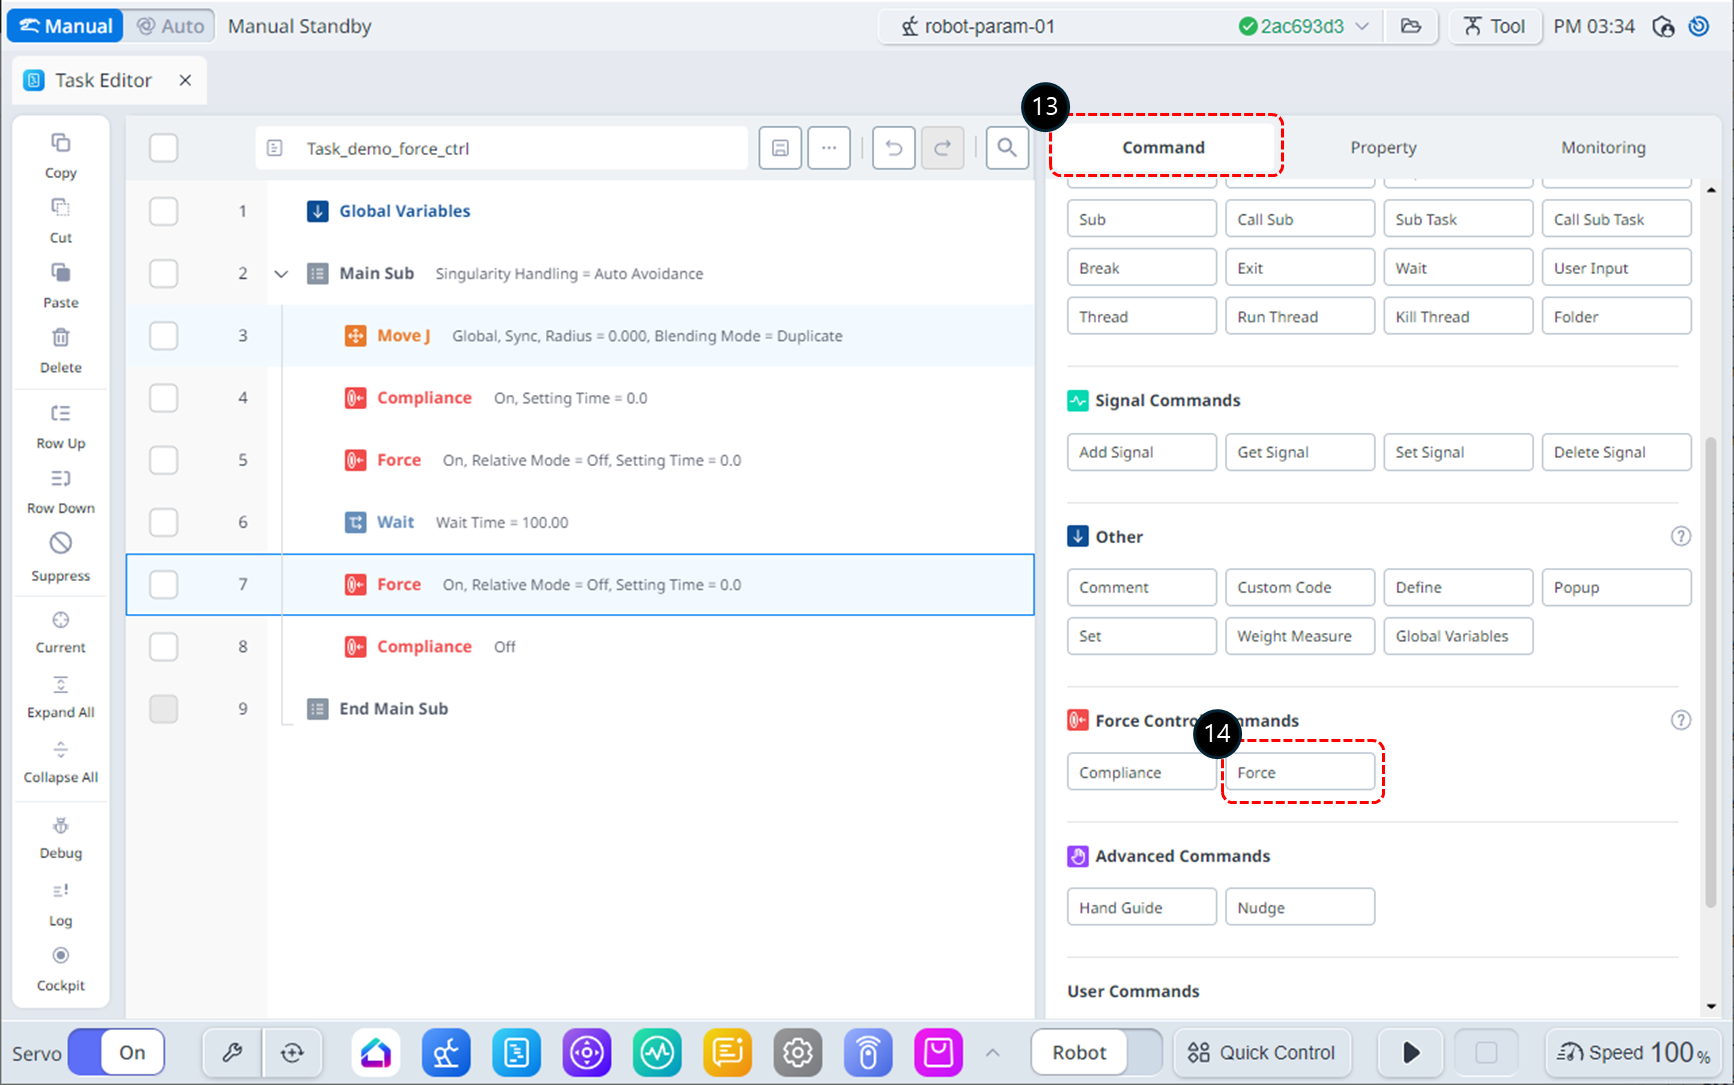
Select the Command tab.
Add a Force command to the 5th and 7th lines. These commands will be used to activate and deactivate Force Control.
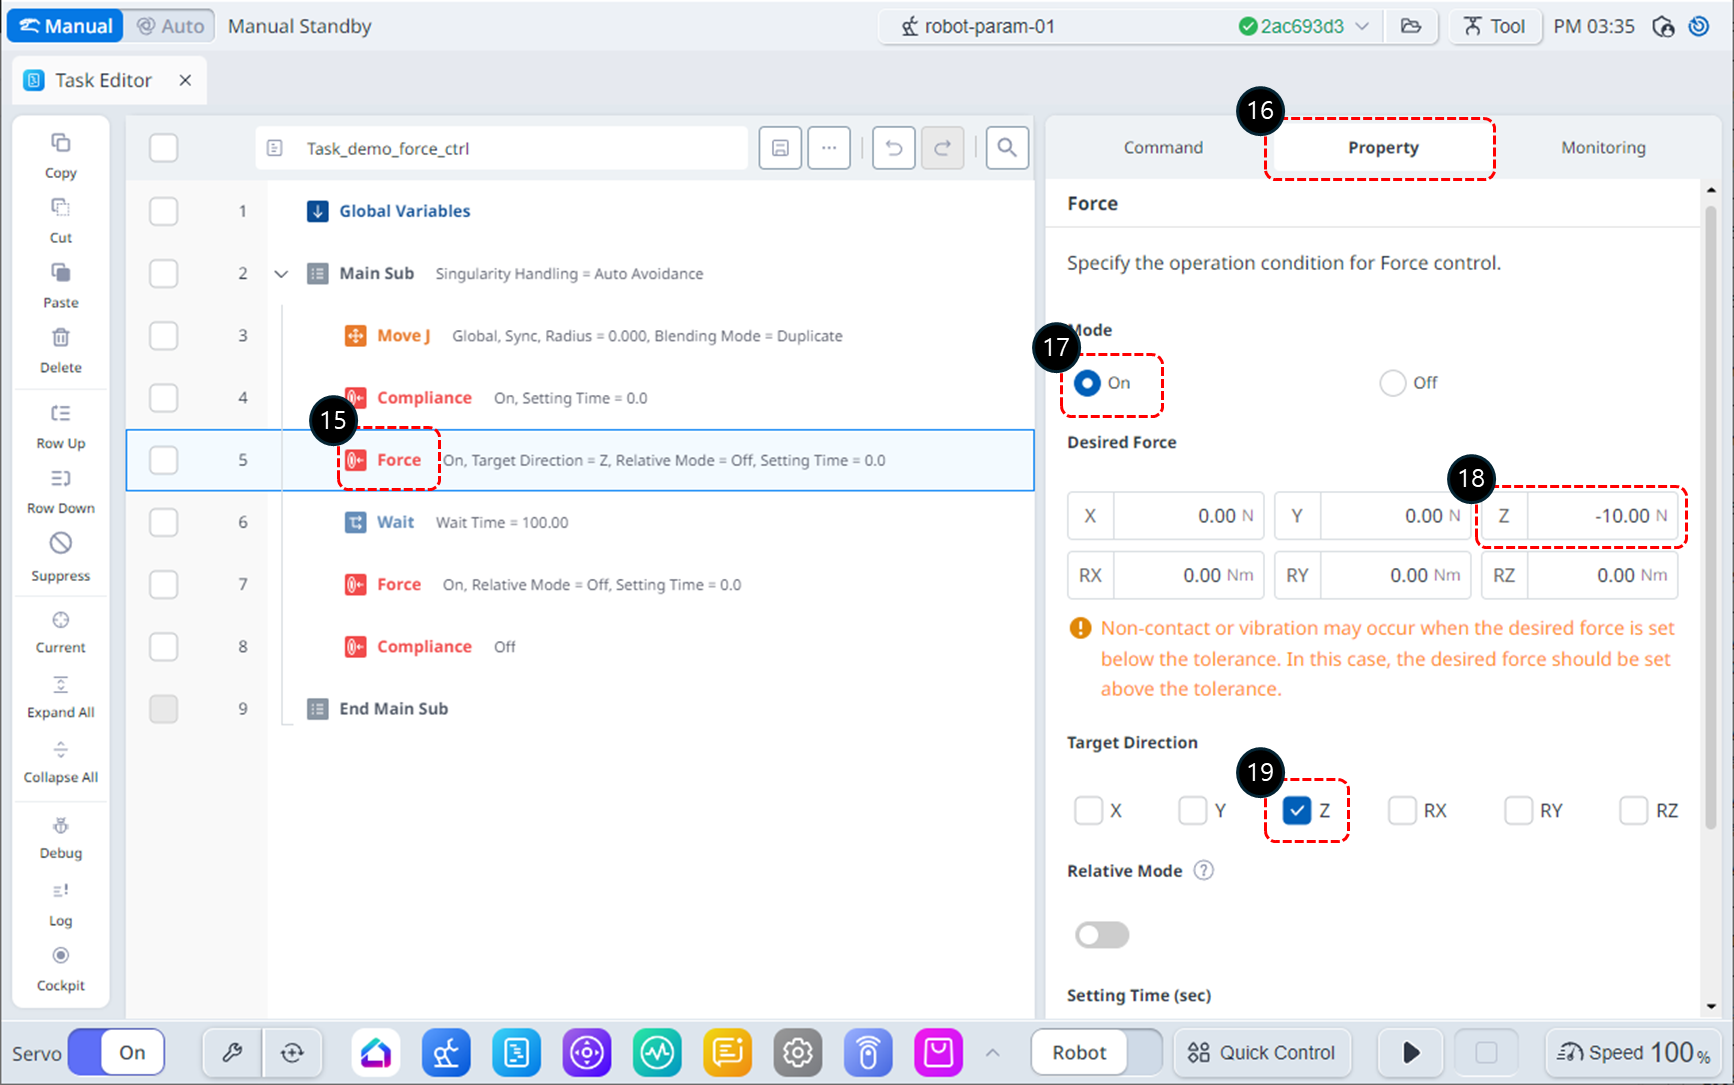
Select the Force command on the 5th line.
Go to the Property tab.
Set the Mode as follows: Mode On activates force control.
Mode : On
Set the Desired Force as follows.
X : 0 N (default)
Y : 0 N (default)
Z : -10 N
Rx, Ry, Rz : 0 Nm/rad (default)
In the Target Direction, check only the z-axis.
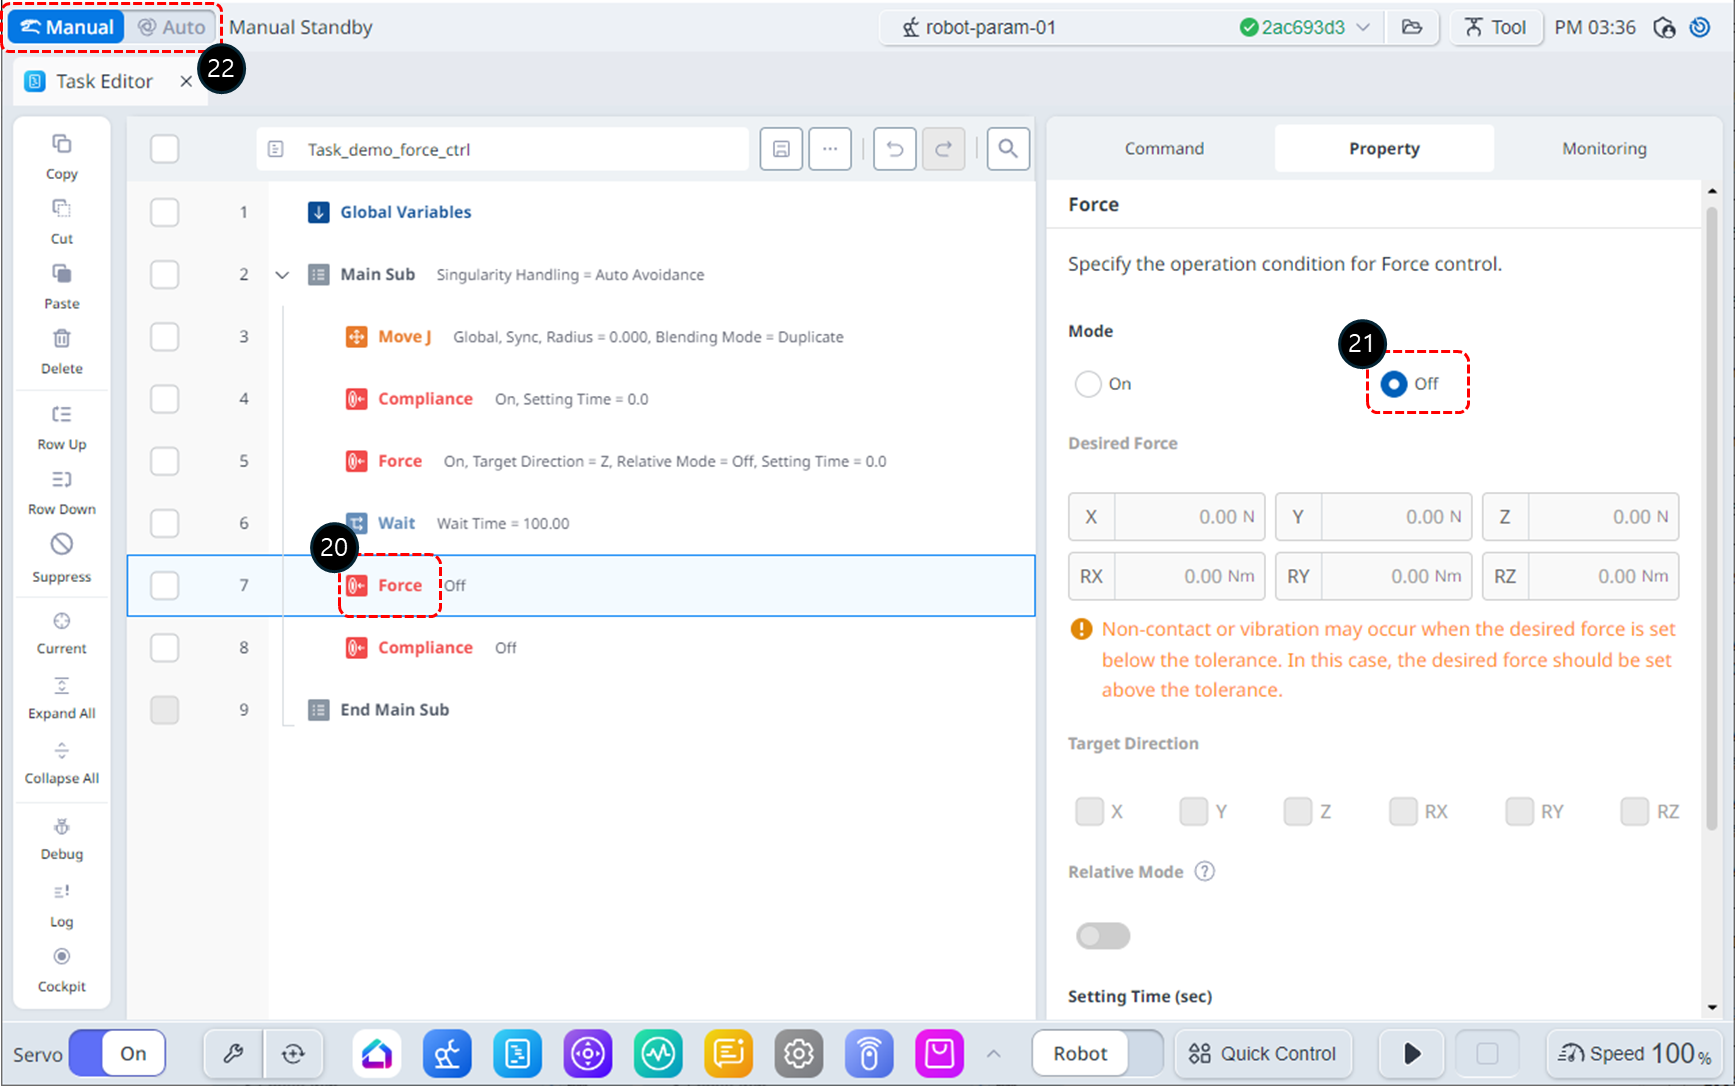
In the Task List, select the Force command on line 7.
Set the Mode as follows: Mode Off deactivates force control.
Mode : Off
Switch the operation Mode to Auto. The Property tab will automatically switch to the Monitoring tab.
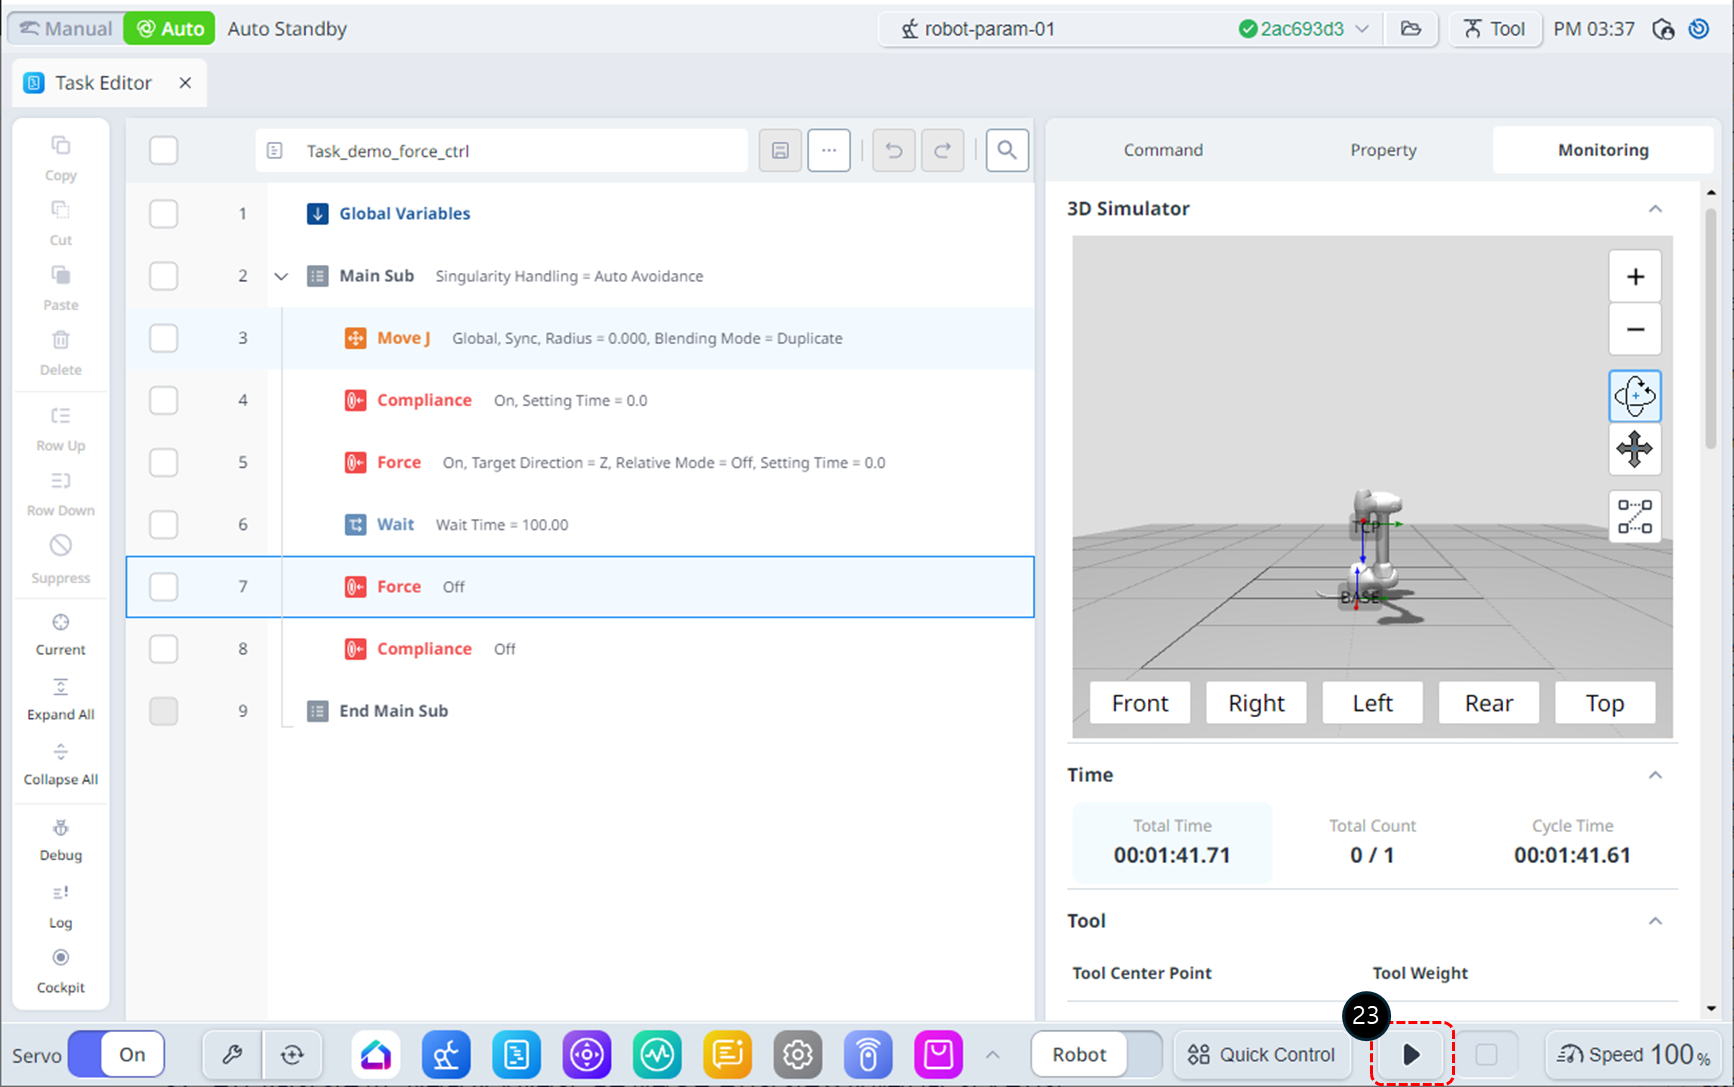

Click the Run button. In the Wait state, the robot operates as follows:
A force of -10N is applied at the robot's end effector, causing the robot to slowly move in the -Z direction.
Apply a counteracting force in the +Z direction, opposing the robot's movement. When the force applied by the robot and the opposing force are balanced, the robot will appear to hold its position as if stationary.
If a force greater than +10N is applied to the robot, it will move in the direction of the applied force.
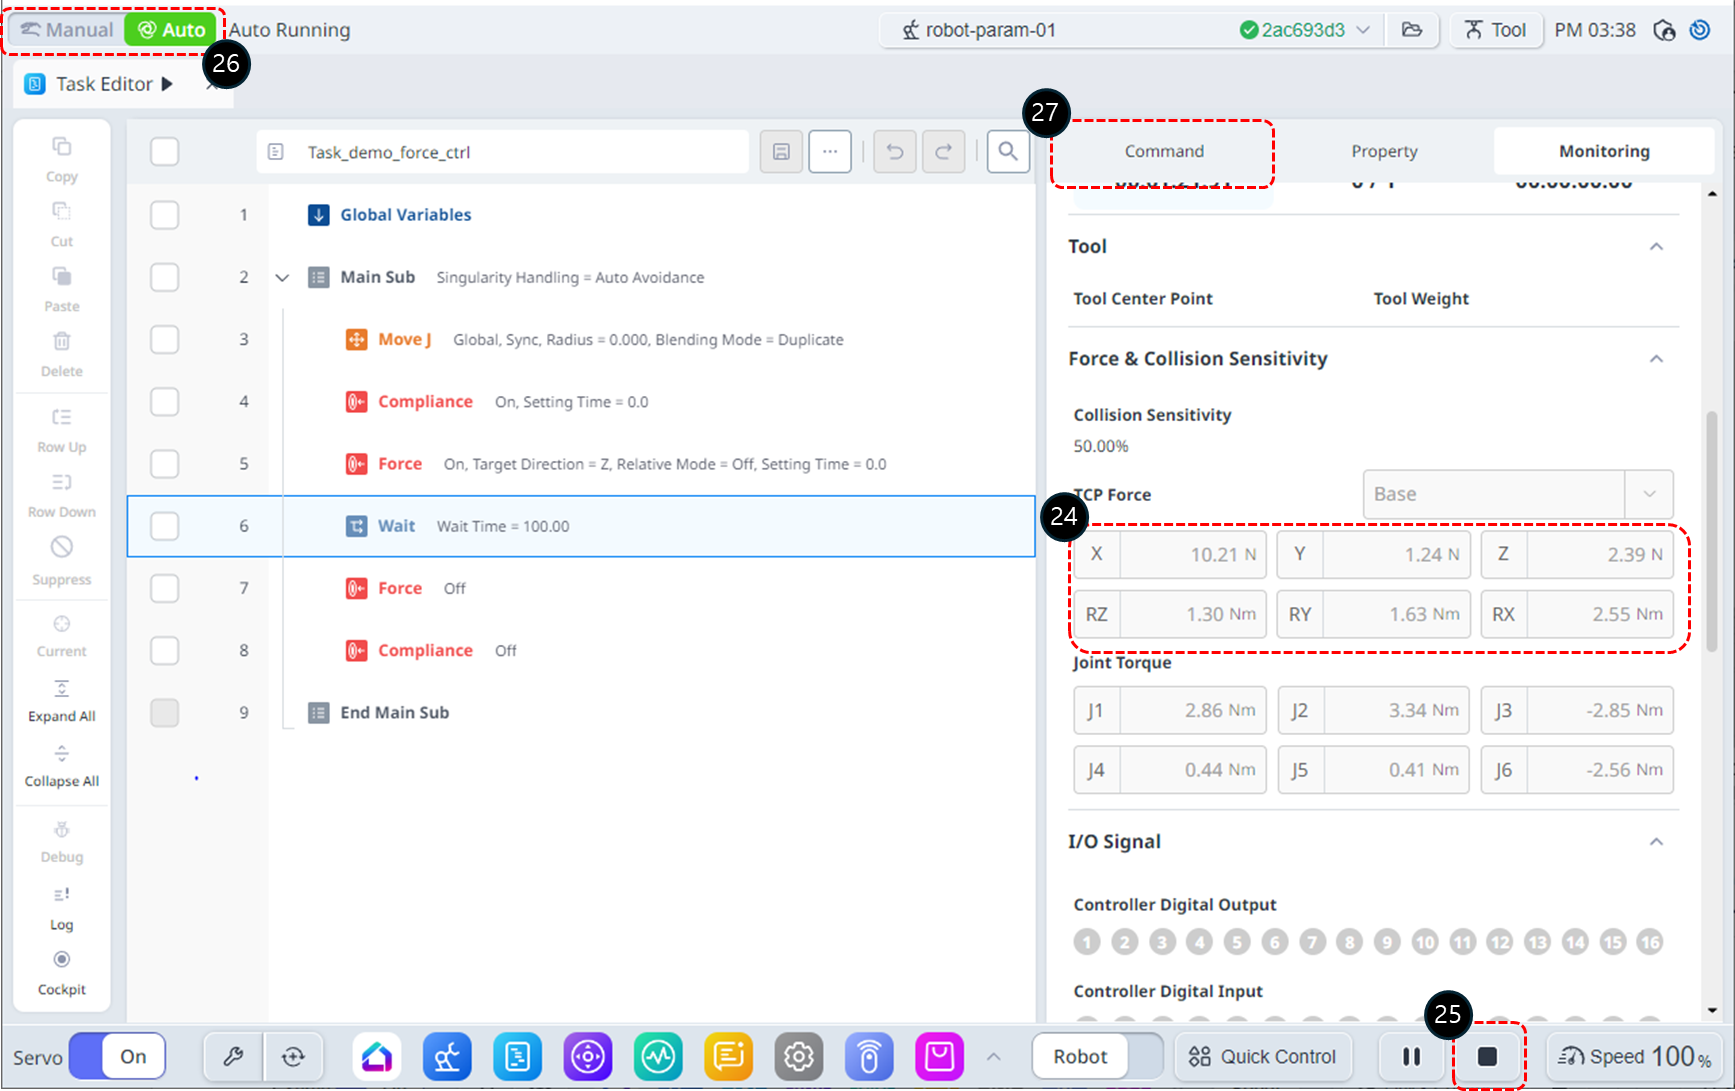
During operation, you can monitor the real-time TCP Force in the TCP Force section of the Monitoring tab. If no force is applied to the robot's end effector, the TCP Force values should all be 0, but you may notice error components being displayed. Below is an additional explanation to address this issue.
Click the Stop button to terminate the Task.
Switch the operation Mode to Manual for Task modification.
Select the Command tab.
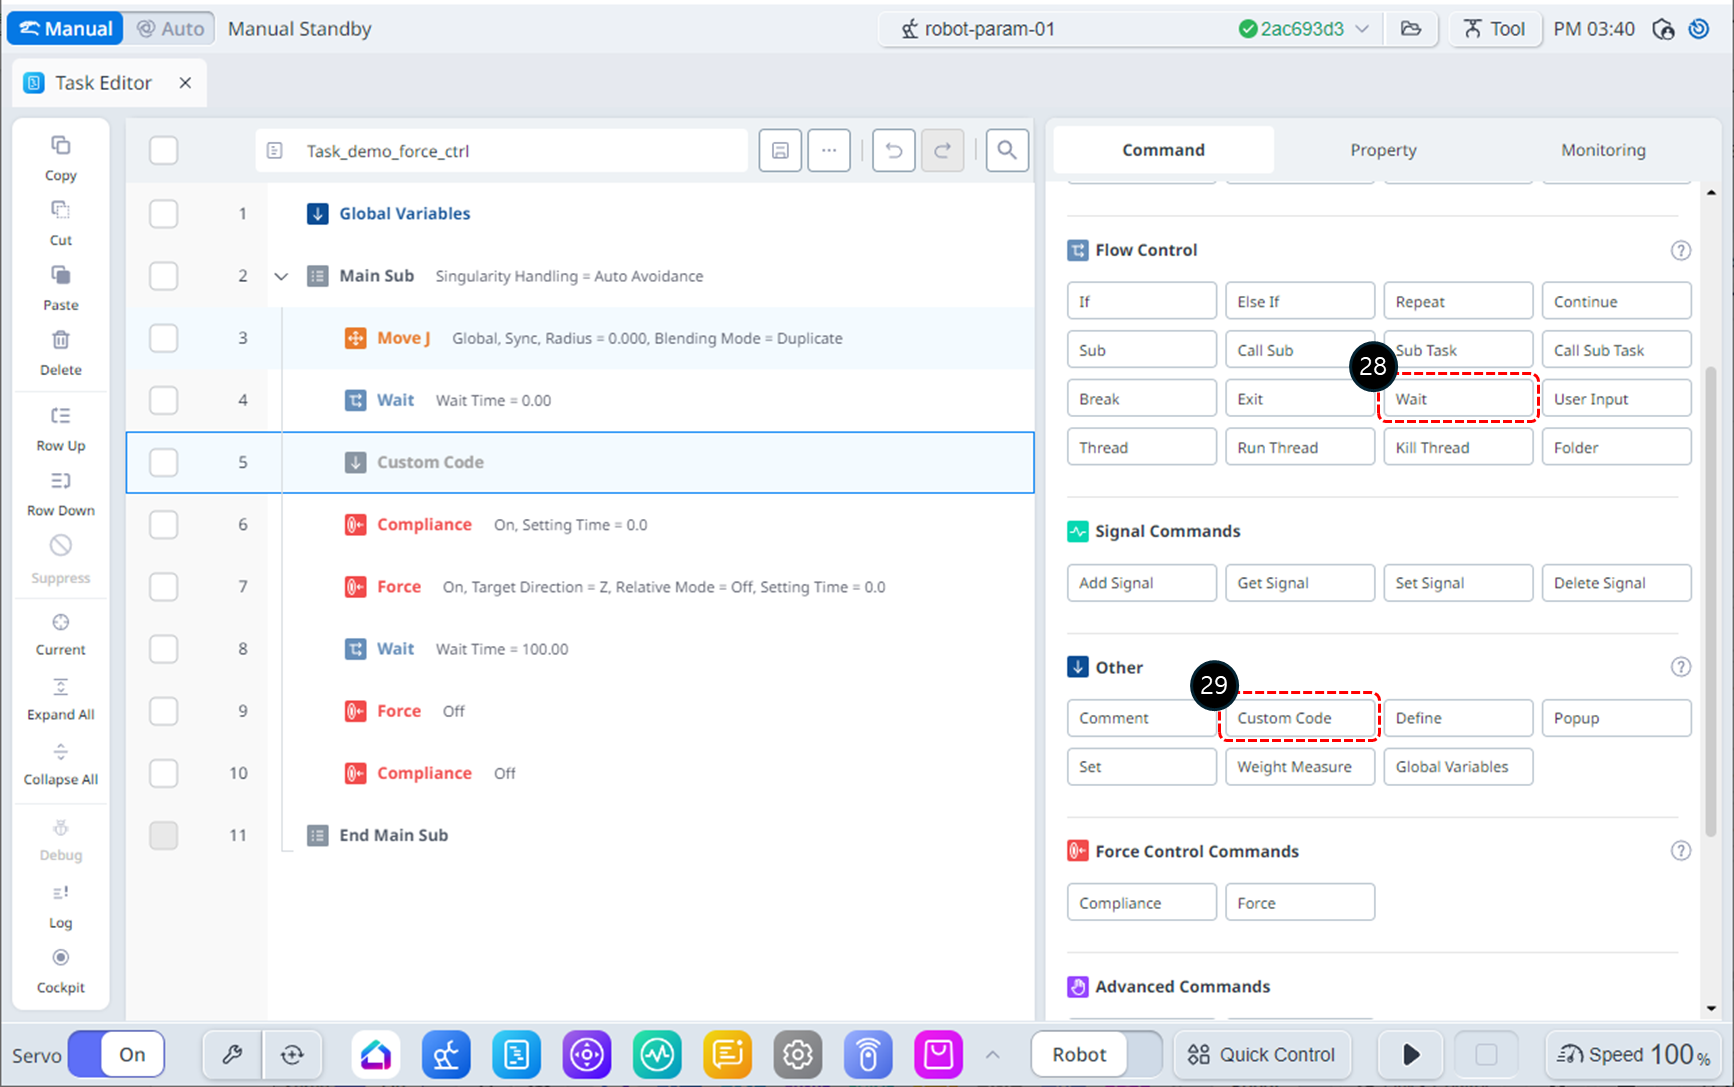
Add a Wait command to line 4 of the Task List.
Add a Custom Code command to line 5 of the Task List.
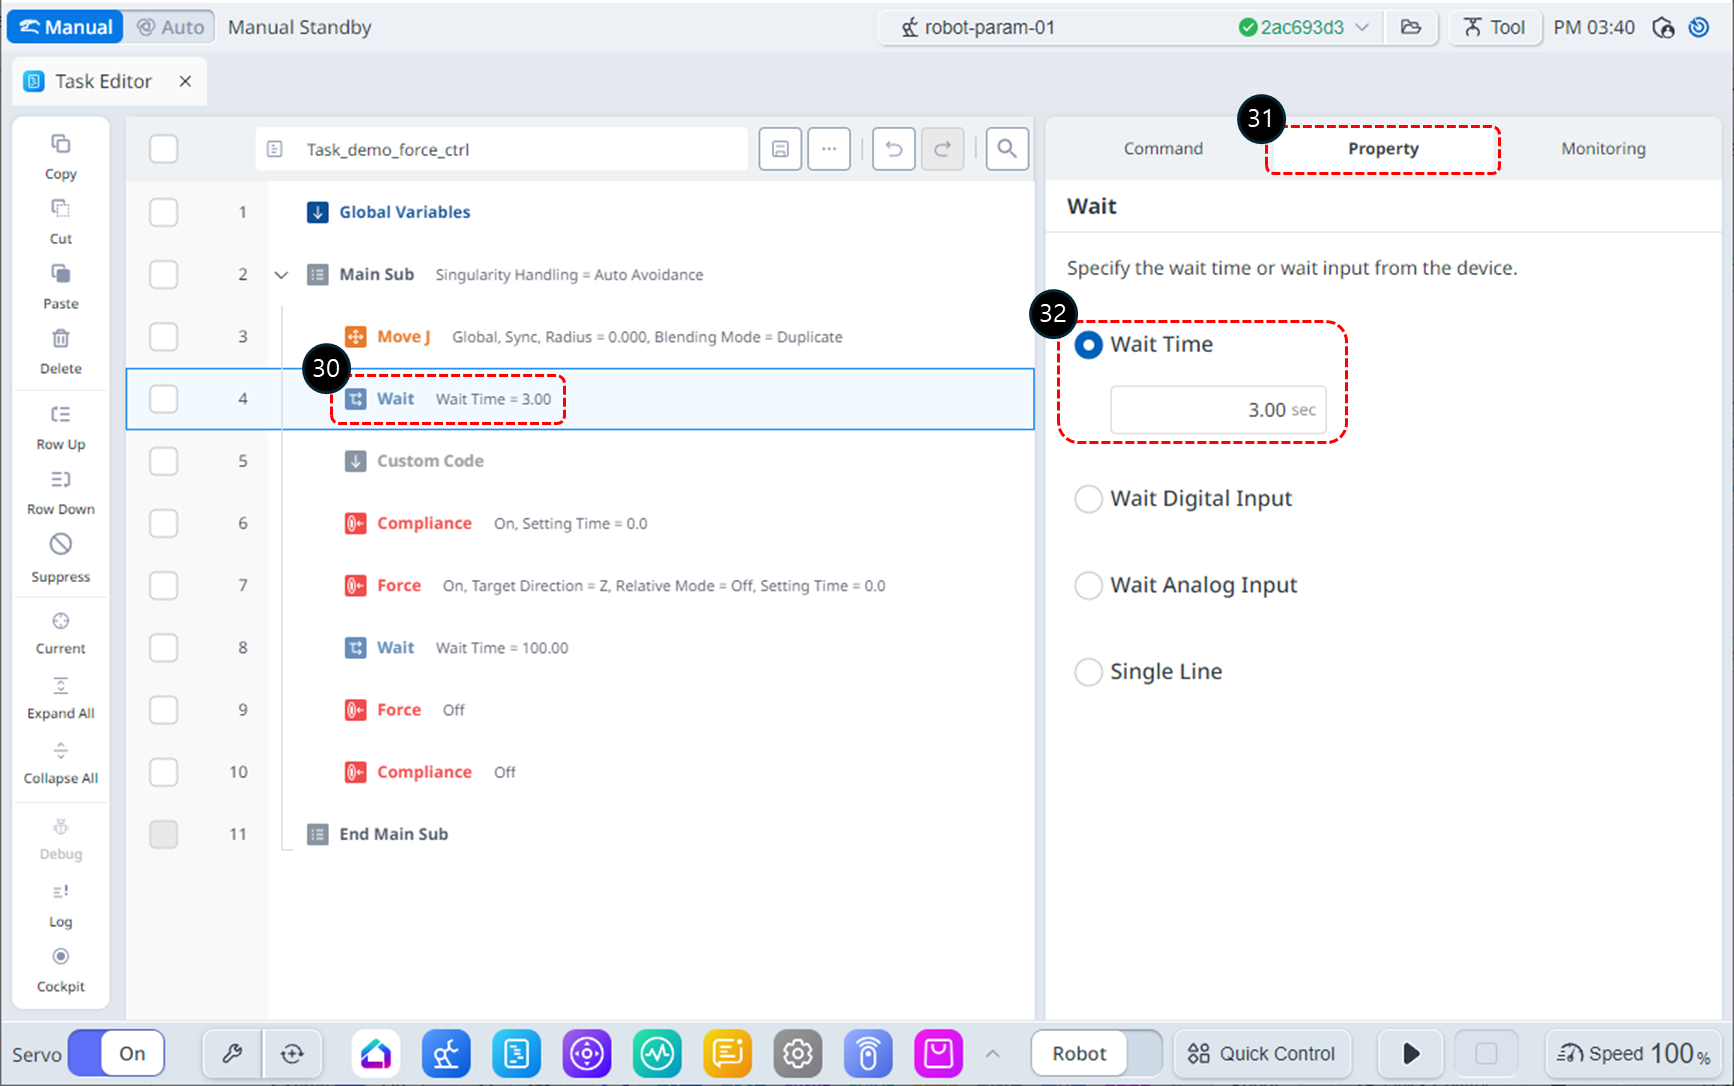
Select the Wait command on line 4.
Select the Property tab.
Set the Wait Time as follows.
Wait Time : 3 sec
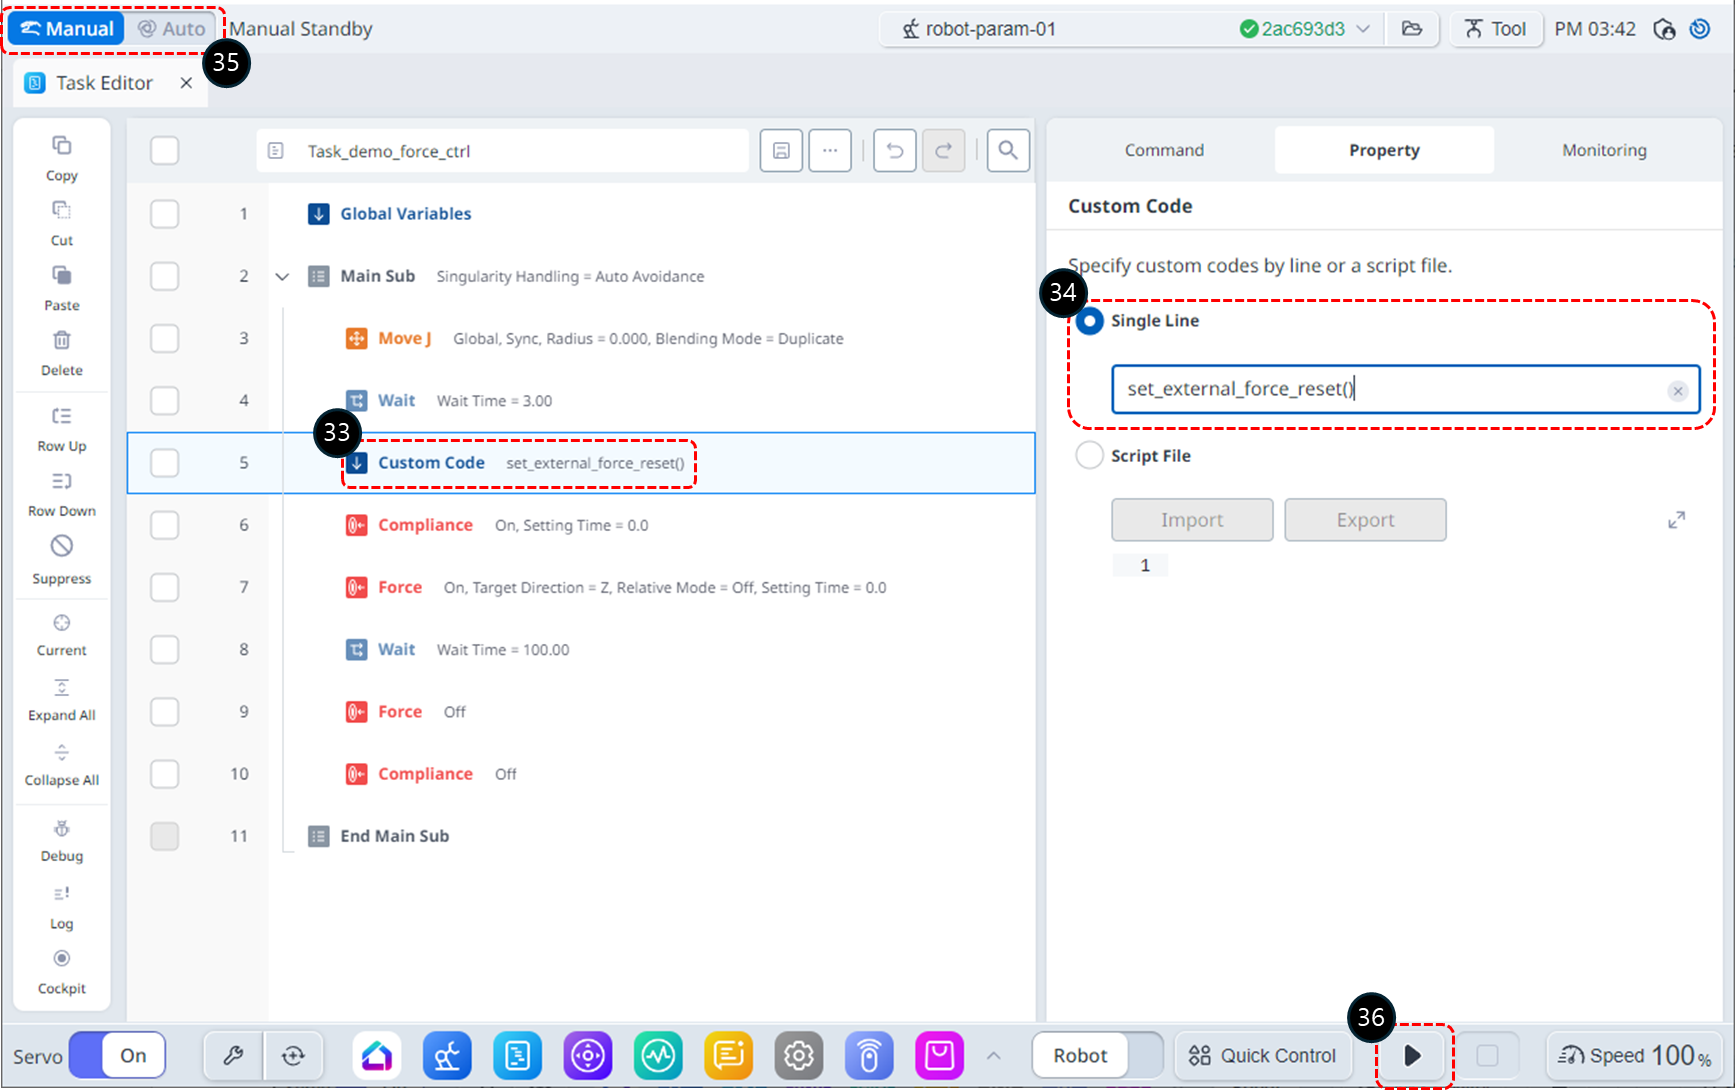
Select the Custom Code command on line 5.
Choose Single Line and add the following DRL command: This command resets the external force sensor values to remove any errors.
set_externl_force_reset()
Switch the operation Mode to Auto. The Property tab will automatically switch to the Monitoring tab.
Click the Run button.
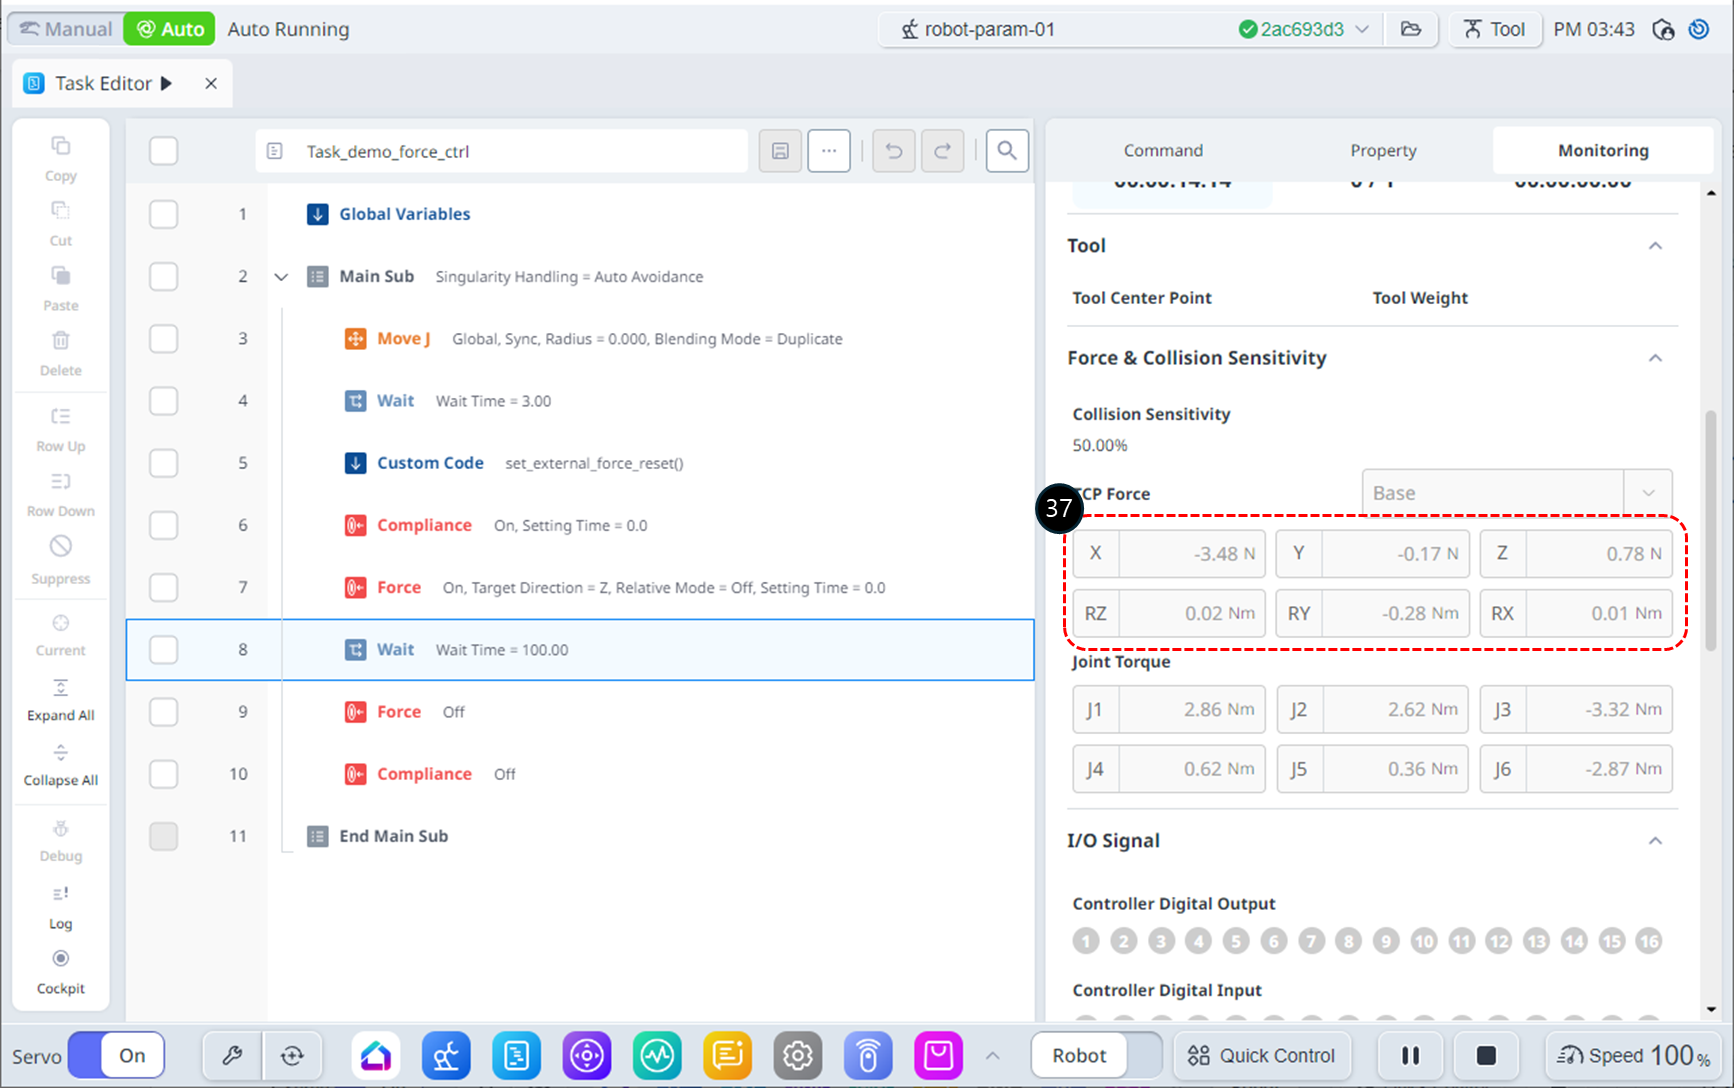
In the Monitoring tab, check the TCP Force values. You will notice that the error has been reduced compared to before using the set_external_force_reset() command.
