Try Compliance command samples
Caution
Before trying the sample, make sure to read and follow Precautions. For more information, refer to PART 1. Safety Manual.
Note
If there is an external torque above the threshold when enabling or disabling compliance control, the robot stops the program due to the JTS (Joint Torque Sensor) error.
Stiffness change can be executed regardless of the external torque size.
During compliance control, joint motions, such as MoveJ command, cannot be executed.
Threshold of JTS error (Nm) | ||||||
Model | J1 | J2 | J3 | J4 | J5 | J6 |
|---|---|---|---|---|---|---|
E0509 | 15 | 15 | 15 | 15 | 15 | 15 |
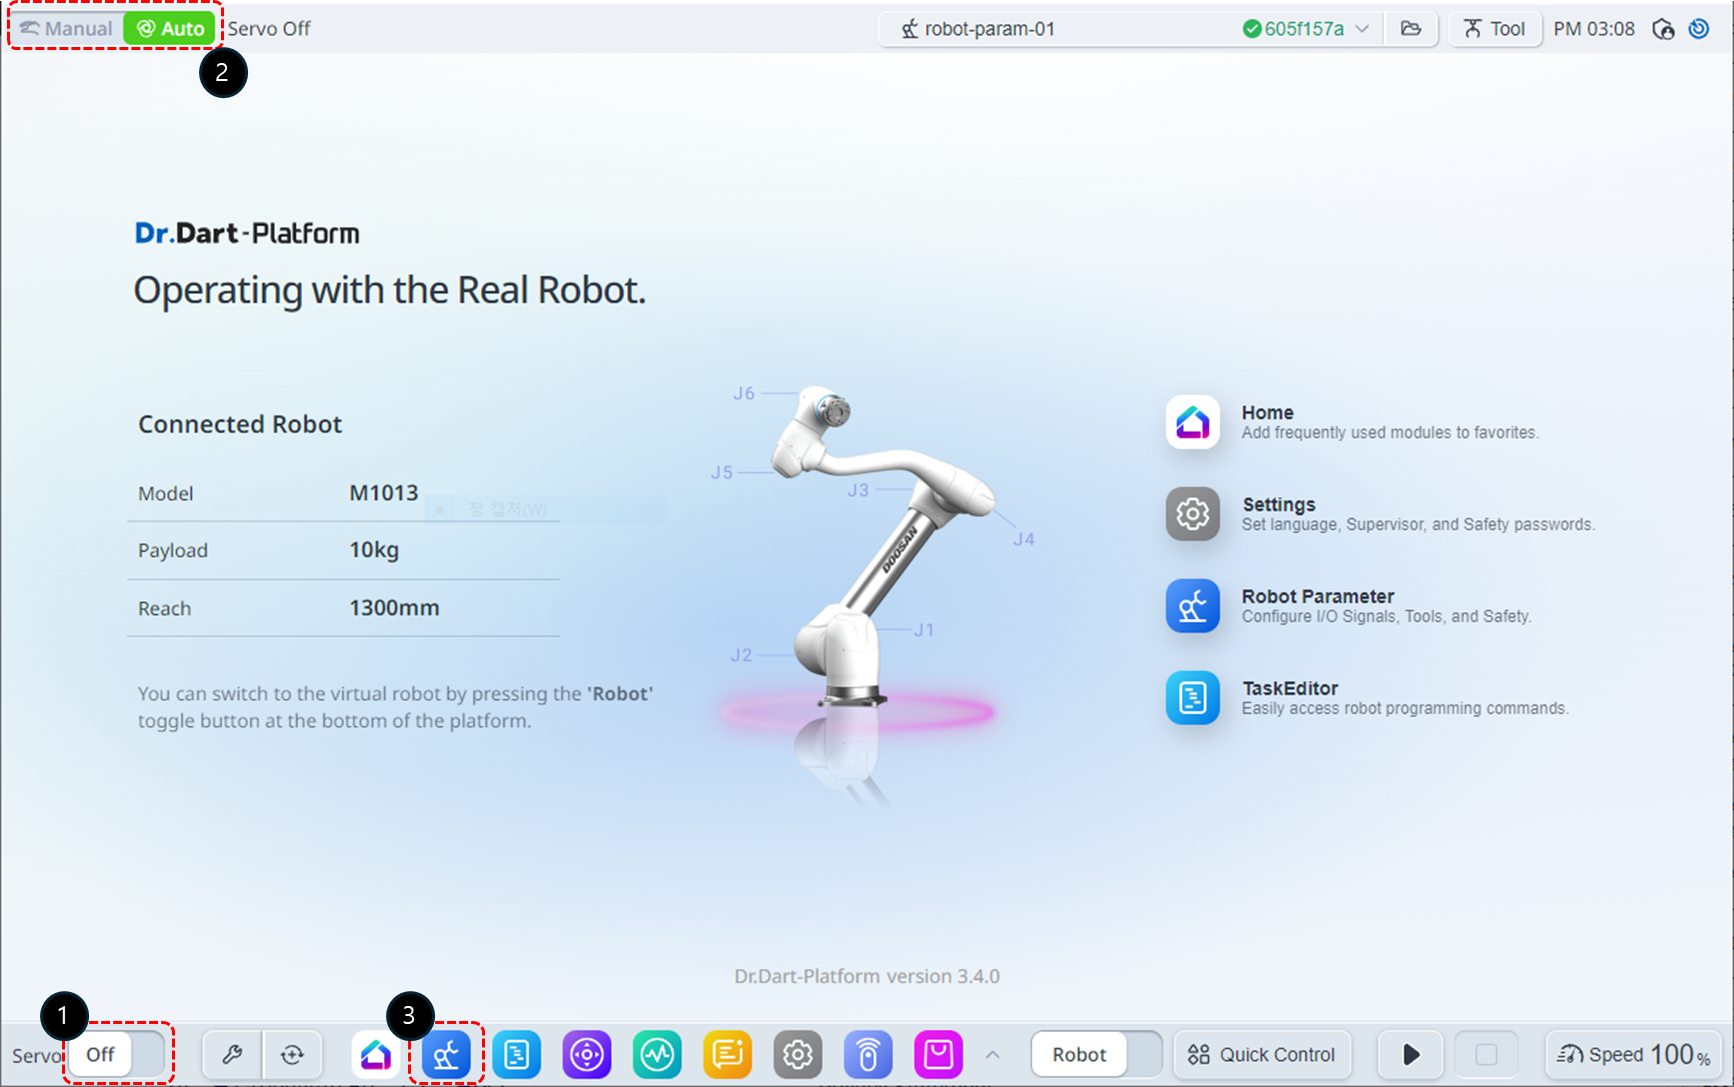
Change the servo state to On.
Change the operation mode to Manual.
Select the Robot Parameters module from the bottom menu. In this example, the Collision Sensitivity is set to 95% to explain the reason for lowering the Collision Sensitivity when using compliance control.
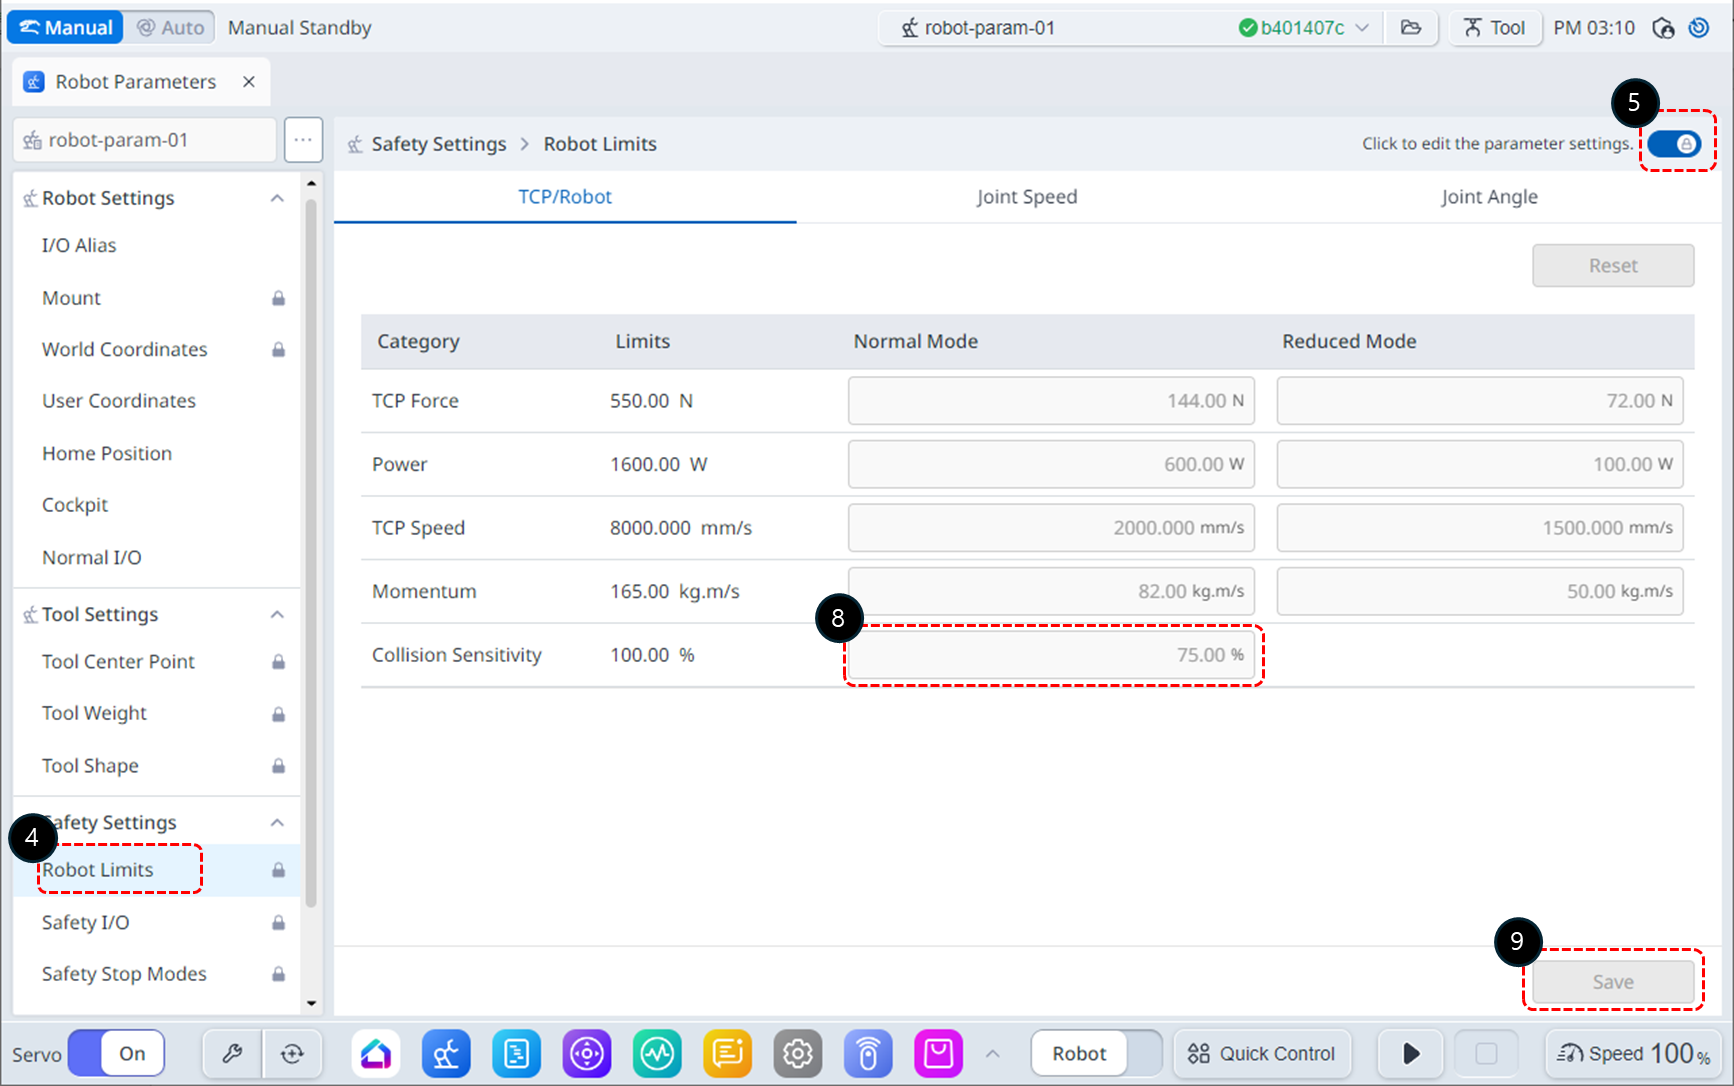
Select Robot Limits from Safety Settings.
Enable the parameter editing state.
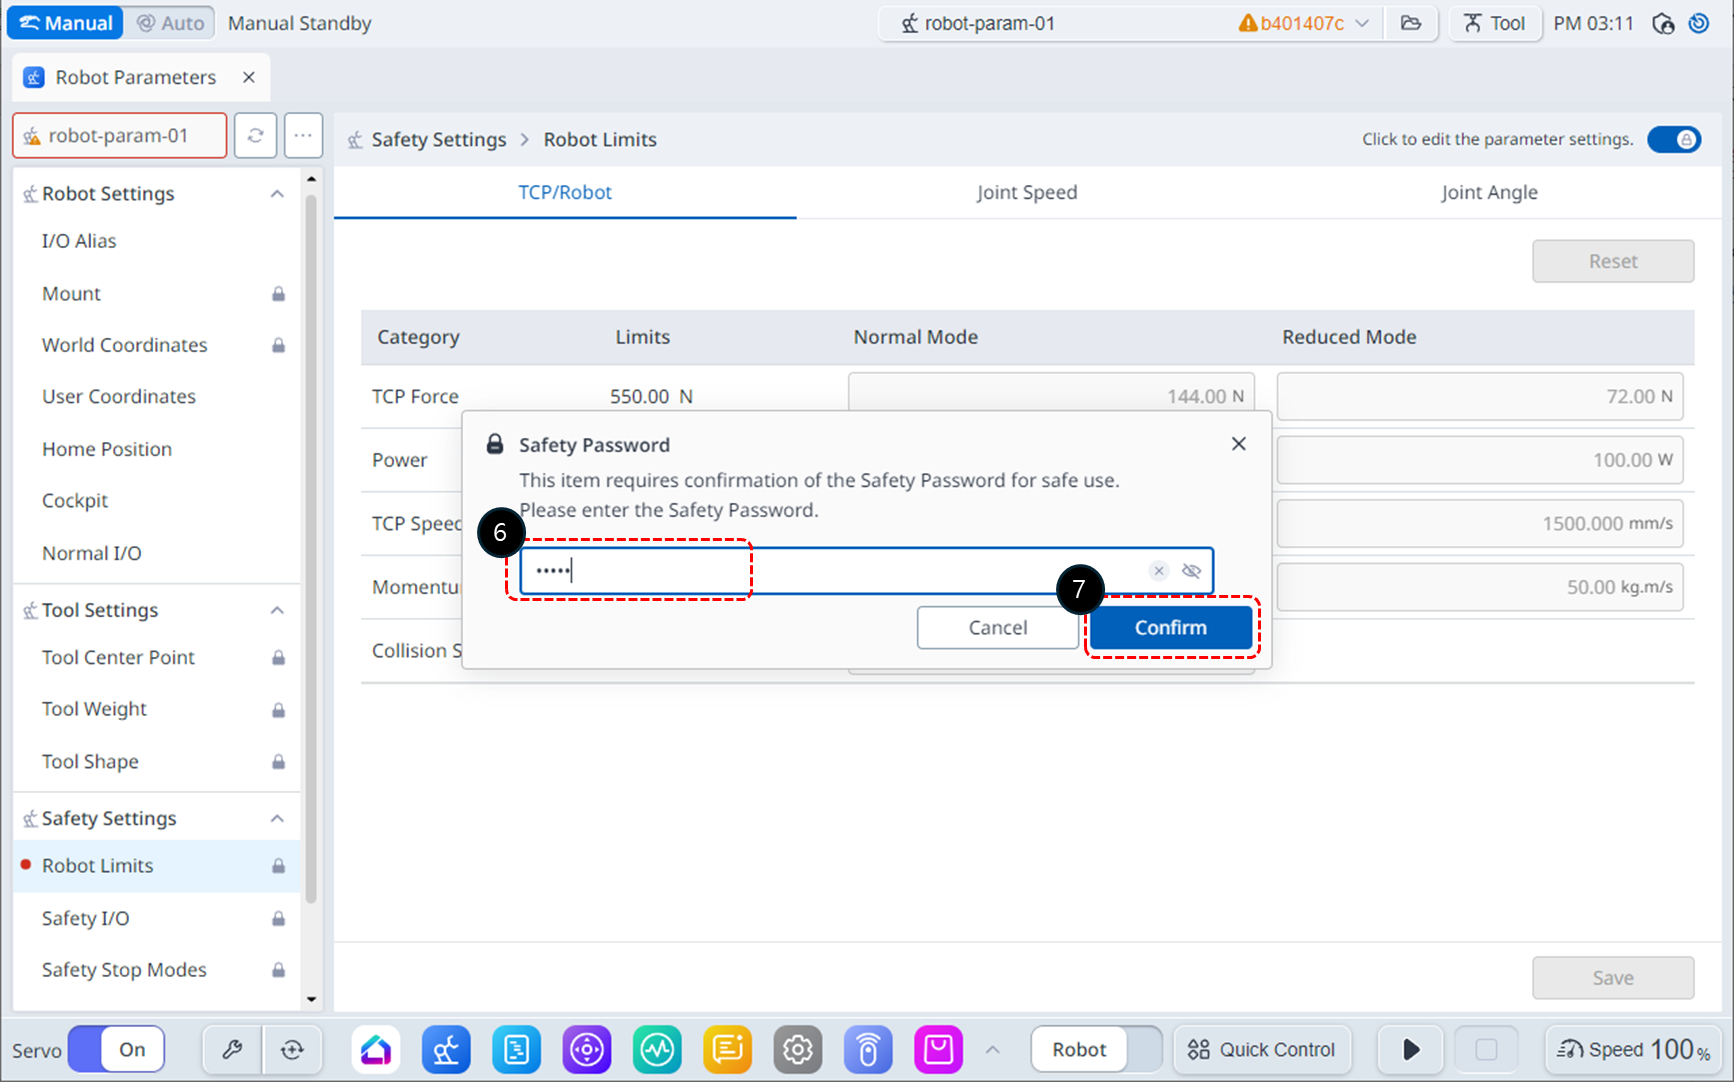
If a password input window appears, enter the Safety Password (default safety password: admin).
Click the Confirm button.
Modify the Collision Sensitivity to 95%.
Click the Save button to save the settings.
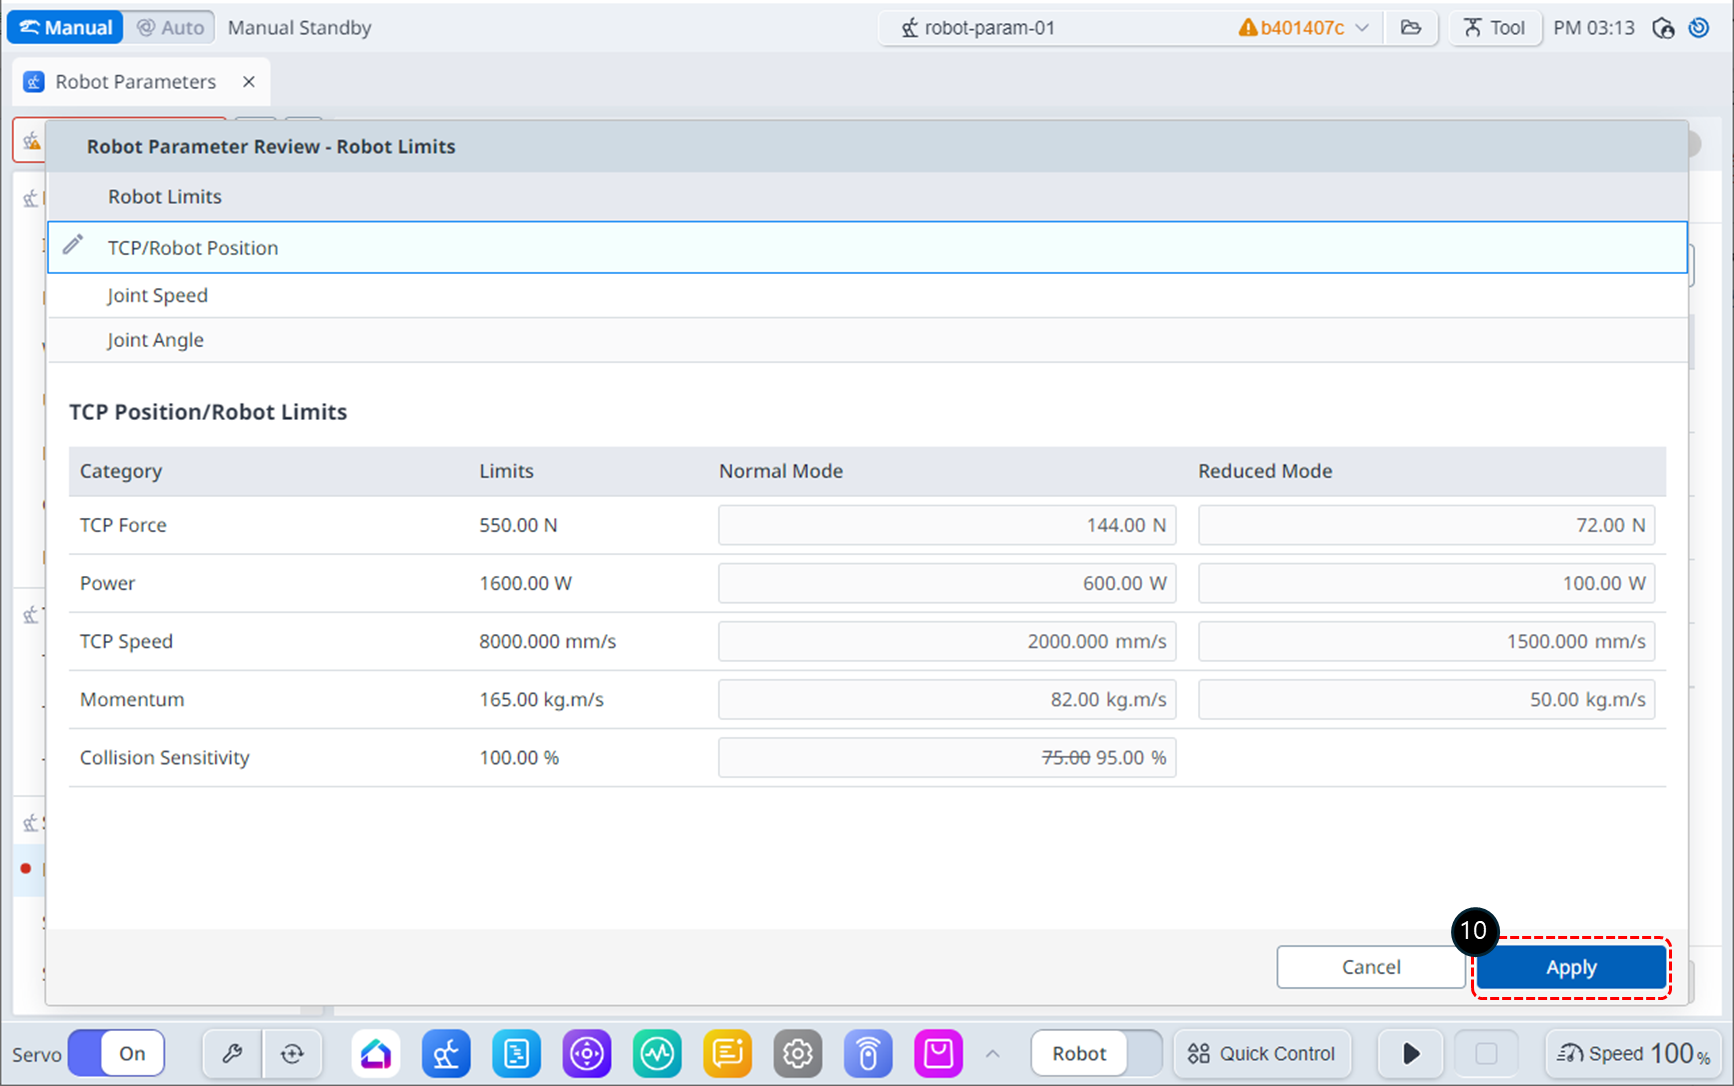
After reviewing the changes, click the Apply button.
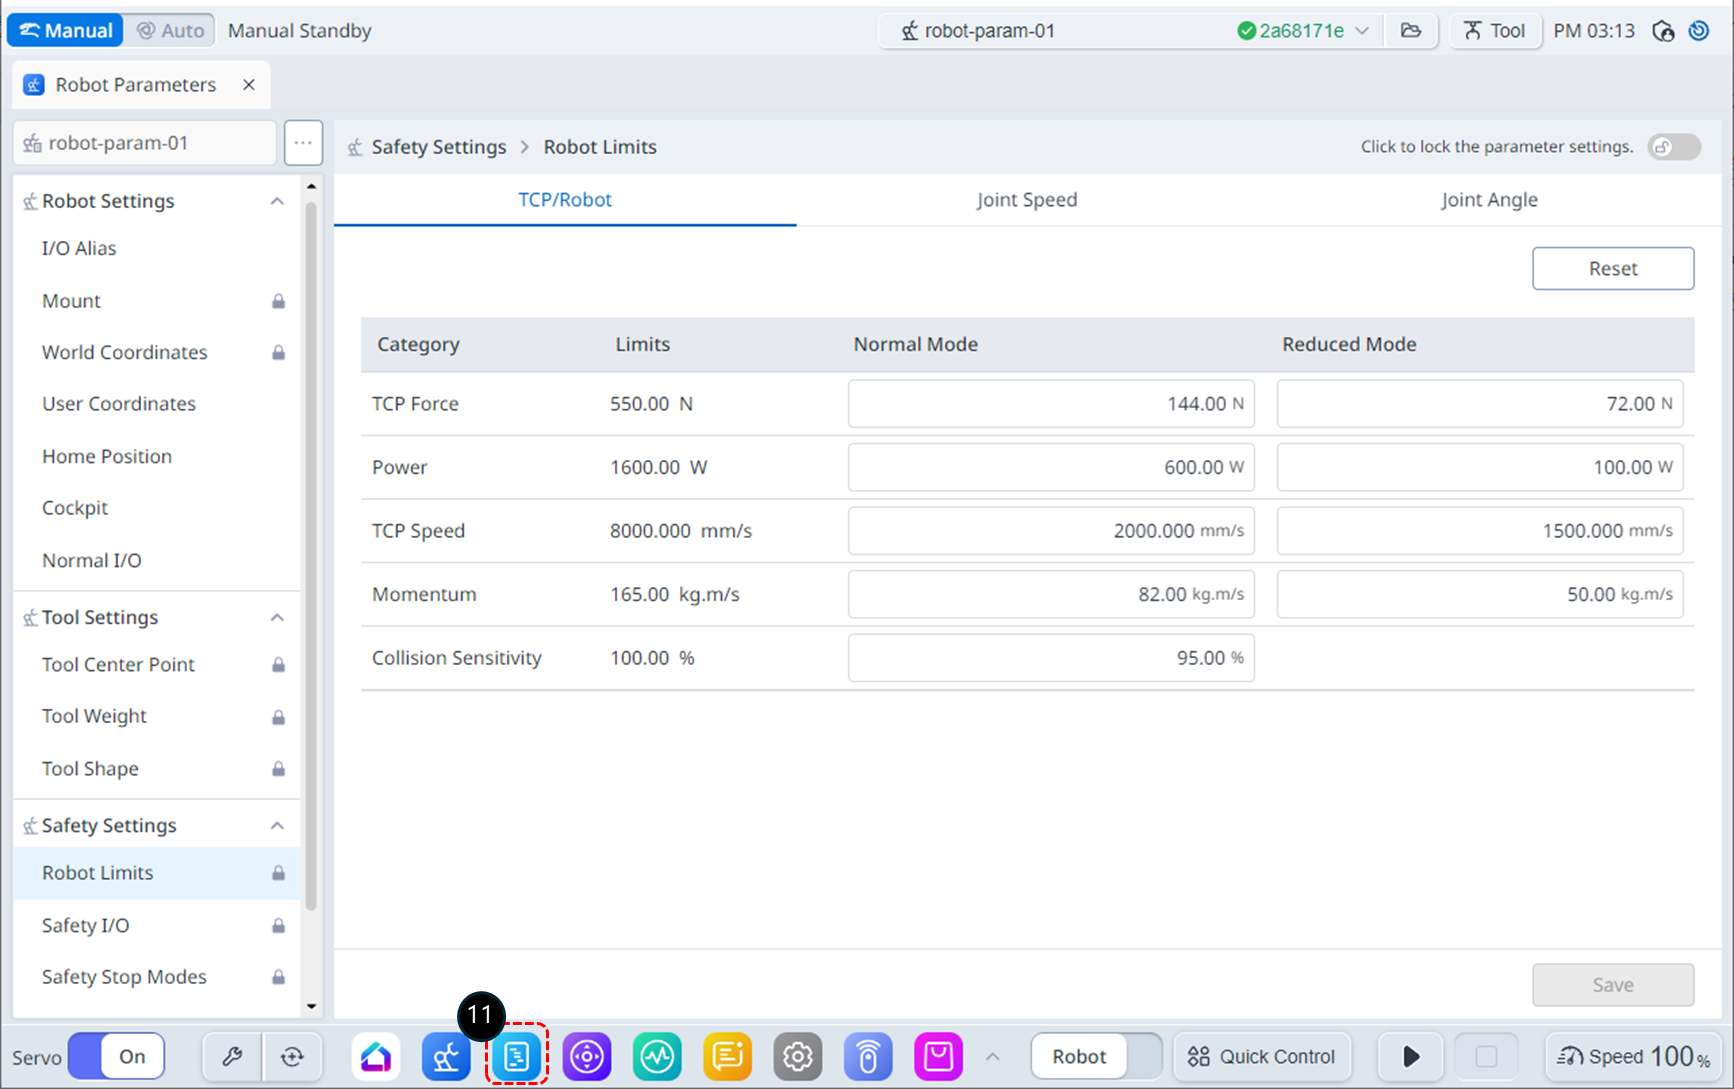
Select the Task Editor module from the bottom menu.
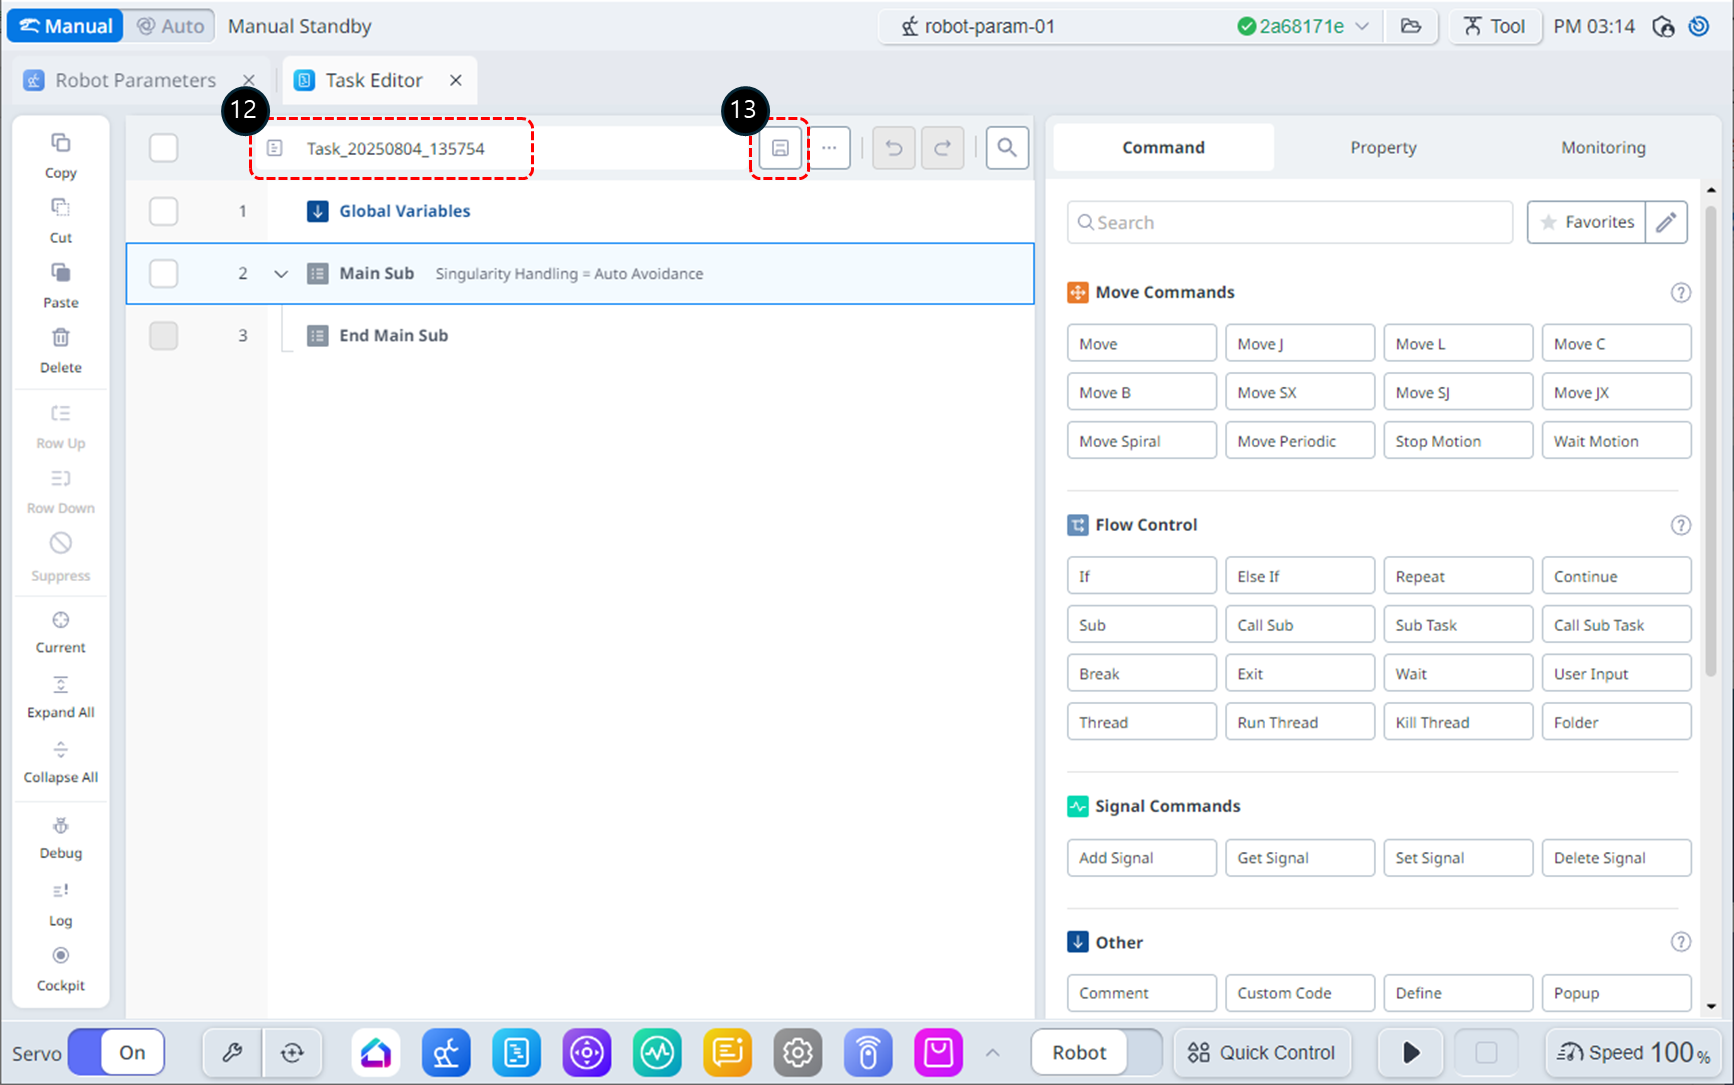
Rename the Task to Task_demo_compliance_ctrl.
Save the updated Task name.
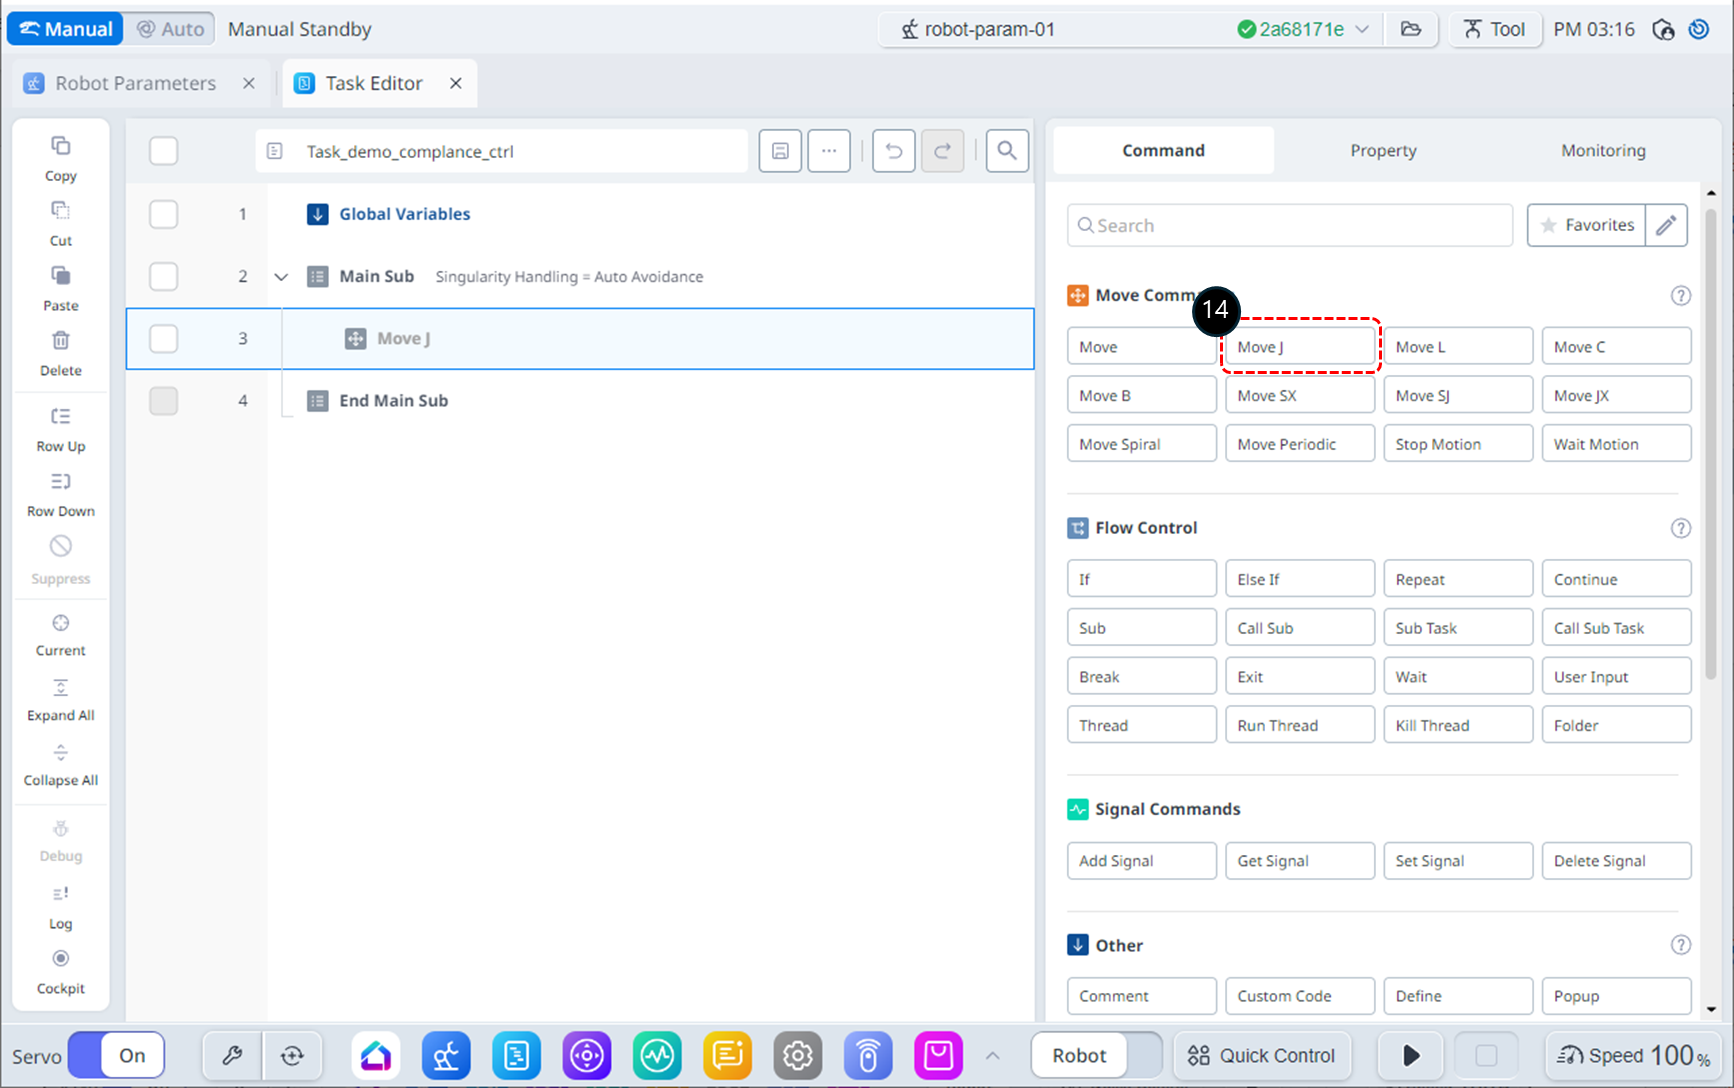
Add the MoveJ command. This command will be used to move the robot to the starting position for compliance control.
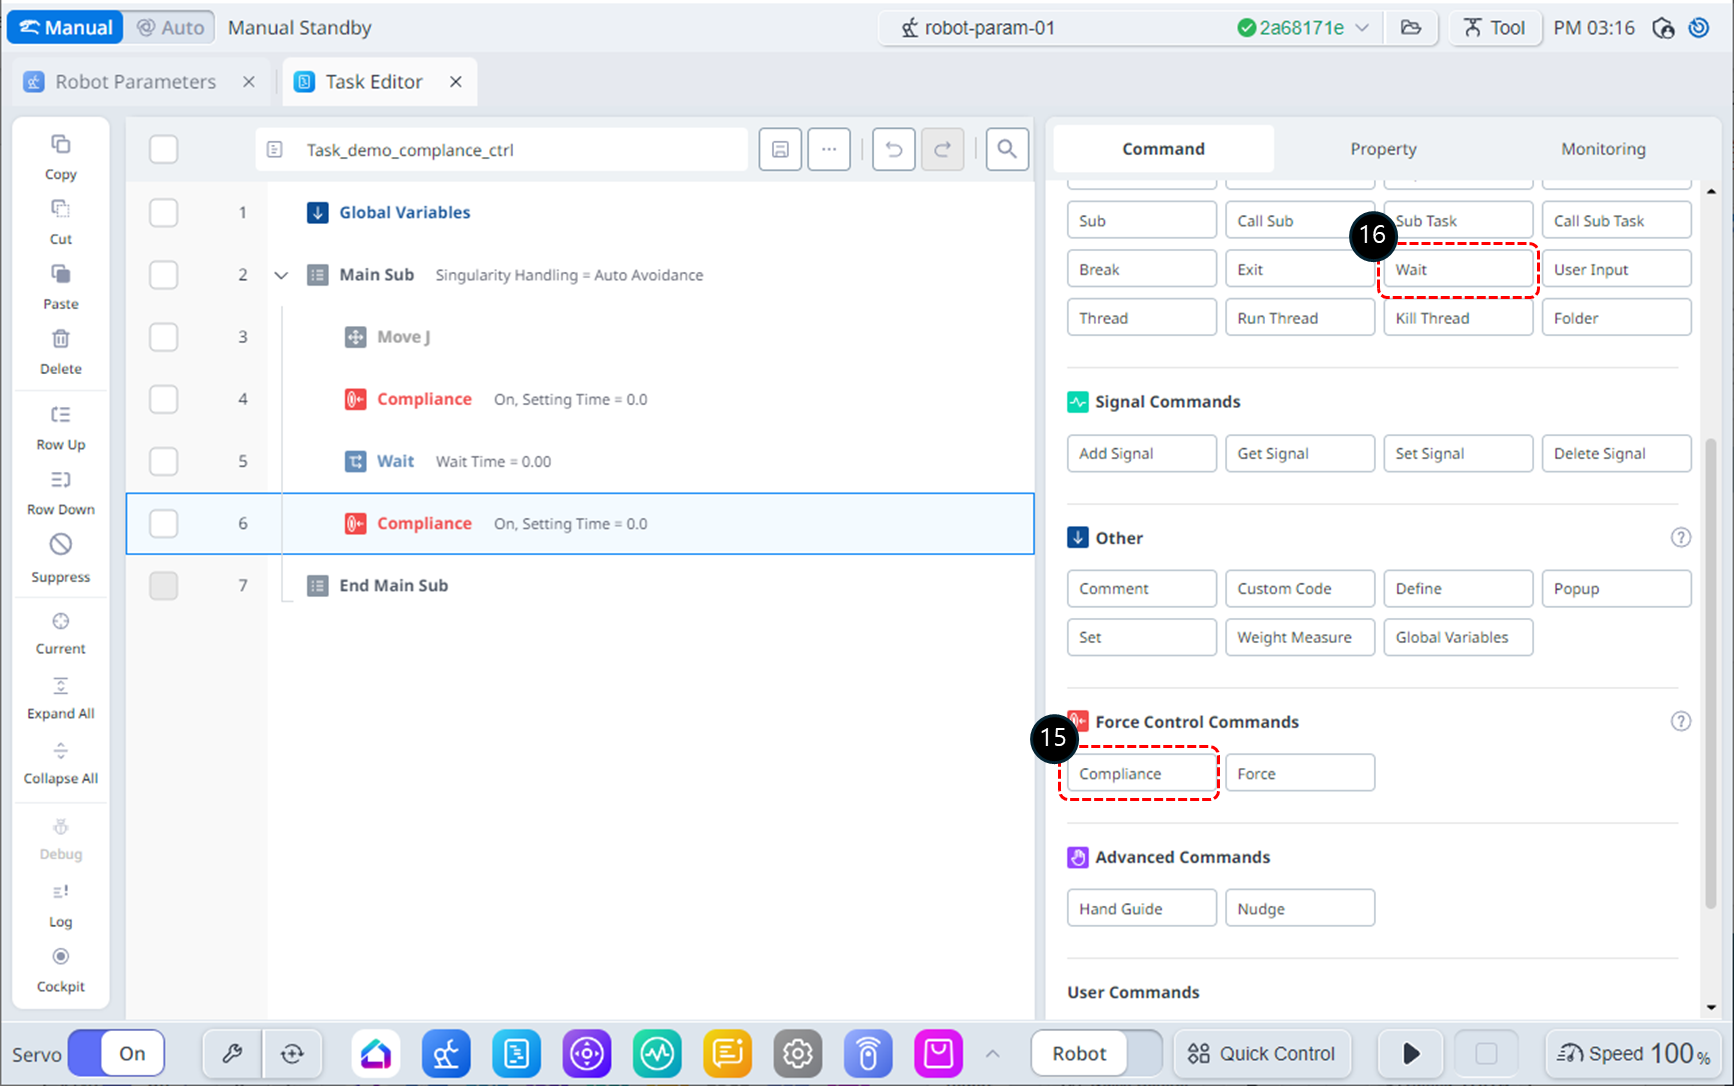
Add two Compliance commands. These commands will be used to activate and deactivate compliance control.
Insert a Wait command between the Compliance commands. This wait command will be used to maintain compliance control.
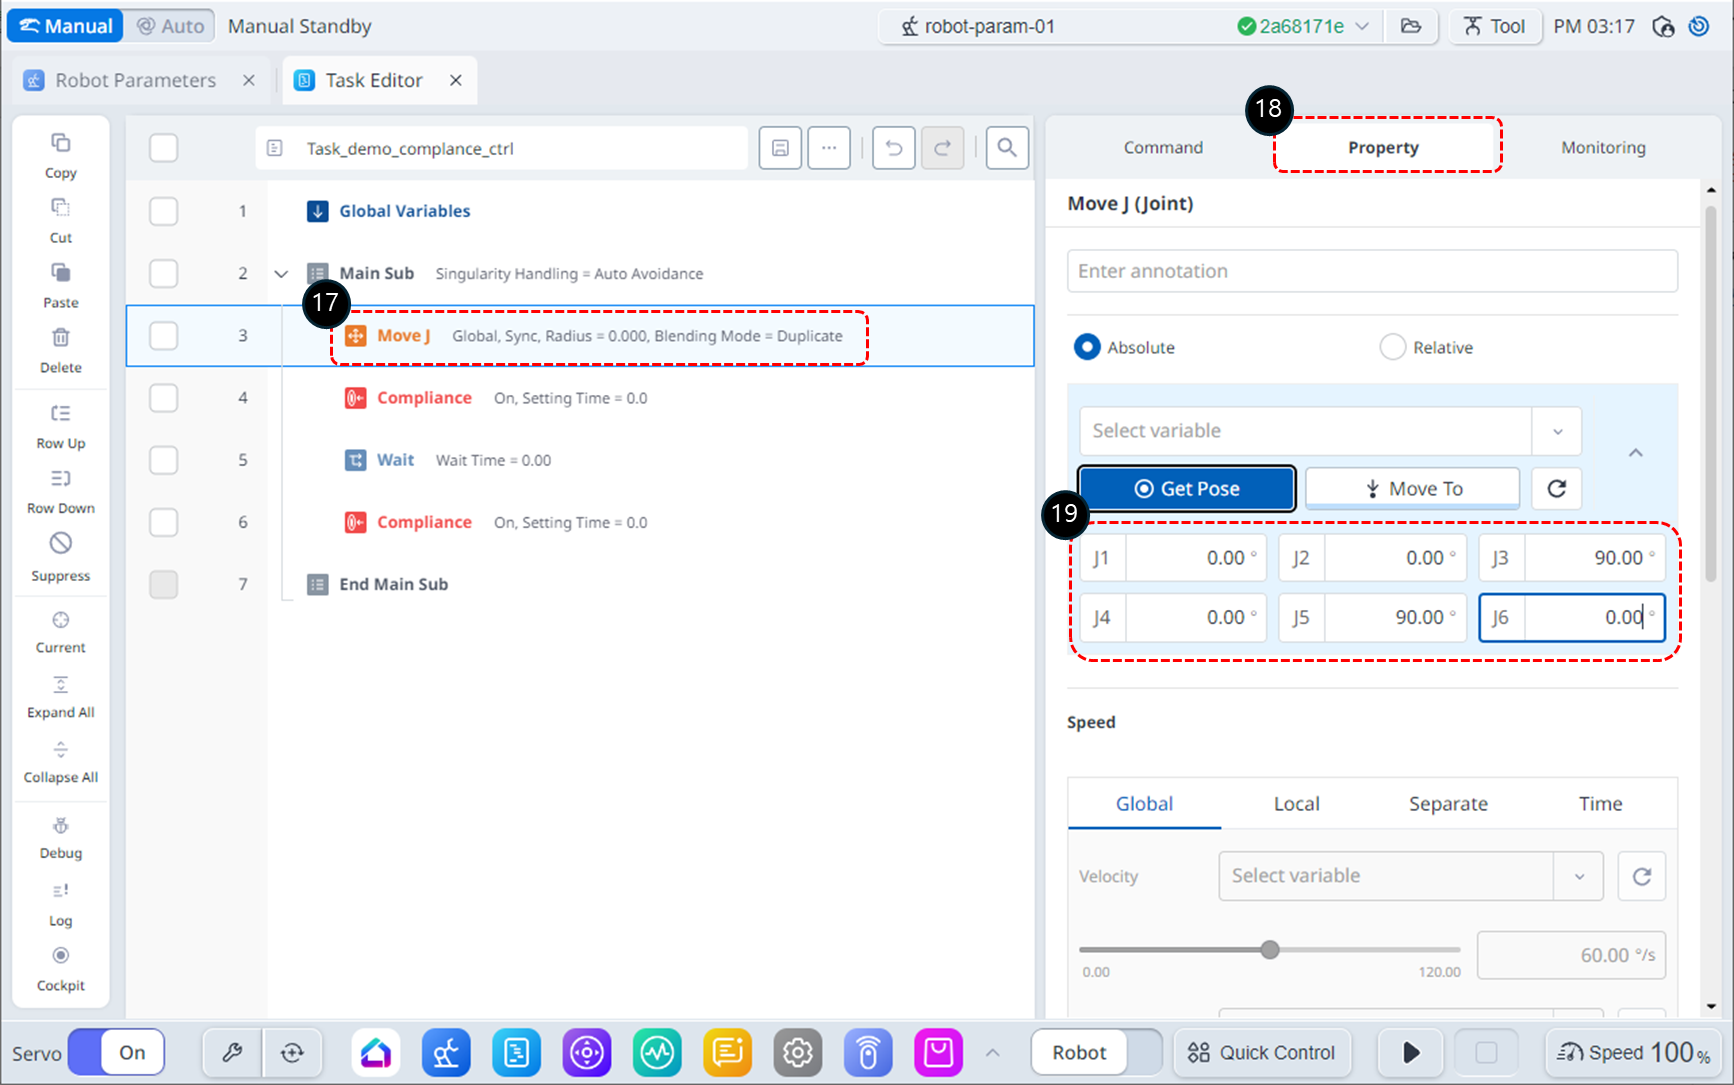
Select the MoveJ command on line 3.
Choose the Property tab.
Modify the target position of MoveJ to (0, 0, 90, 0, 90, 0) deg. Depending on the robot's installation space, the angle of the J1 can be adjusted if necessary.
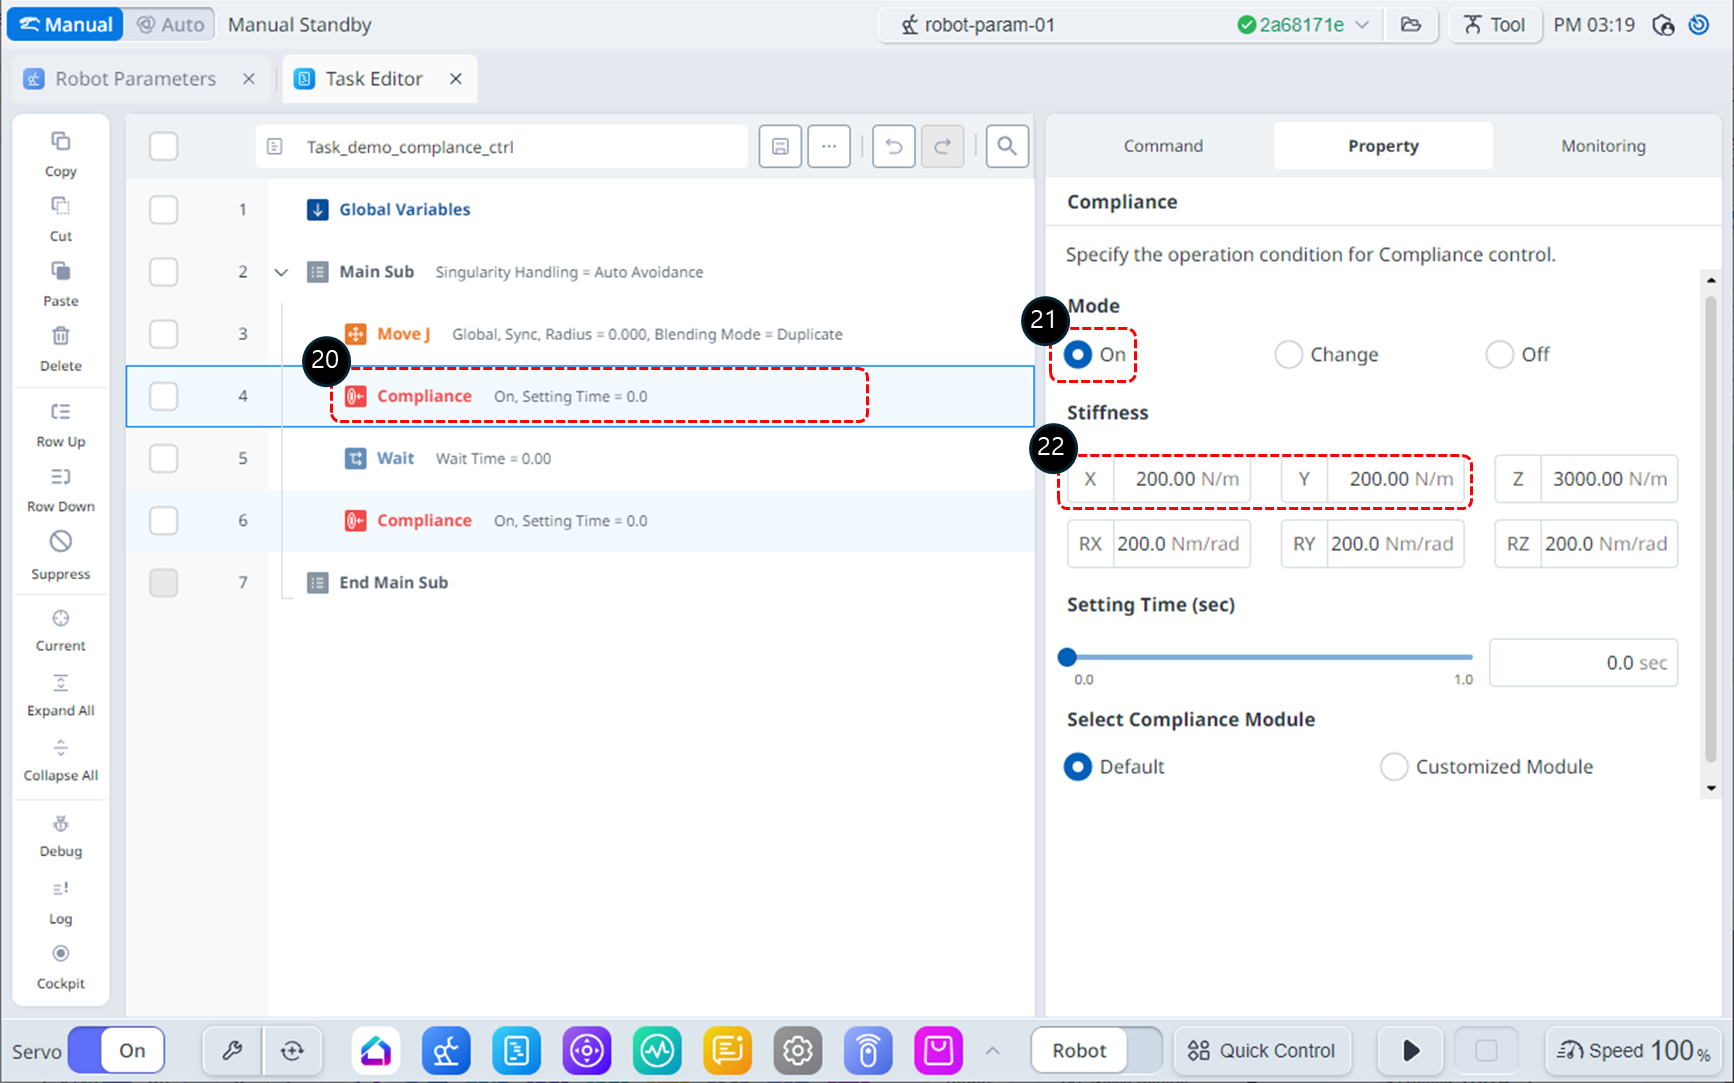
Select the Compliance command on line 4.
In the Property tab, set the Mode as follows: Mode On activates compliance control.
Mode : On
Set the Stiffness as follows: Lower the stiffness in the X and Y directions to make the robot respond more softly in those directions.
X : 200 N/m
Y : 200 N/m
Z : 3000 N/m (default)
Rx, Ry, Rz : 200 Nm/rad (default)
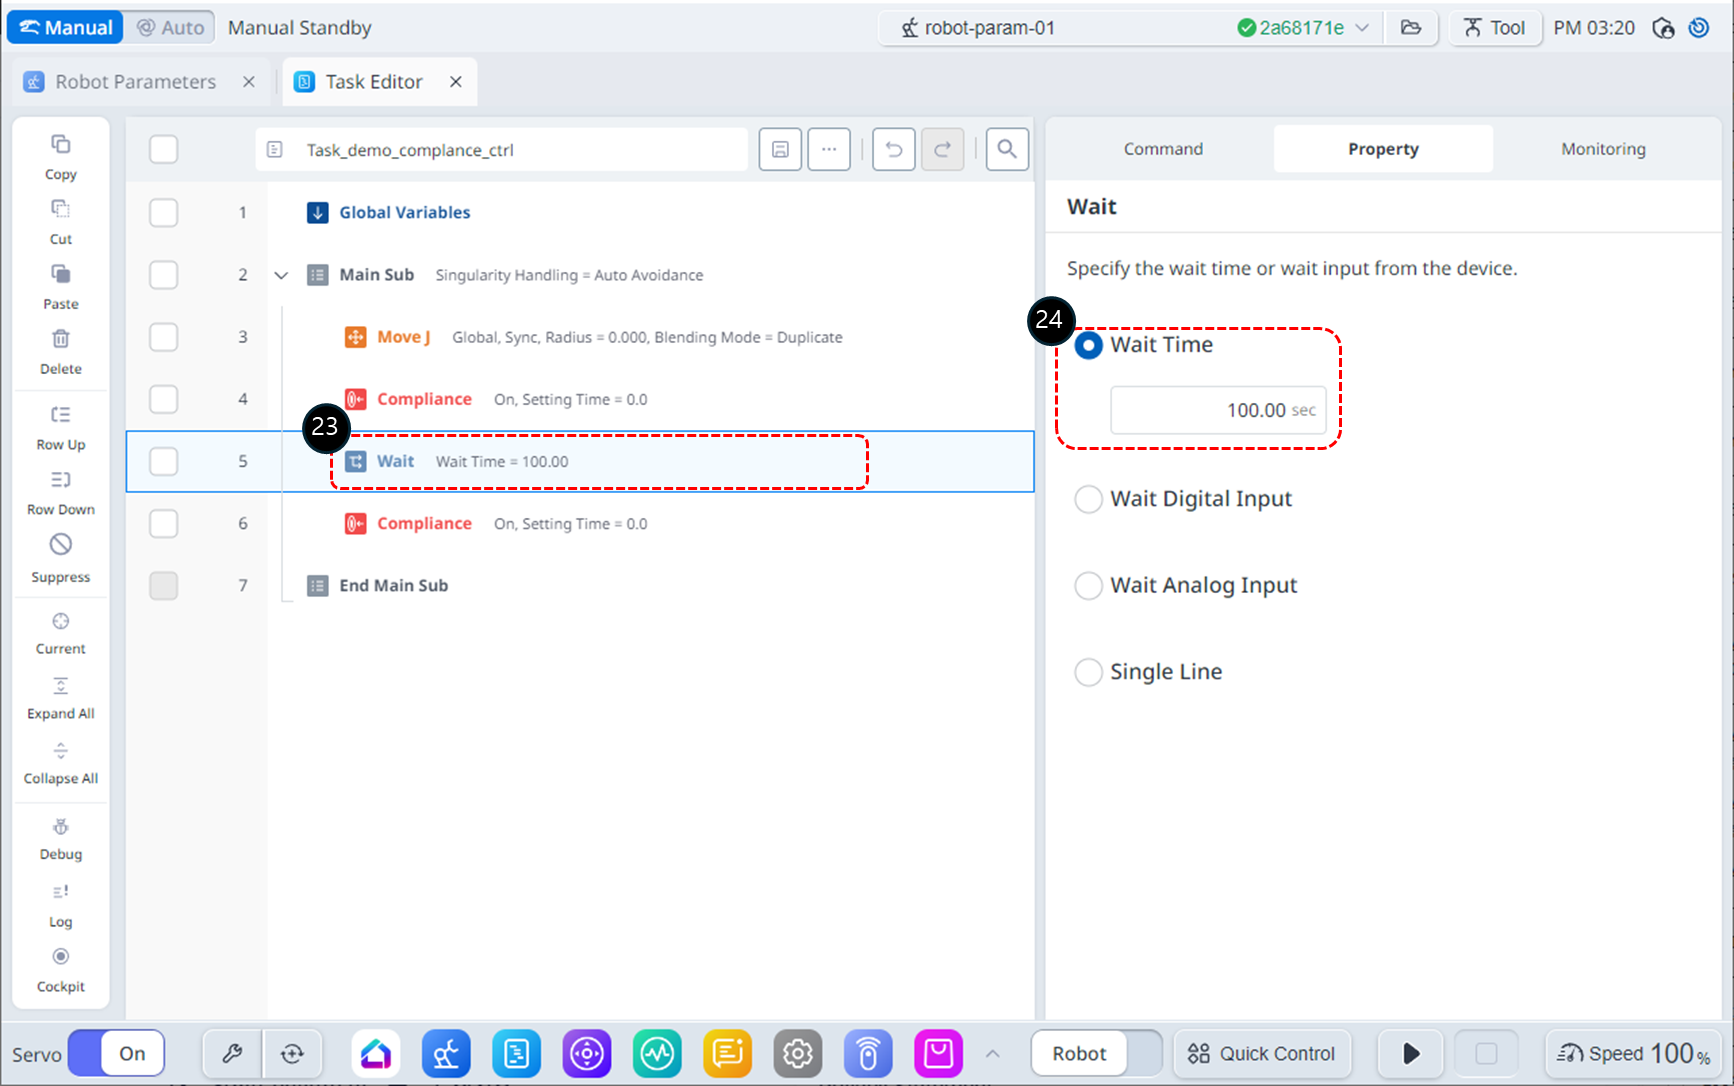
Select the Wait command on line 5.
Set the Wait Time as follows.
Wait Time : 100 sec
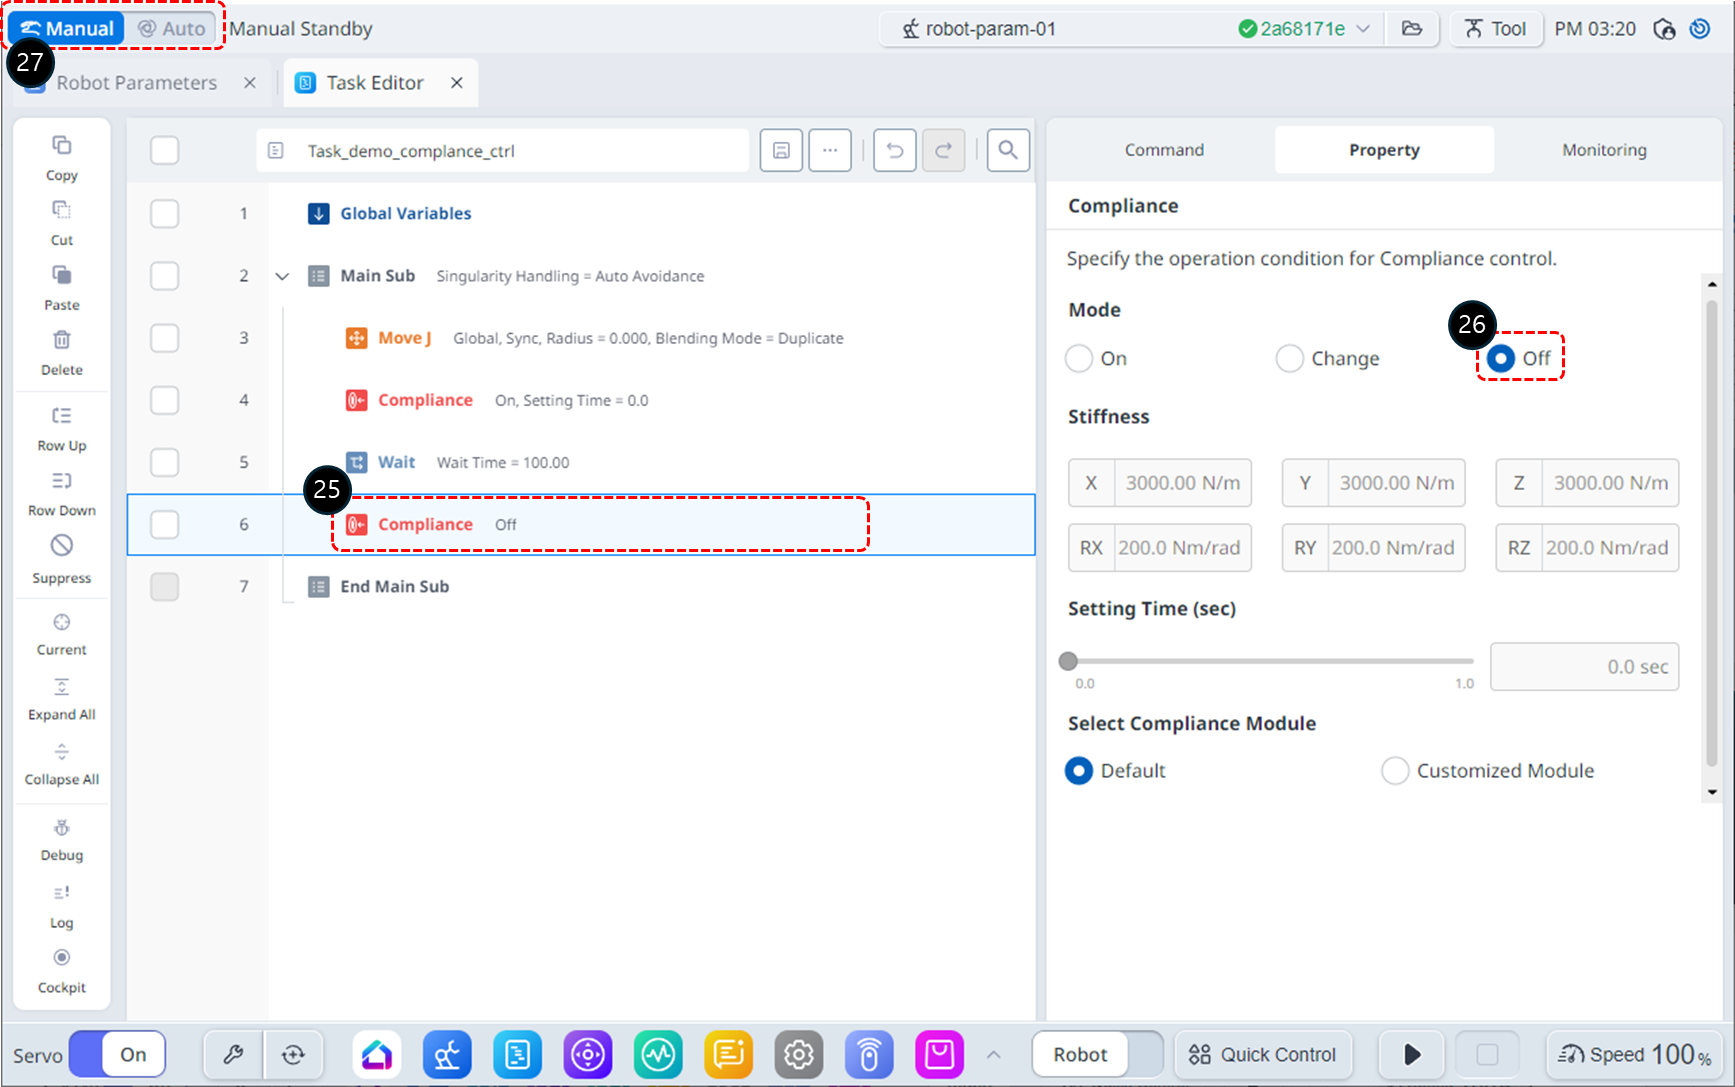
Select the Compliance command on line 6.
In the Property tab, set the Mode as follows: Mode Off deactivates compliance control.
Mode : Off
Change the operation mode to Auto. The Property tab will automatically switch to the Monitoring tab.
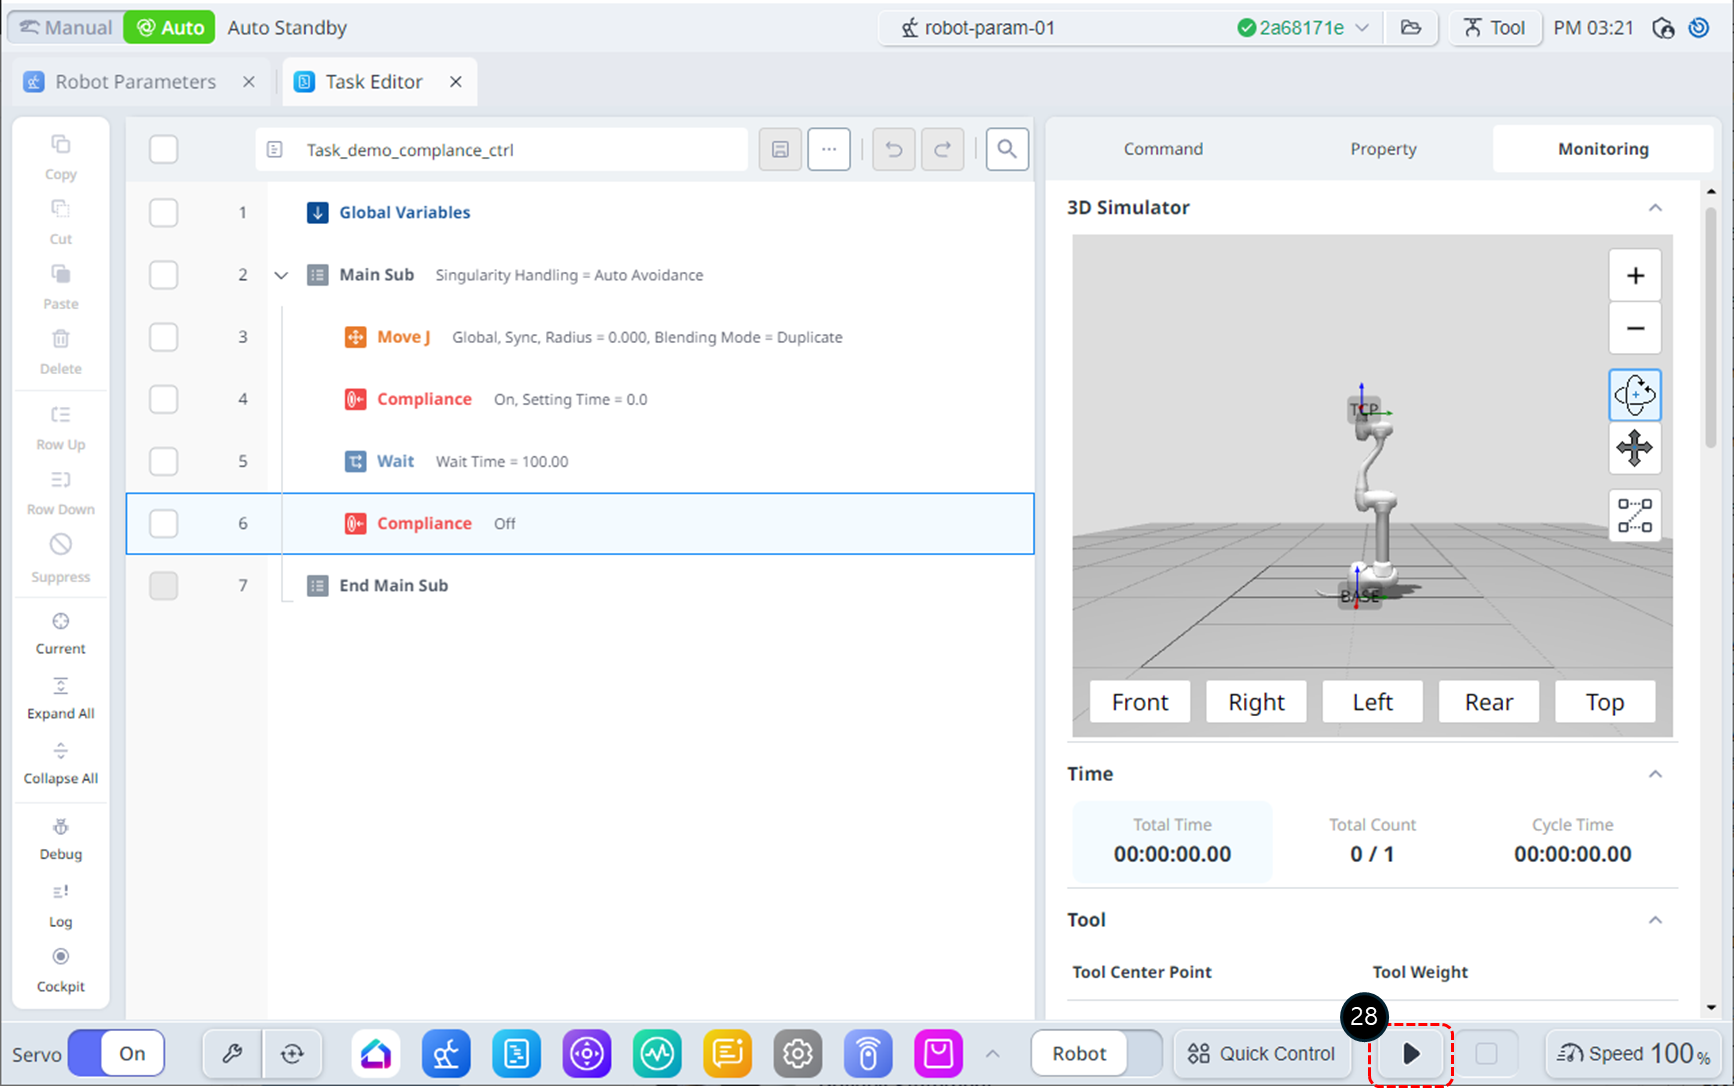
Click the Run button. The robot will move to the starting position, initiate compliance control, and remain stationary for 100 seconds. During this time, gently push the robot's end effector toward the robot's body. The robot will stop with a collision error(or TCP Force Limit error). In the safety stop state caused by the collision, the robot's LED will display a yellow color.
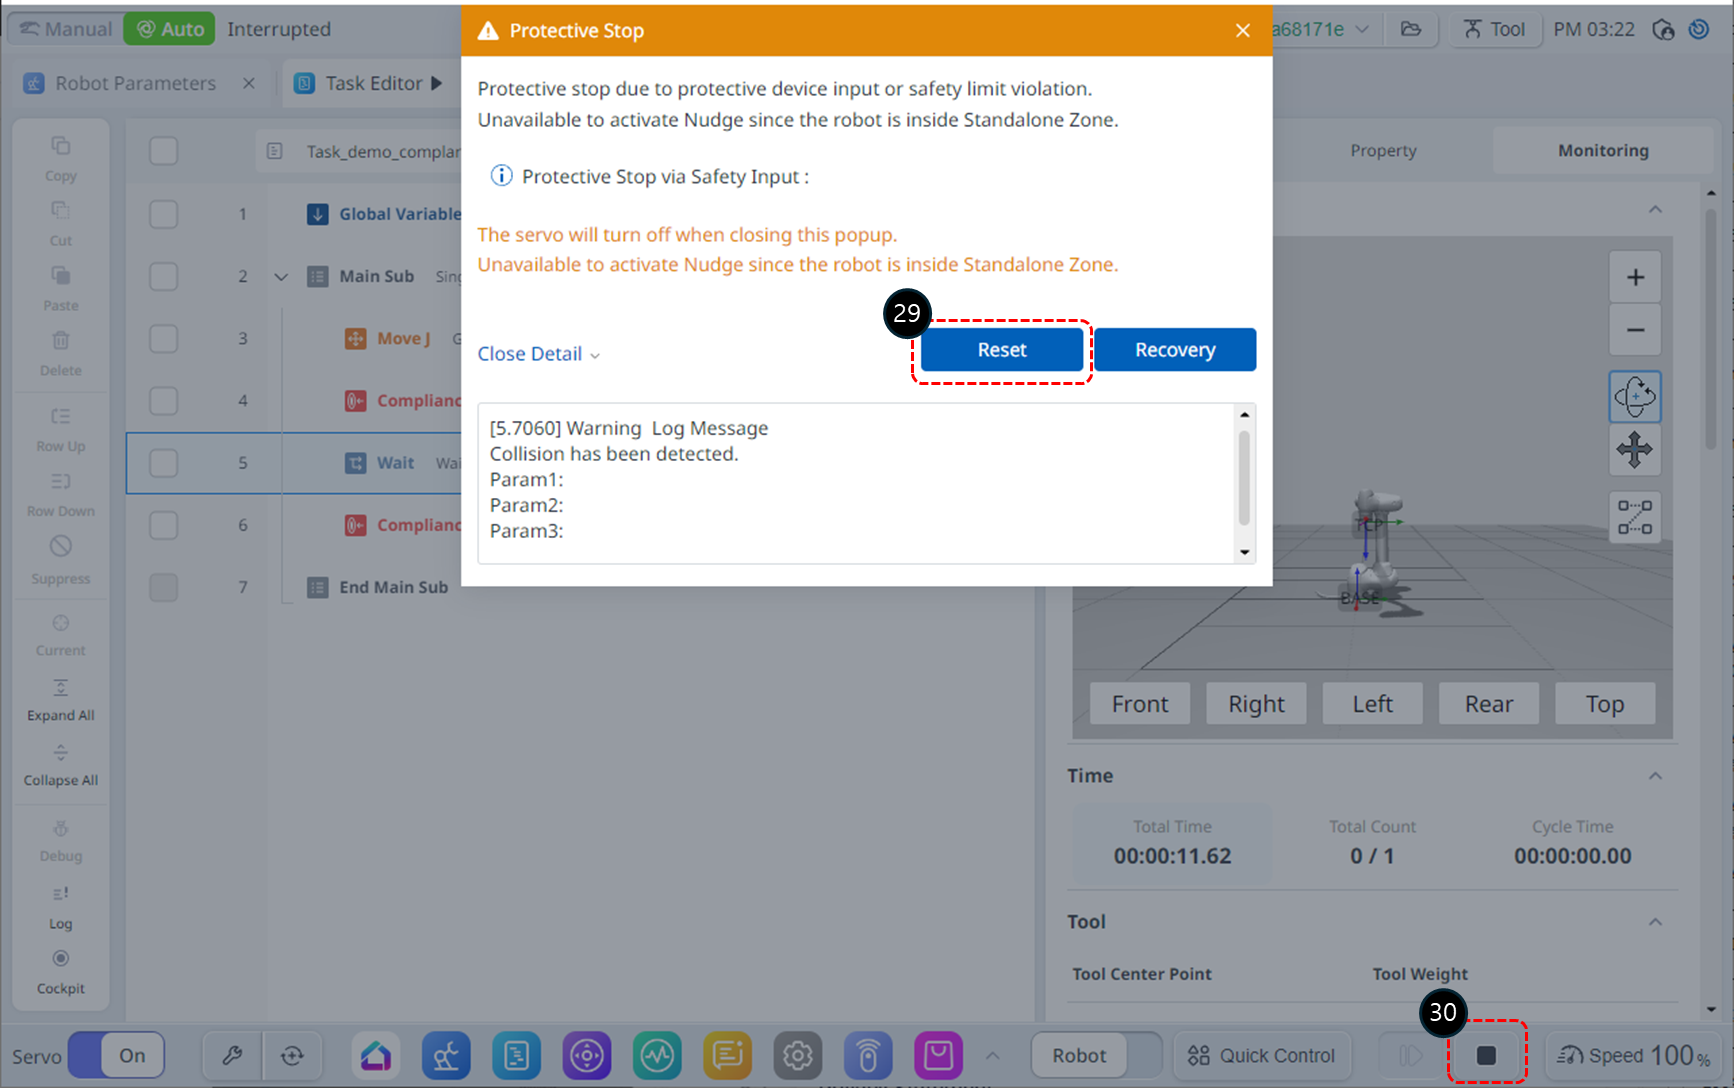
Click the Reset button on the safety stop warning window. The task program will resume operation.
Click the Stop button to terminate the program.
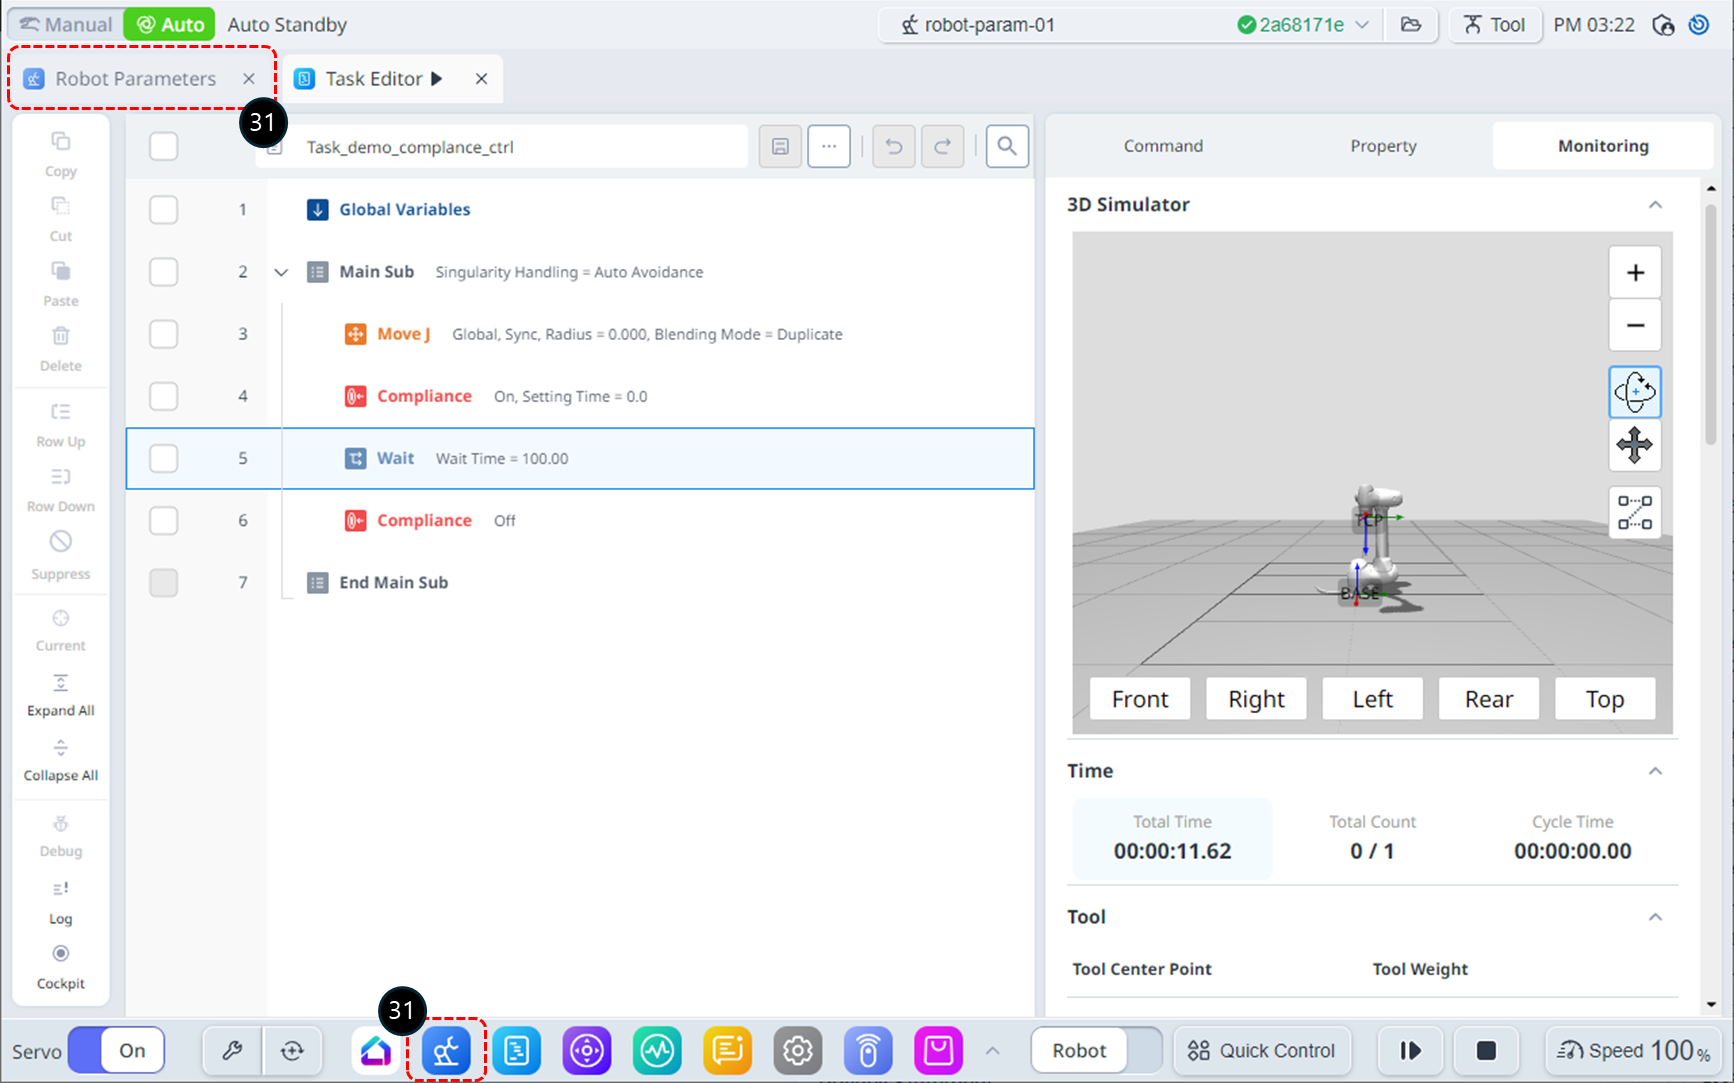
To resolve collision issues, the Collision Sensitivity in the safety settings should be lowered. (If there is a TCP Force Limit issue, the TCP Force parameter should be increased.) Select the Robot Parameters module from the bottom menu. Alternatively, you can select the Robot Parameters module tab in the top left corner, which works the same.
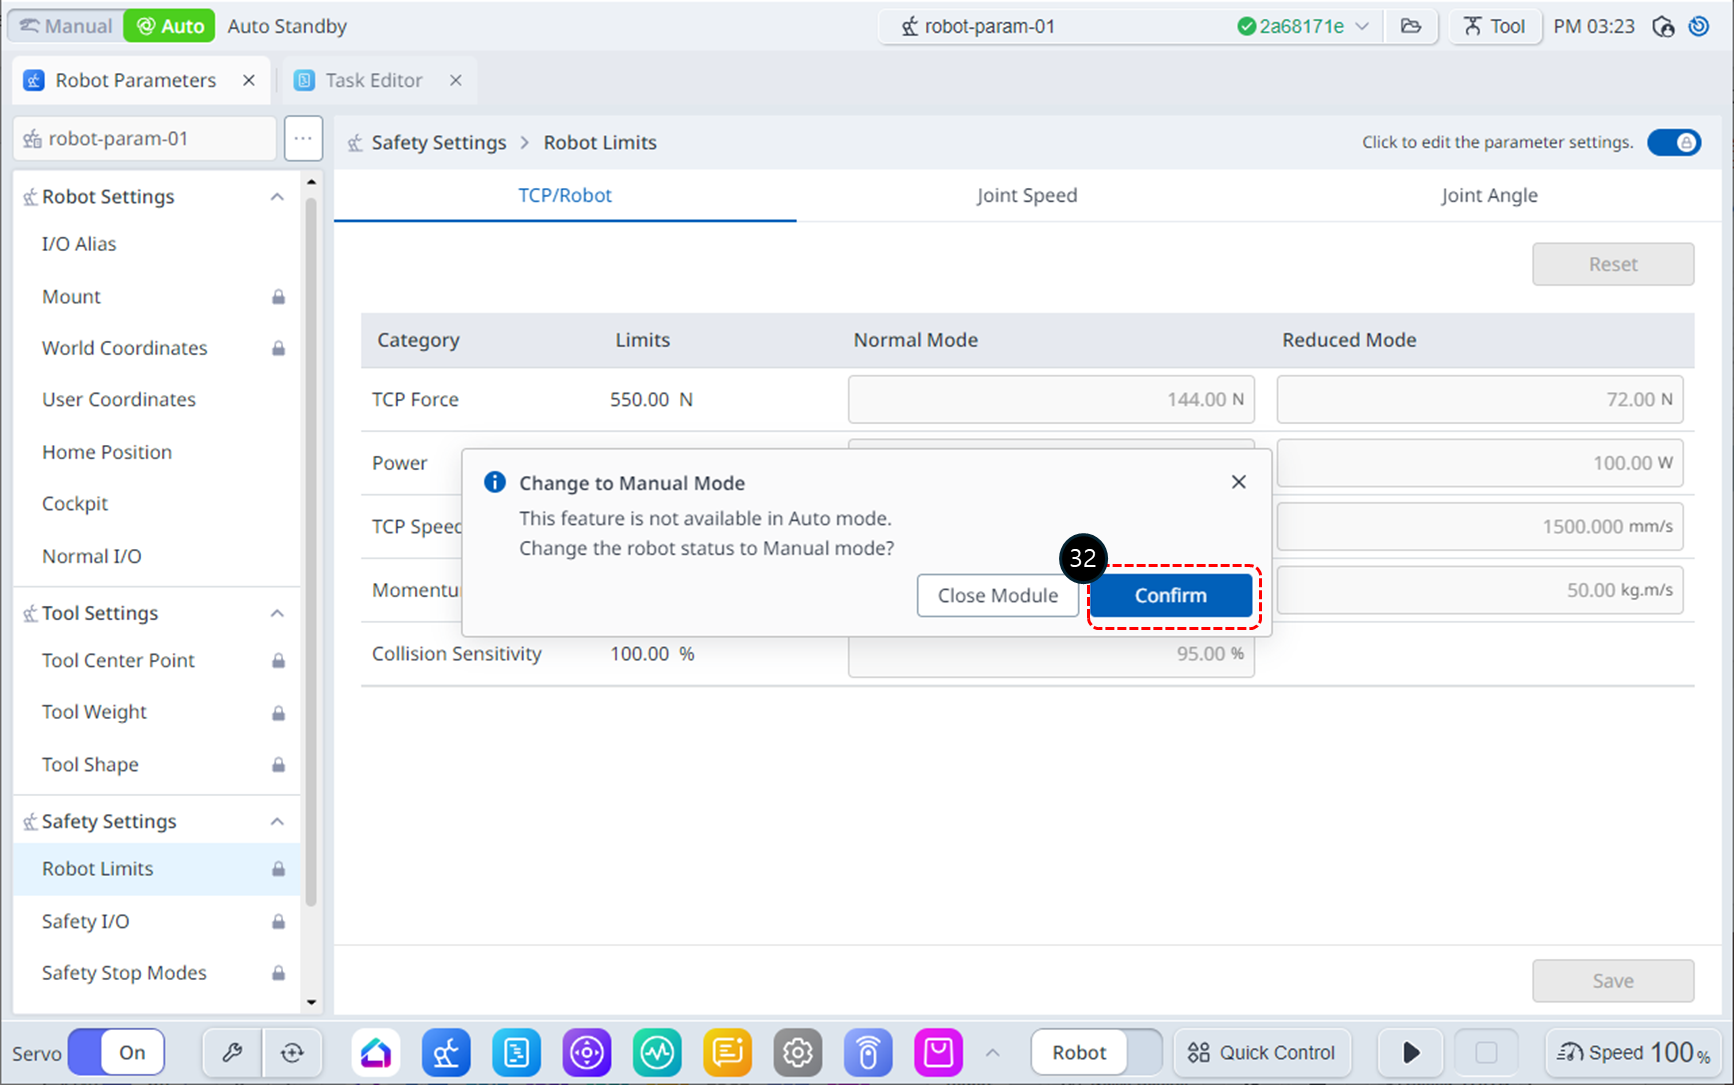
In Auto mode, accessing the Robot Parameters module will trigger a notification window. Click the Confirm button to switch to Manual mode.
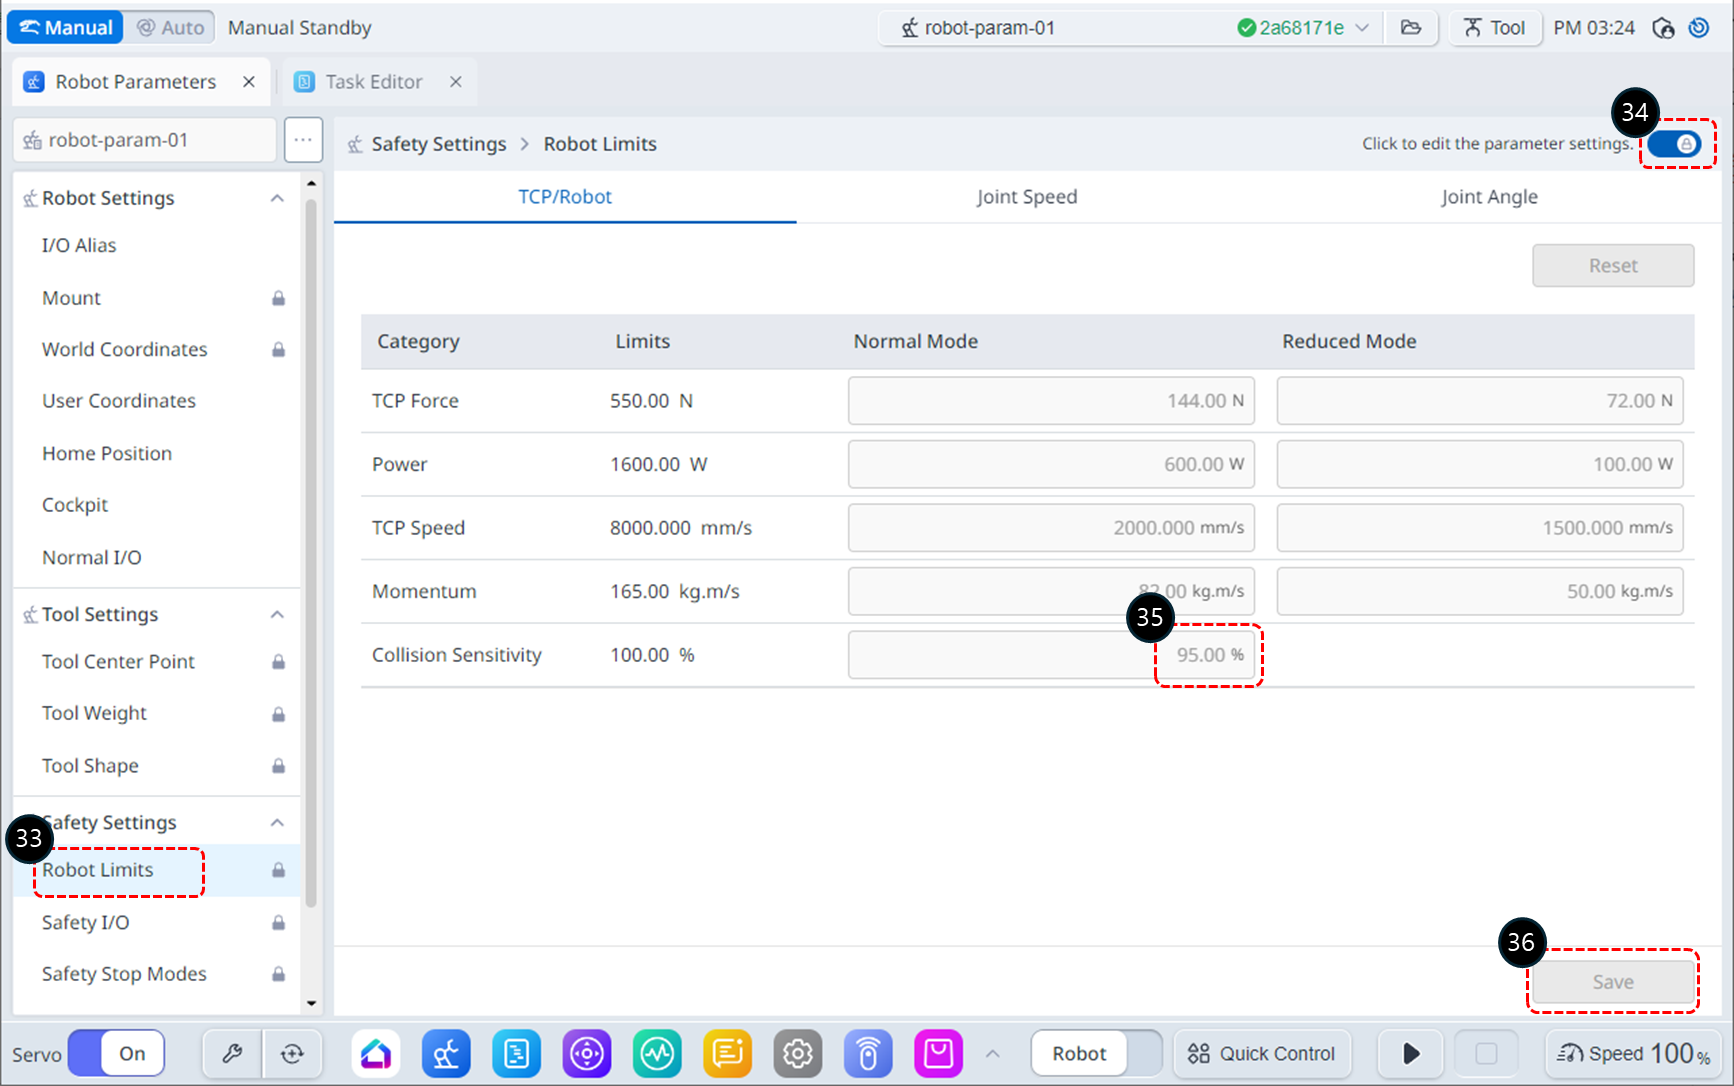
Select Robot Limits from Safety Settings.
Enable the parameter editing state. If a password input window appears, refer to steps 6–7.
Modify the Collision Sensitivity to 50%.
Click the Save button to save the settings. If the Robot Parameters Review window appears, review the modifications and click the Apply button.
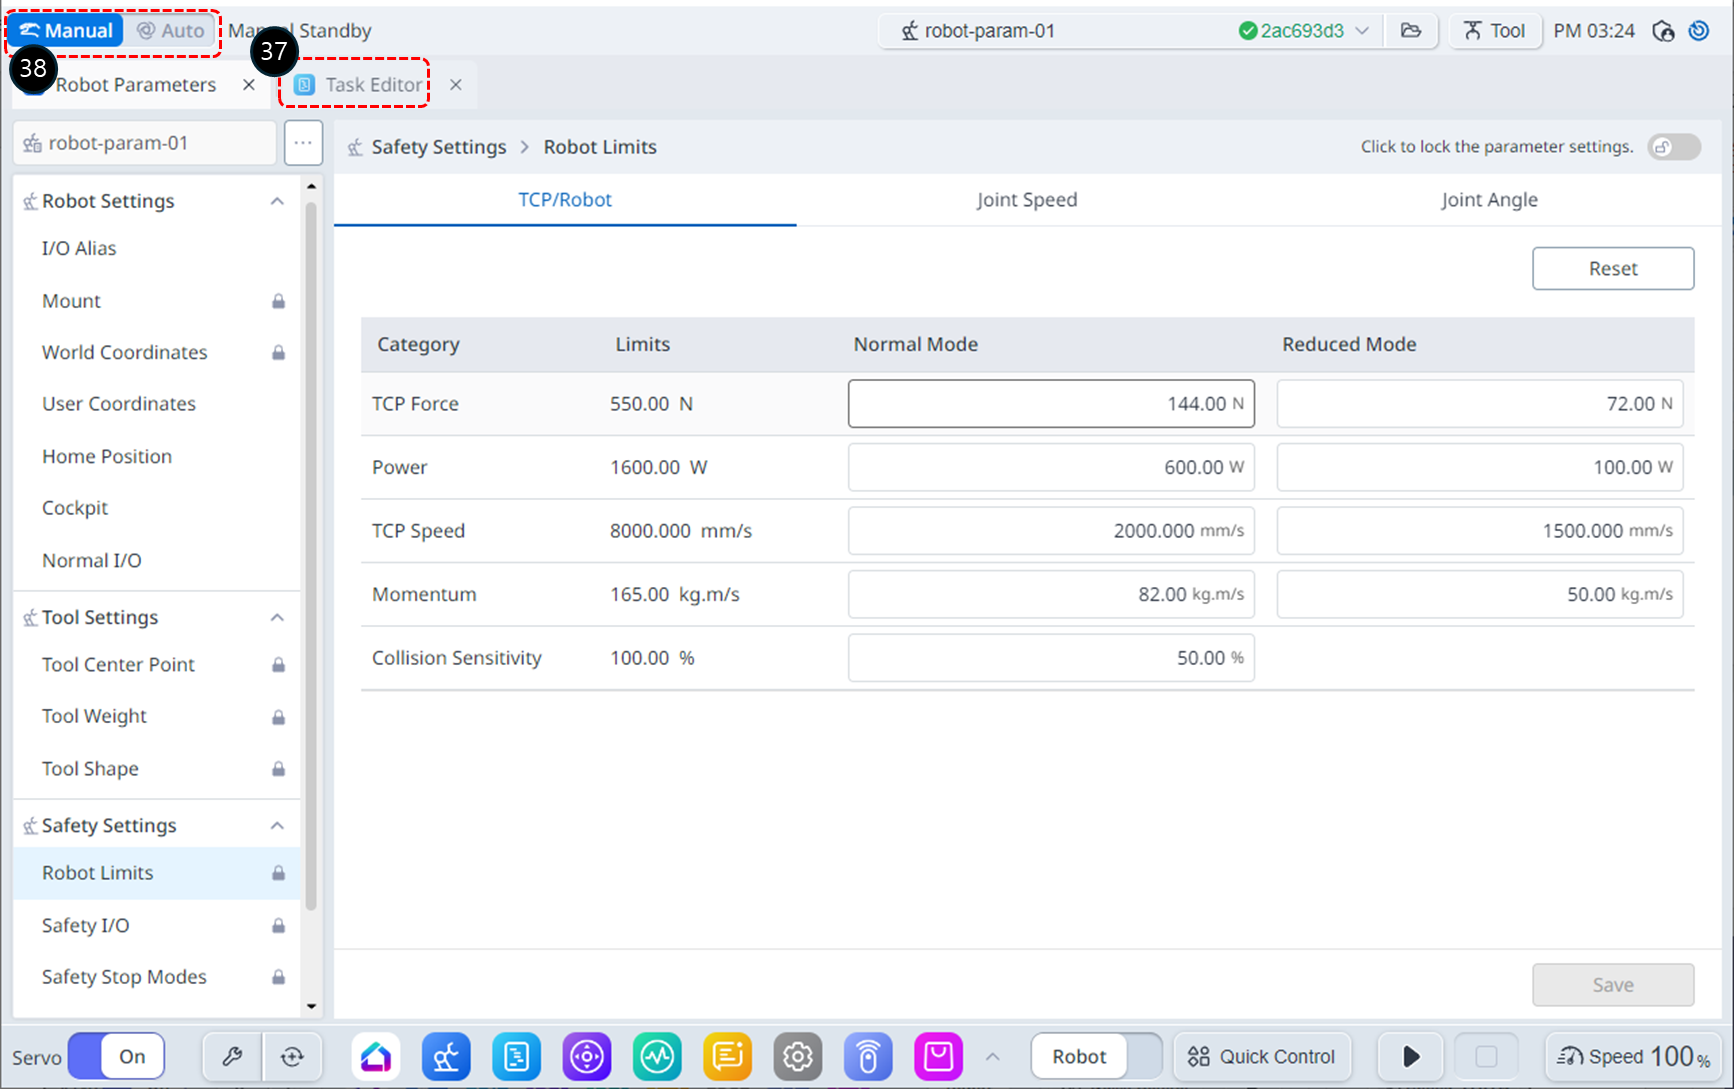
Select the Task Editor module tab.
Switch to Auto mode to execute the Task Program.
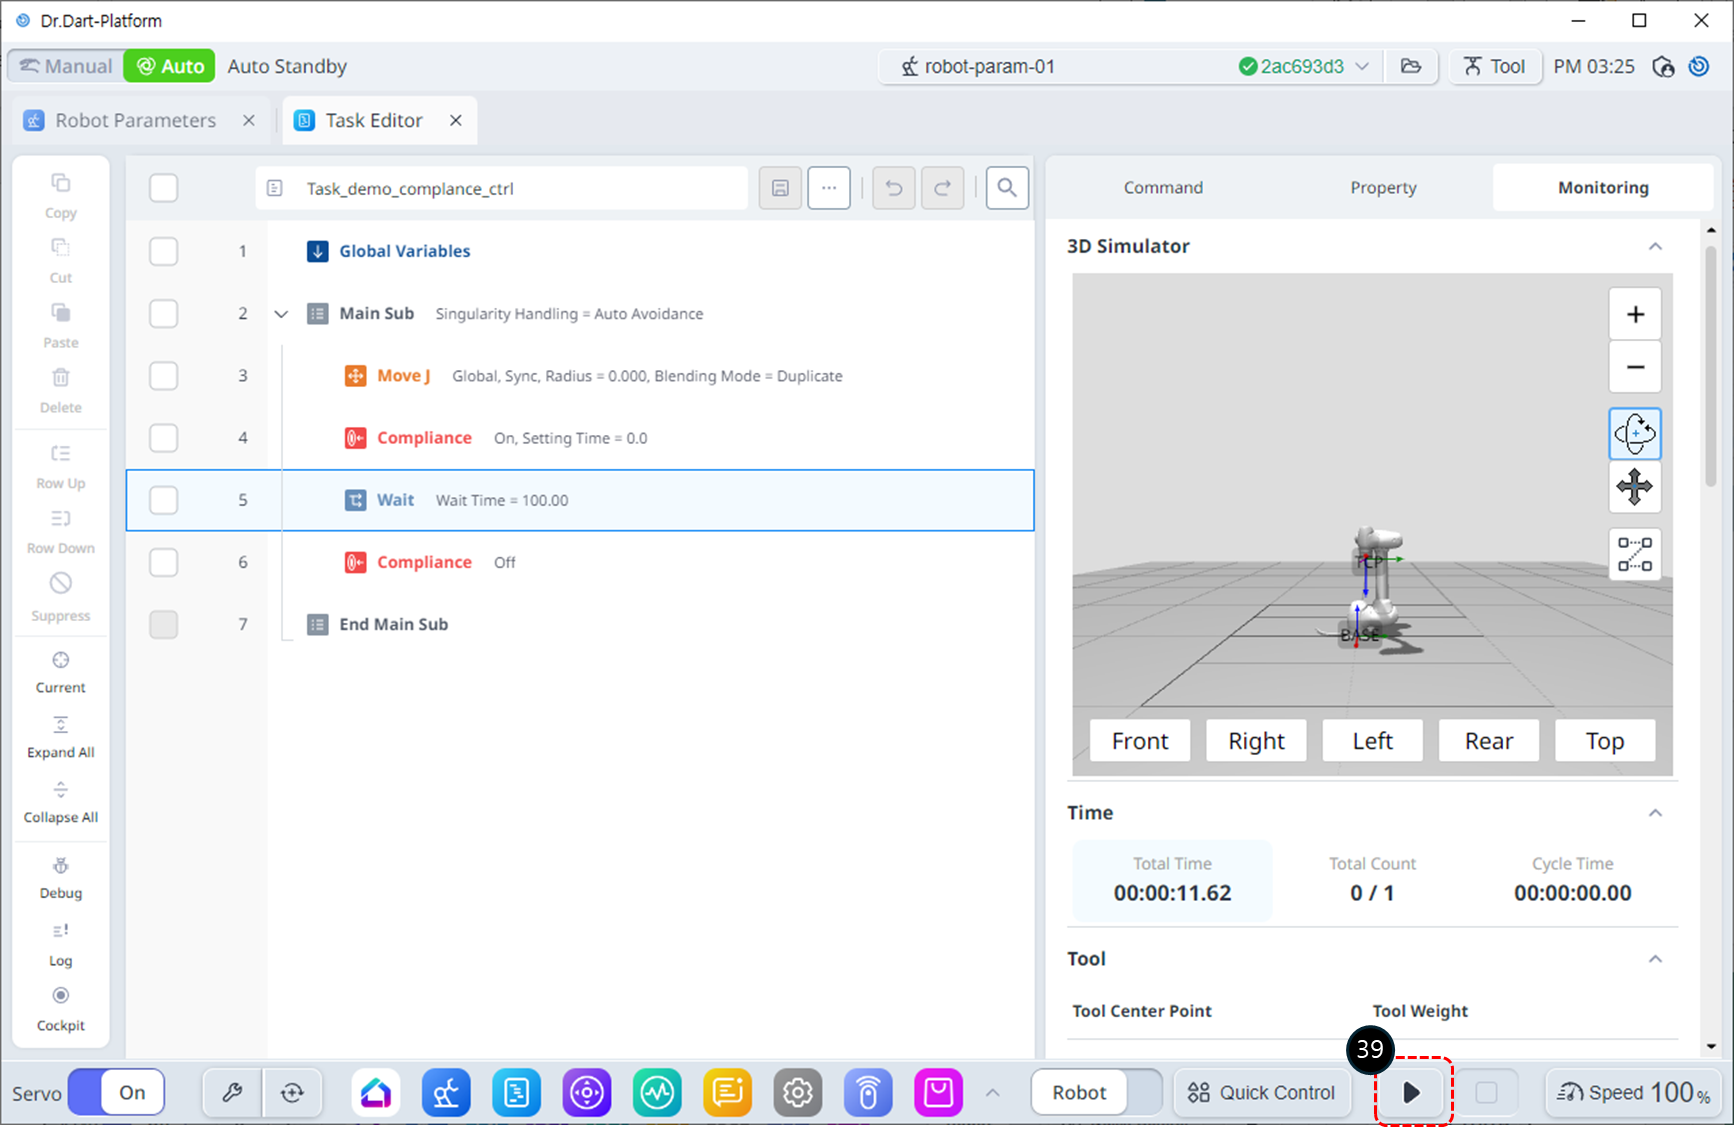
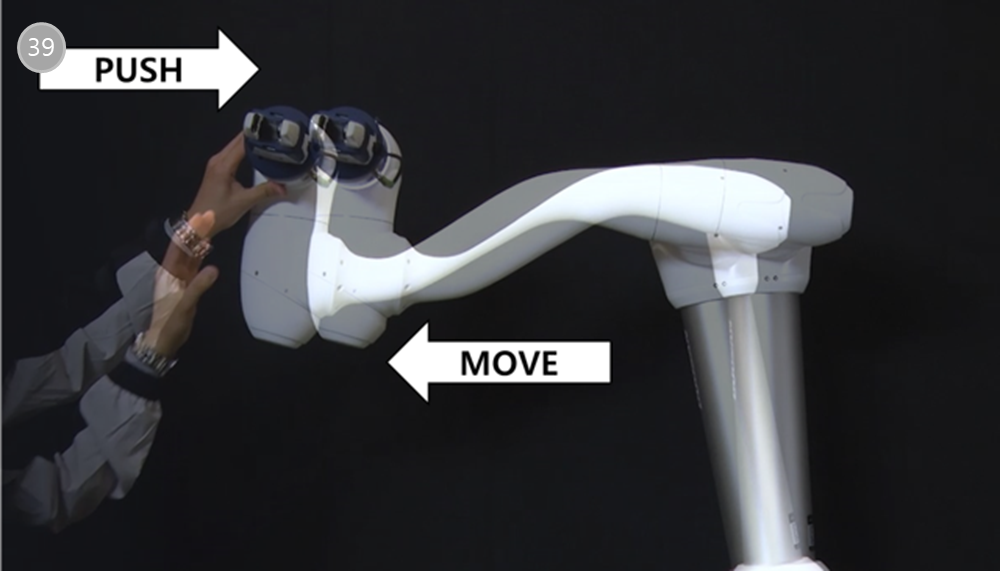
Click the Run button. During the wait time, gently push the robot's end effector toward the robot's body. The robot will move due to the pushing force, and once you release your hand, it will return to its original position.
