Digital Welding Machine Interface Settings (Digital Welding Machine)
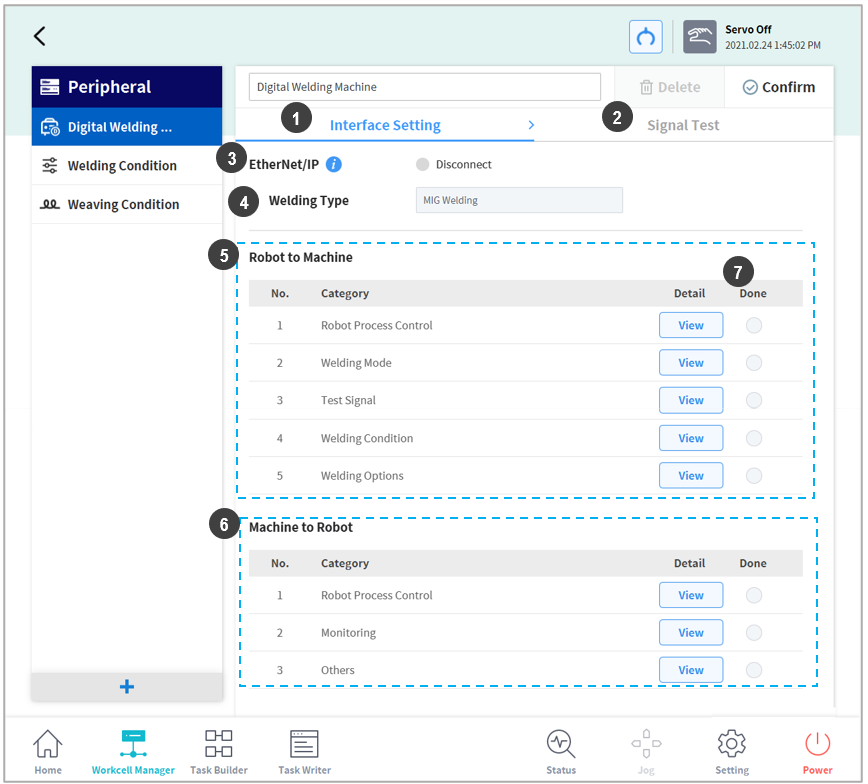
With a synergic welding machine and EtherNet/IP communication, two-way communication between the robot and welding machine can be set and they can be linked through signal transmission. The signal settings and functions provided by each welding machine are different, therefore use the universal UI to set welding conditions, link signals and monitor the information provided by each welding machine from the Welding Machine Interface Settings menu.
‘Signals’ set and activated from Interface Settings menu are linked to functions related to welding conditions and welding task settings, so they must be set first. After completing the physical interface setting of Arc Welding Overview, go to Workcell Manager → Peripheral → Welding menu to set settings according to the following.

No | Item | Description |
|---|---|---|
1 | Interface Settings Tab (Interface Settings) | Sets the interface between the robot and the welding machine. Groups with mandatory settings must be completely saved. |
2 | Signal Test Tab (Signal Test) | Performs signal tests based on the settings set in the Interface Setting tab. This tab is available after Robot Process Control, Test Signal of the Robot to Machine, and Robot Process Control of Machine to Robot are set. |
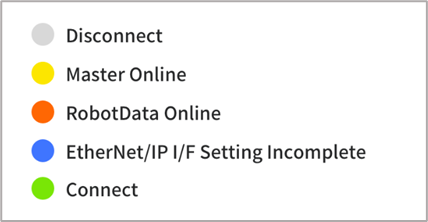
3 | EtherNet/IP Connection Status | Displays the EtherNet/IP connection status between the robot and the welding machine.
|
4 | Welding Type | Displays the welding type of the connected welding machine. (S/W V2.8 supports EtherNet/IP communication MIG/MAG/CO2 welding machines) |
5 | Signal from Robot to Welding Machine (Robot to Machine) | Sets the signals sent from the robot to the welding machine. |
6 | Signal from the welding machine to the robot (Machine to Robot) | Sets the signals sent from the welding machine to the robot. |
7 | Setting Complete | Displays items which have completed setting. |

