
Jog Plus Module
The user can select a manual movement method from the Jog tab.
- Jog: It moves the robot joint or TCP to the joint axis or coordinate axis the user selected
- Move: It moves the robot joint or TCP to the target point the user entered
Robot movement consists of two types.
- Joint Motion: It moves each joint linearly with a rotating motion
- Task Motion: It moves the end linearly to the target point
The following is the method how to move the robot using joint motion from the jog screen:
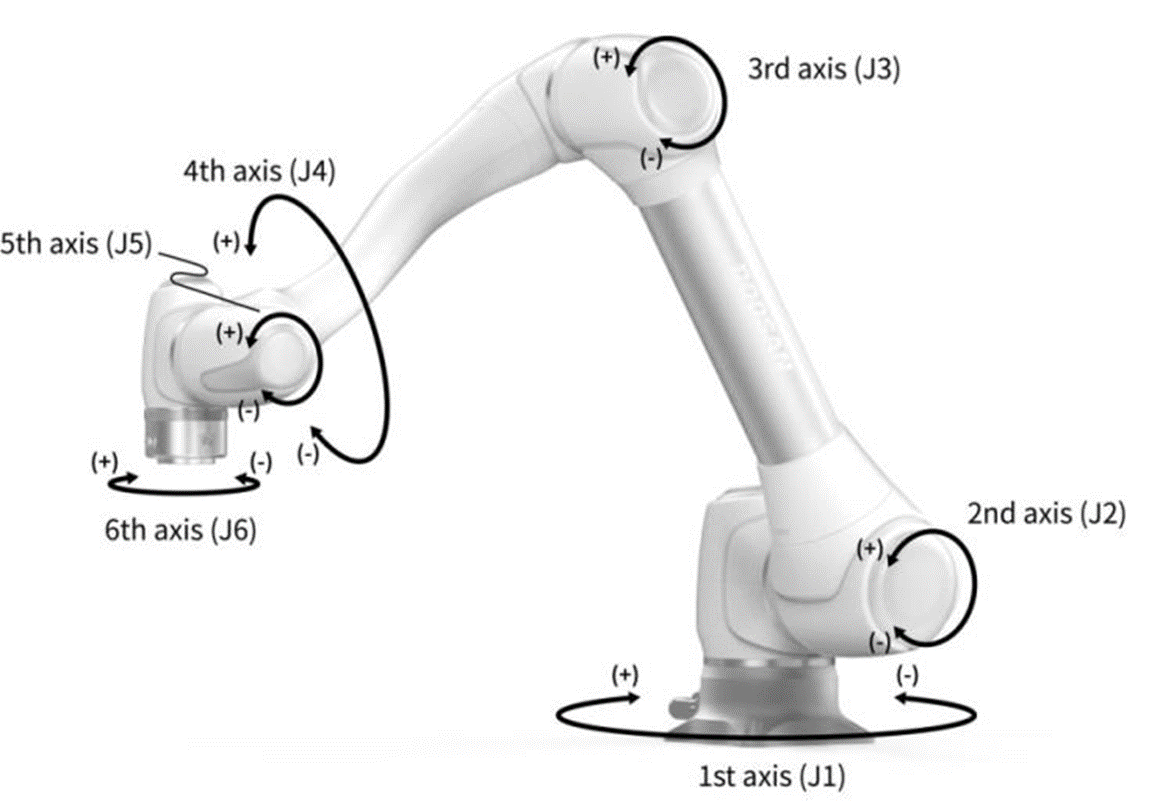
- Select the Joint tab.
- Select the axis to move. For example, You can select J1.
- Press the +/- button to move the robot. The robot moves while the +/- button is pressed, and the current location is displayed on the screen in real-time.
The following is the method how to move the robot using task motion on the jog screen:
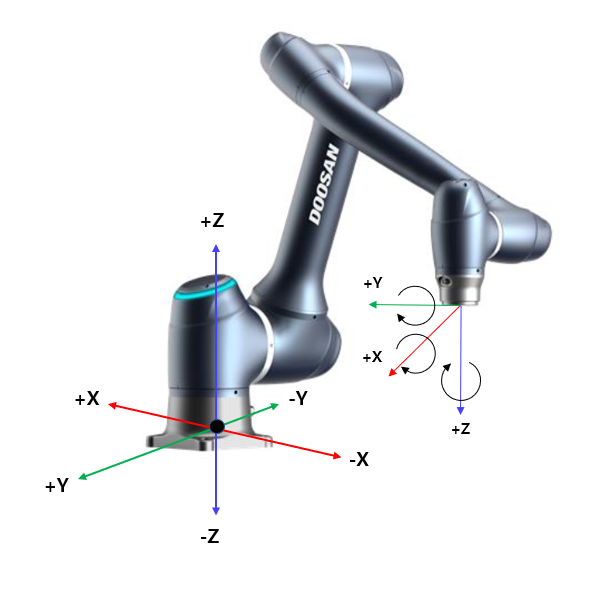
- Select the base coordinates. The robot can be moved according to the BASE coordinates or the TOOL coordinates.
- Select the direction to move. For example, X-axis can be selected.
- Press the +/- button to move the robot. The robot moves while the +/- button is pressed, and the current location is displayed on the screen in real-time.
For more information about jog movement, move and align, refer to Jog Screen, and Move Panel respectively.
Note
- If the toggle switch of the actual mode on the top left of the Jog screen is turned off, the robot moves only on the virtual screen on the left of the Jog screen. The actual robot moves if the actual mode toggle switch is turned on.
With the Jog Plus module, the user can explore the entire work space in manual mode or set the Operation Space as the robot operation space. The movement angle of each axis can be limited according to the selected operation space and joint angle limit of the safety setting.
To use the Jog Plus function, tap the Jog Plus Module on the main menu.
- The Jog function cannot be used during Servo Off.
- The robot is operated manually in the Jog Plus screen, so the robot only moves when the Jog button is pressed.
- It is possible to move the robot based on the current position on the Jog Plus tab screen.
- The robot can be moved by configuring the target angle/coordinates on the Move tab screen.
- It is possible to configure the reference coordinates on the Jog Plus tab screen and Move tab screen as a joint or task.
Note
- If the robot cannot be navigated due to being located in a space other than the operation space of the Jog Plus mode, set the robot operation space to “None”to allow the robot to be navigated.
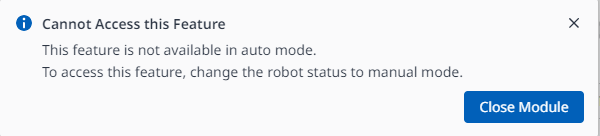
Note
This module is not available in Auto mode. Tapping the toggle button in the bottom right makes it available in Manual mode.
Using Job Plus (Jog+) allows you to use the jog feature simultaneously while performing different work. This can be utilized when manual control is required to move the robot to the target point during teaching.
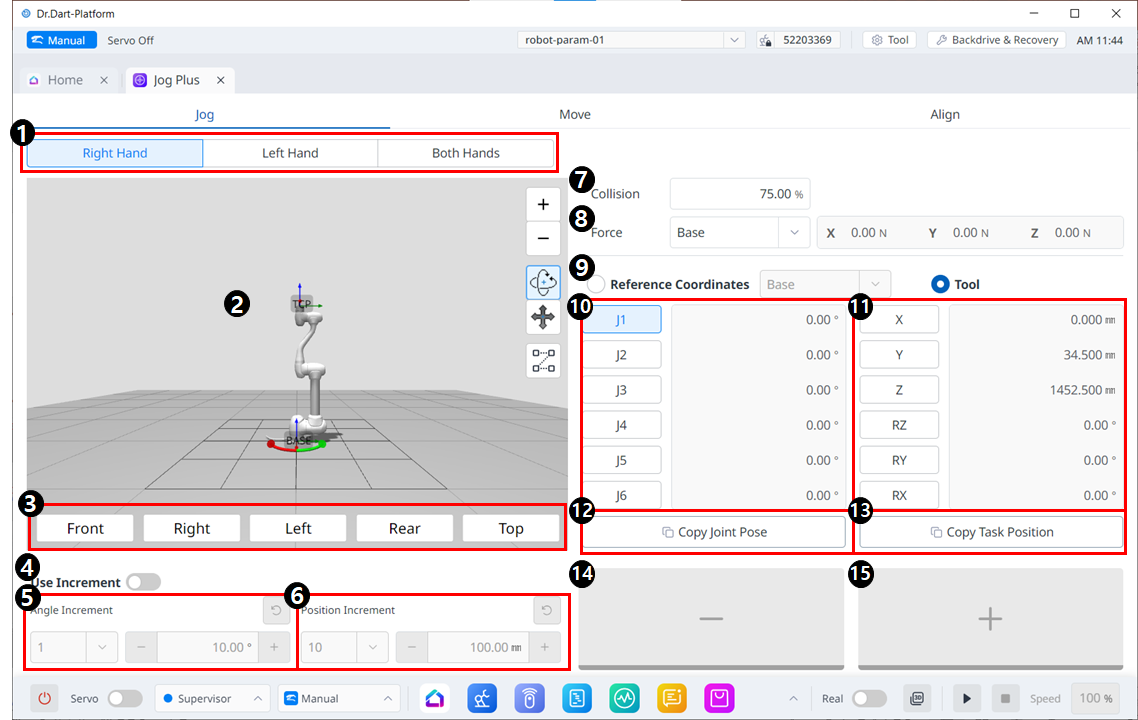
Jog Menu Layout
| Item | Description | |
|---|---|---|
| 1 | Select panel type | You can choose the location of the move button. |
| 2 | 3D simulation | This is the 3D viewer, where you can see how the robot looks. |
| 3 | Simulator Alignment | You can utilize this section to steer the simulator. |
4 | Use Increment | This button allows you to enable angle or position increments. |
| 5 | Angle Increment | This section is where the angle increment on the selected axis is set. |
| 6 | Position Increment | This section is where the position increment on the selected axis is set. |
| 7 | Collision | This field is where you set the Robot Collision. |
| 8 | Force Monitoring | This section is where you set the forces in the X, Y, and Z axes based on Base, Tool, World, Reference and among others. |
| 9 | Select reference coordinate system | Select a reference coordinate system to display or jog the task coordinates in Figure 11. It can be Base, World, or User coordinates. |
| 10 | Joint panel | You can select the joint axis to jog. |
| 11 | Task panel | You can select the task axis to jog. |
| 12 | Copy Pose J button | This button allows you to copy Pose J. |
| 13 | Copy Pose X button | This button allows you to copy Pose X. |
| 14 | Move - Button | You can have the robot move in the - direction based on each axis. At this time, you can figure out the direction of the - and + on the 3D simulation on the left-hand side. |
| 15 | Move + Button | You can have the robot move in the + direction based on each axis. At this time, you can figure out the direction of the - and + on the 3D simulation on the left-hand side. |
Move
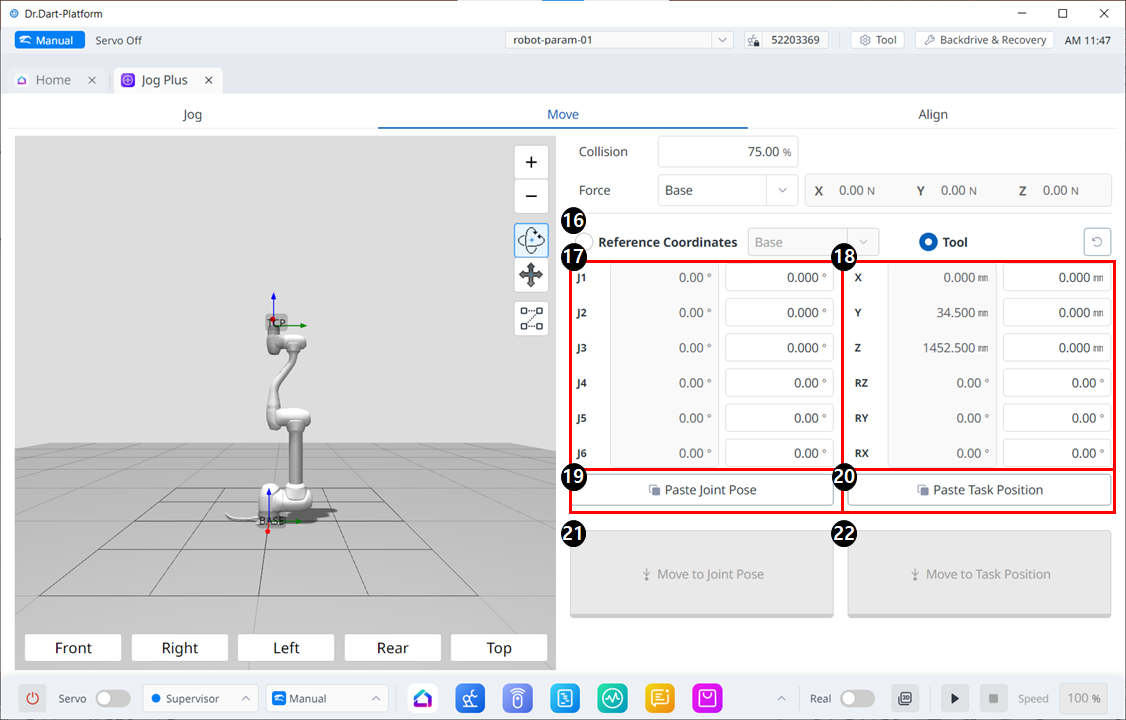
Move Menu Layout
| Item | Description | |
|---|---|---|
| 16 | Reference Coordinates | Select the reference coordinate system to be used for the task coordinates in Figure 18. You can choose Base, World, or User coordinates. |
| 17 | Joint Posture | Displays the current robot posture and the target joint posture. |
| 18 | Task Posture | Displays the current robot posture and the target task posture that fit the selected reference coordinate system. |
| 19 | Paste Joint Posture | Paste the posture value copied to the clipboard into the joint posture panel. |
| 20 | Paste Task Posture | Paste the posture value copied to the clipboard into the task posture panel. |
| 21 | Joint Move button | This button causes the robot to move to the target joint posture. |
| 22 | Task Move button | This button causes the robot to move to the target task posture. |