
Try the sample MoveJ/MoveL commands
MANDATORY NORMAL 20 MIN
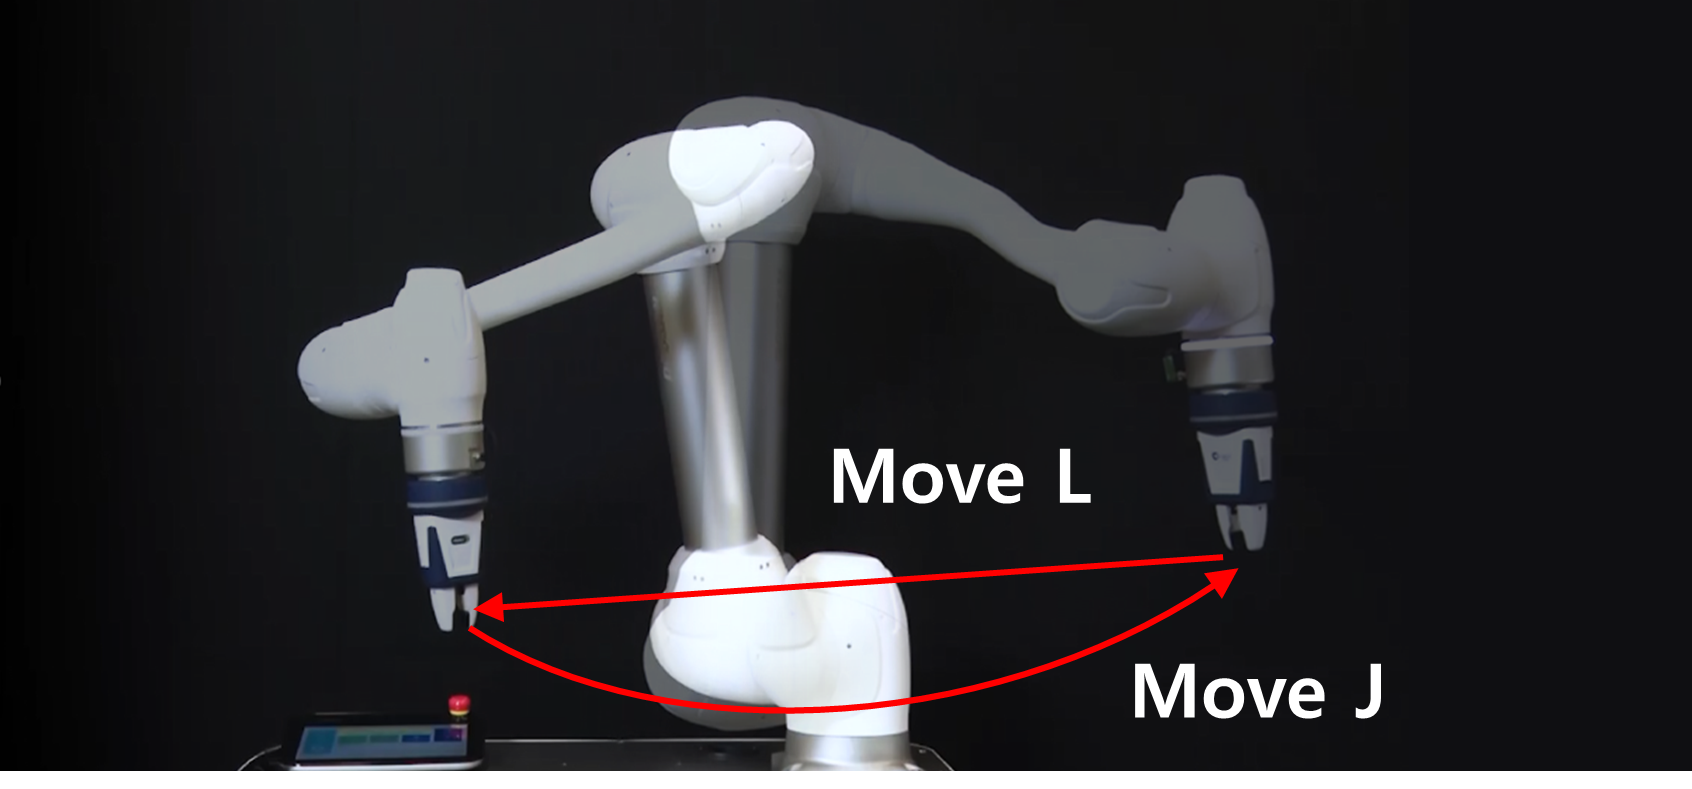
In this sample, add MoveJ and MoveL commands in the Task Builder, execute them and compare the difference between the two motions.
Caution
- Before trying the sample, make sure to read and follow Precautions for Use. For more information, refer to PART 1. Safety Manual.
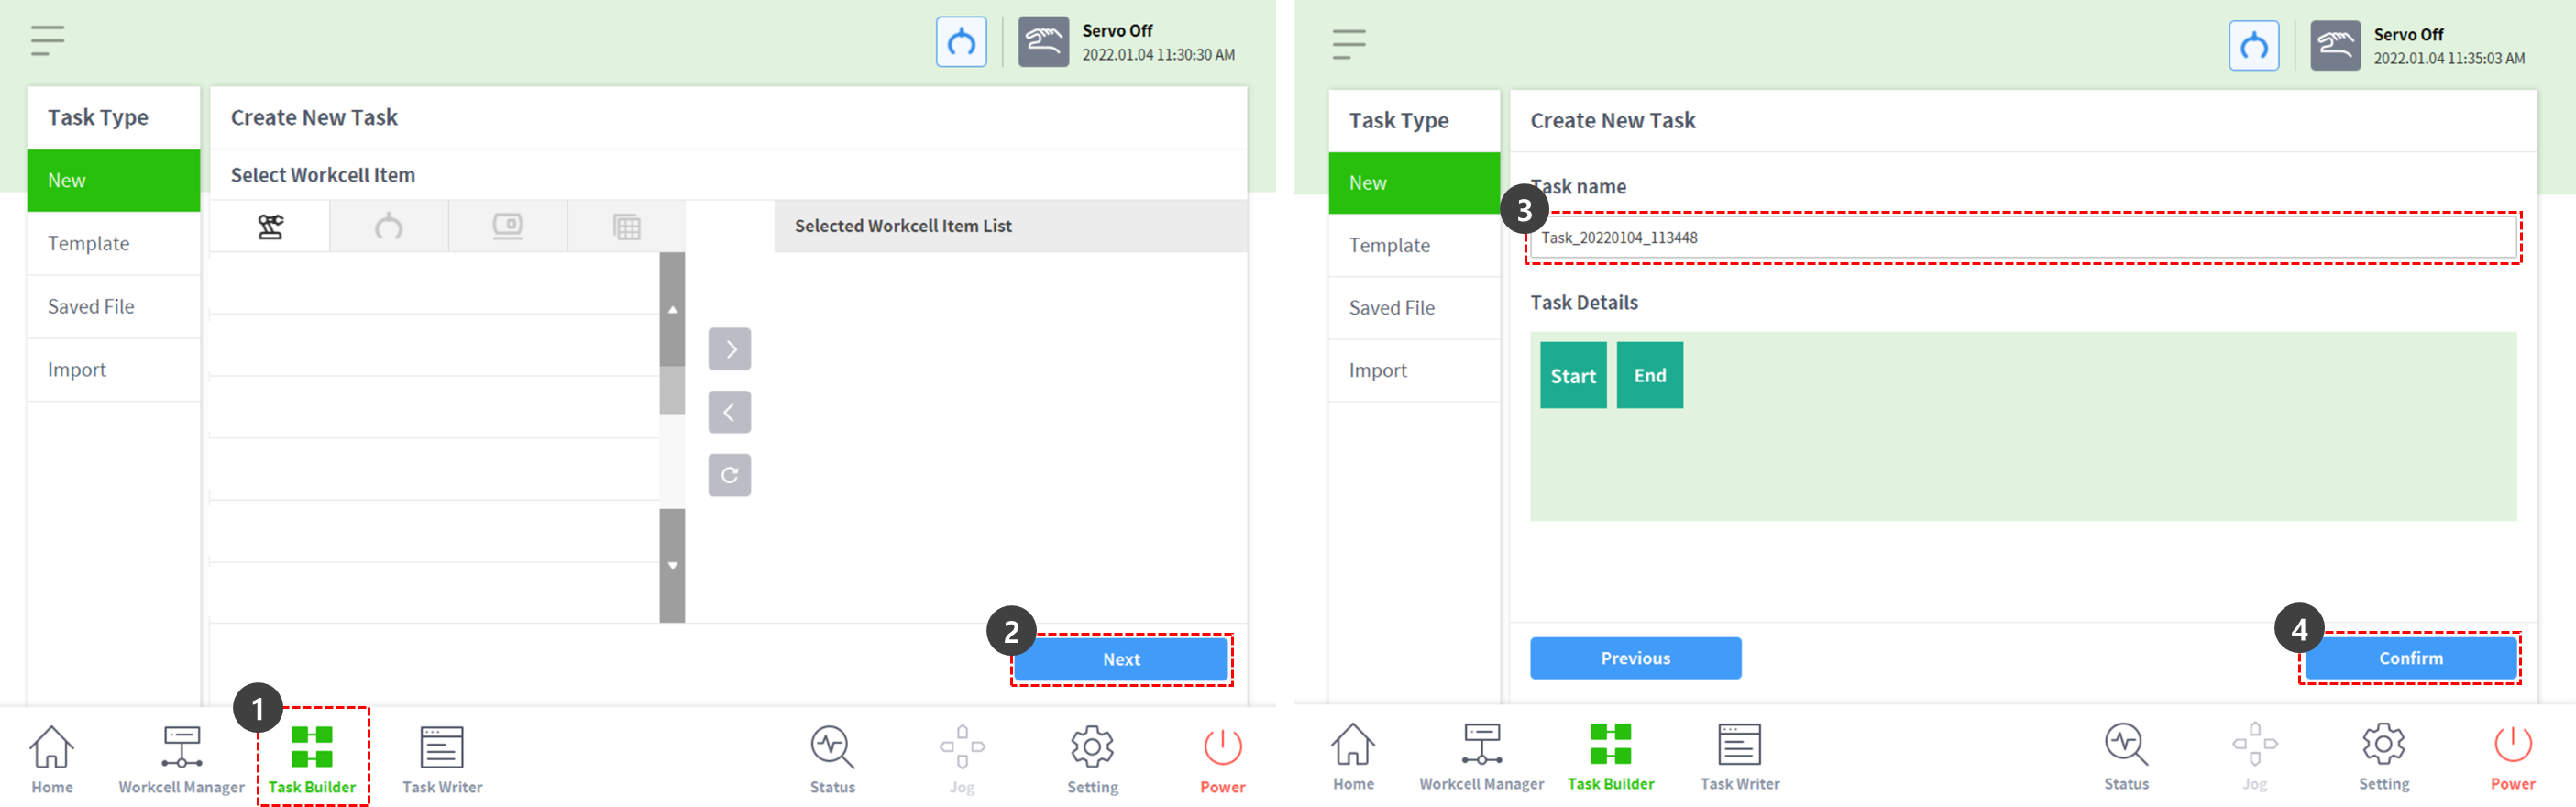
- Select the Task Builder from the bar at the bottom of the screen.
- The programming method in the Task Writer is almost identical to that of the Task Builder.
- Press the Next button.
- To create a program with registered Workcell Items, such as grippers, a Workcell Item must be added.
- In this sample, press the Next button without selecting any Workcell Items and skills.
- Enter a task name.
- Press the Confirm button.
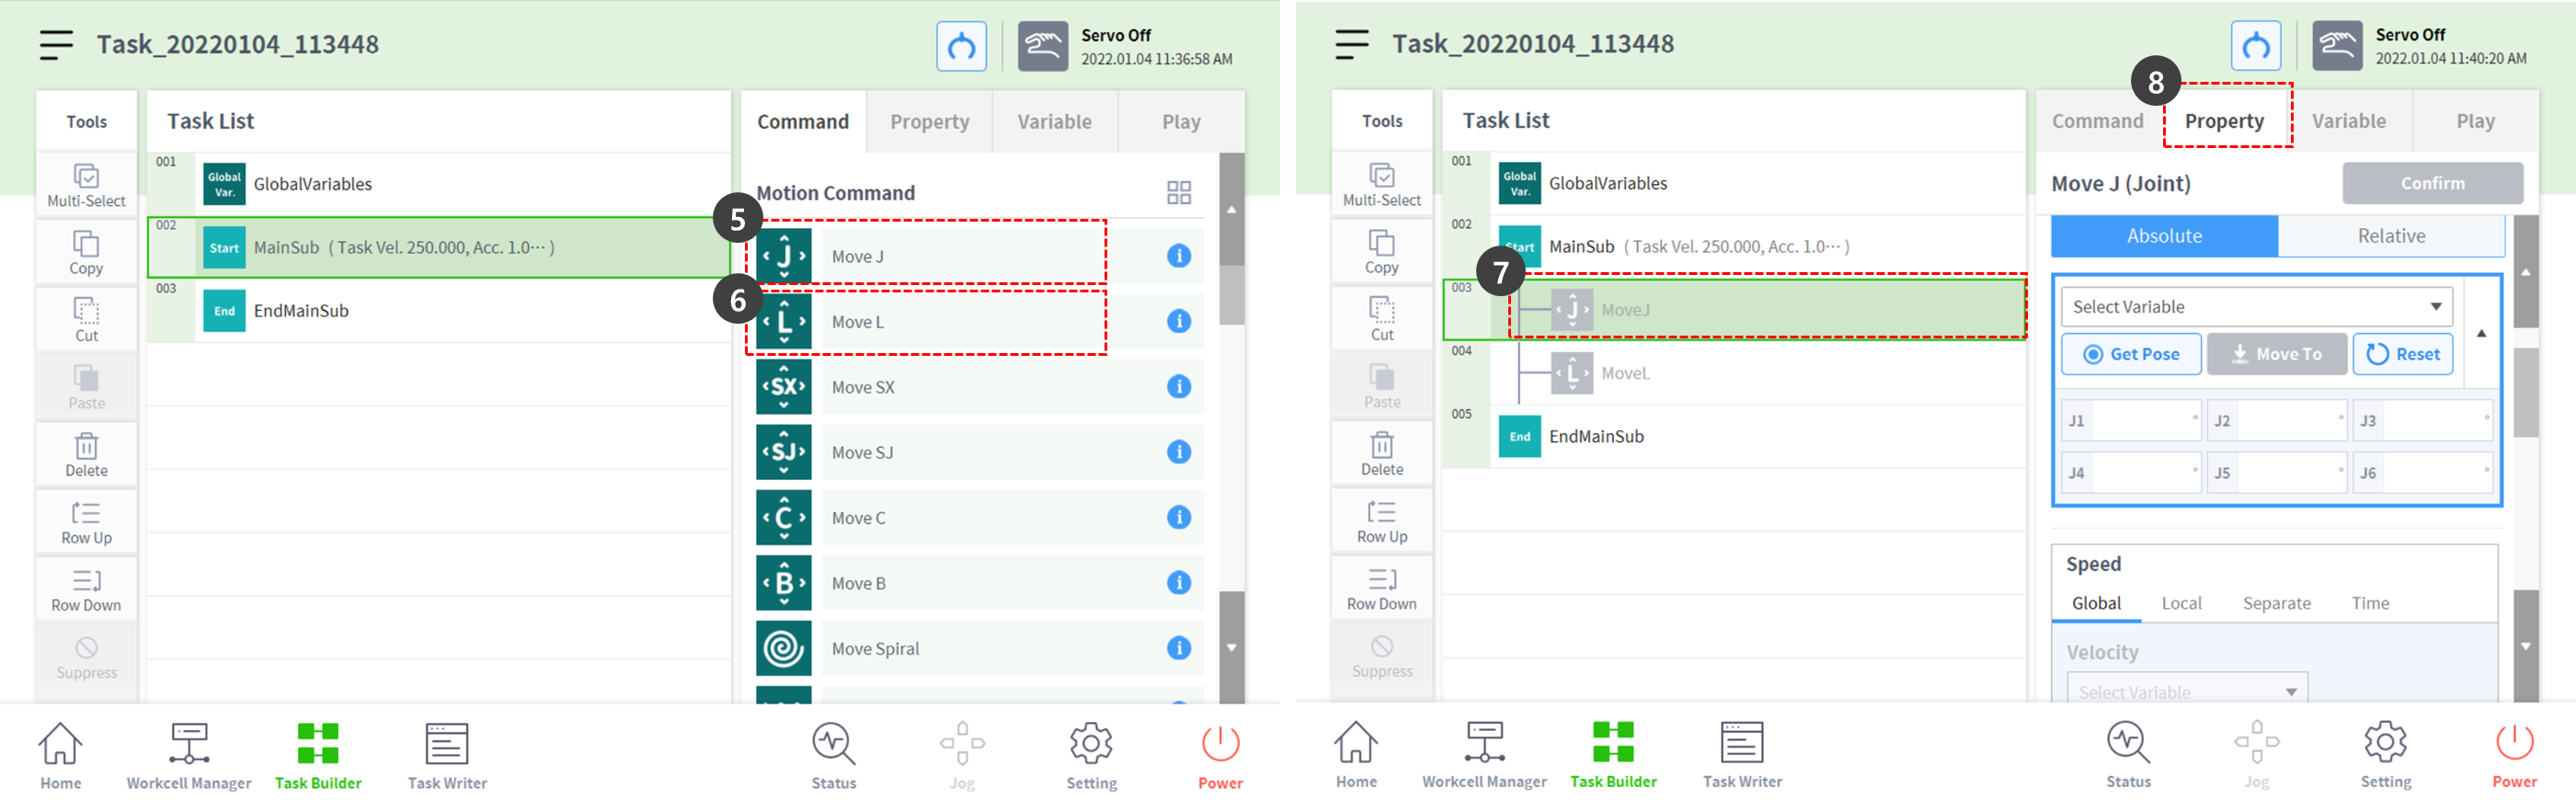
- With MainSub on the second line selected, press MoveJ to add MoveJ command to the task list.
- Command is added to the following line of the selected one.
- Press MoveL to add MoveL command to the task list.
- Select MoveJ on the third line of the task list.
- Select the Property tab at the top right. Property values of the command can be set in the Property tab.
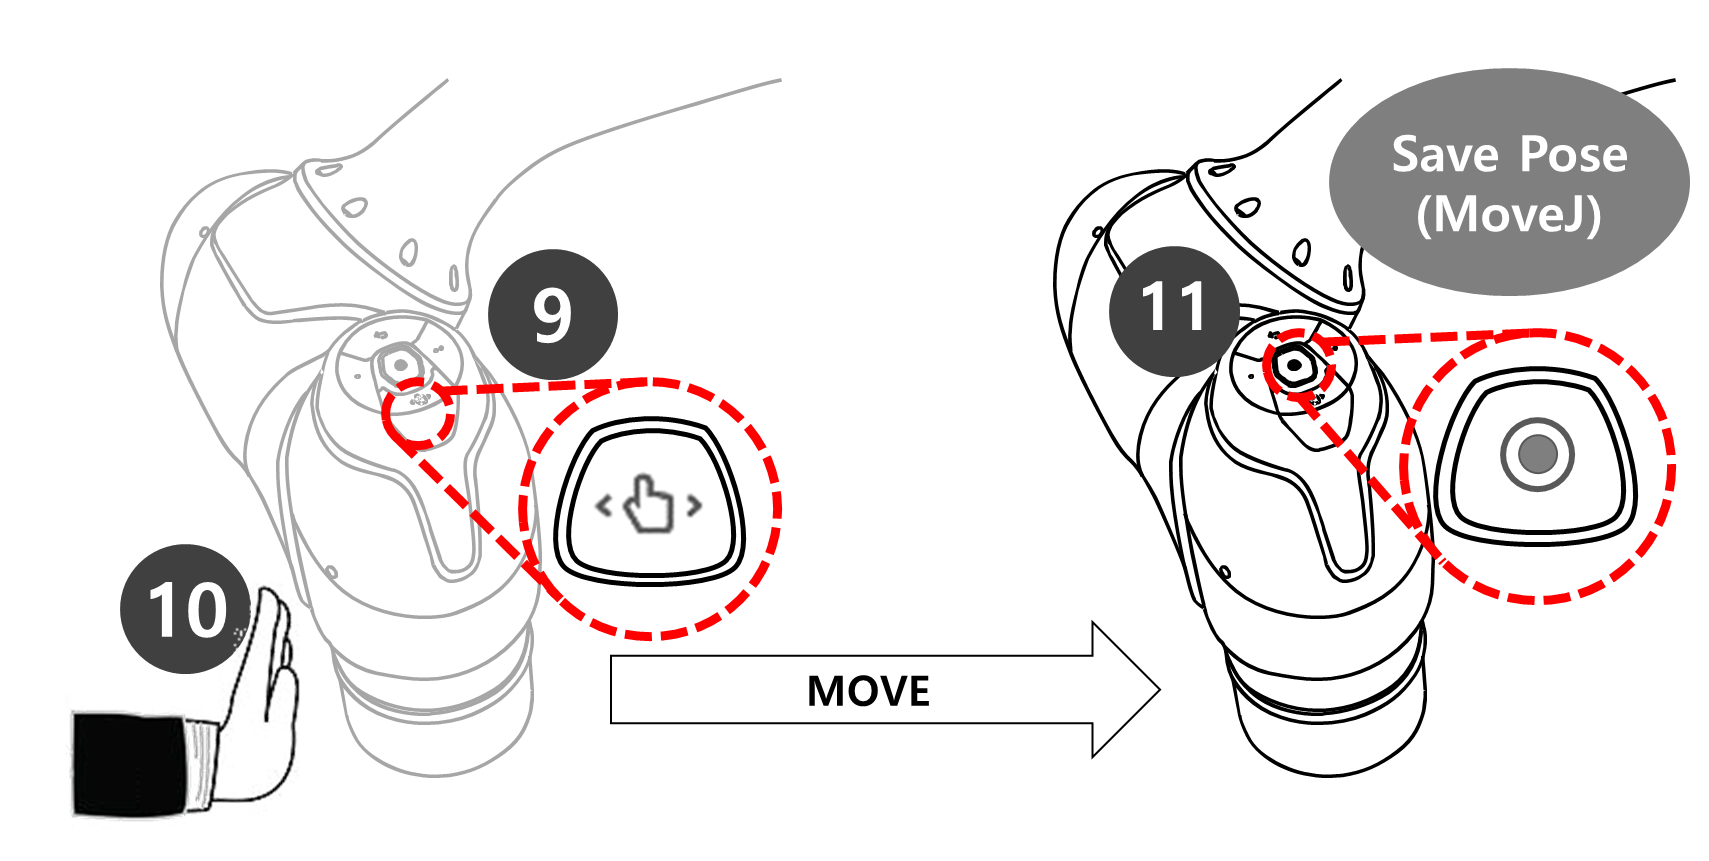
- Use one hand to press and hold the hand guiding button, which has a hand shape, located on the cockpit at the top of the robot end. Step 9 to 11 saves the pose of MoveJ.
- In case of robots which cannot use a cockpit, check the “Note” below.
- Use the other hand to push the robot to a safe location.
- Release the hand guiding button and press the save pose button.
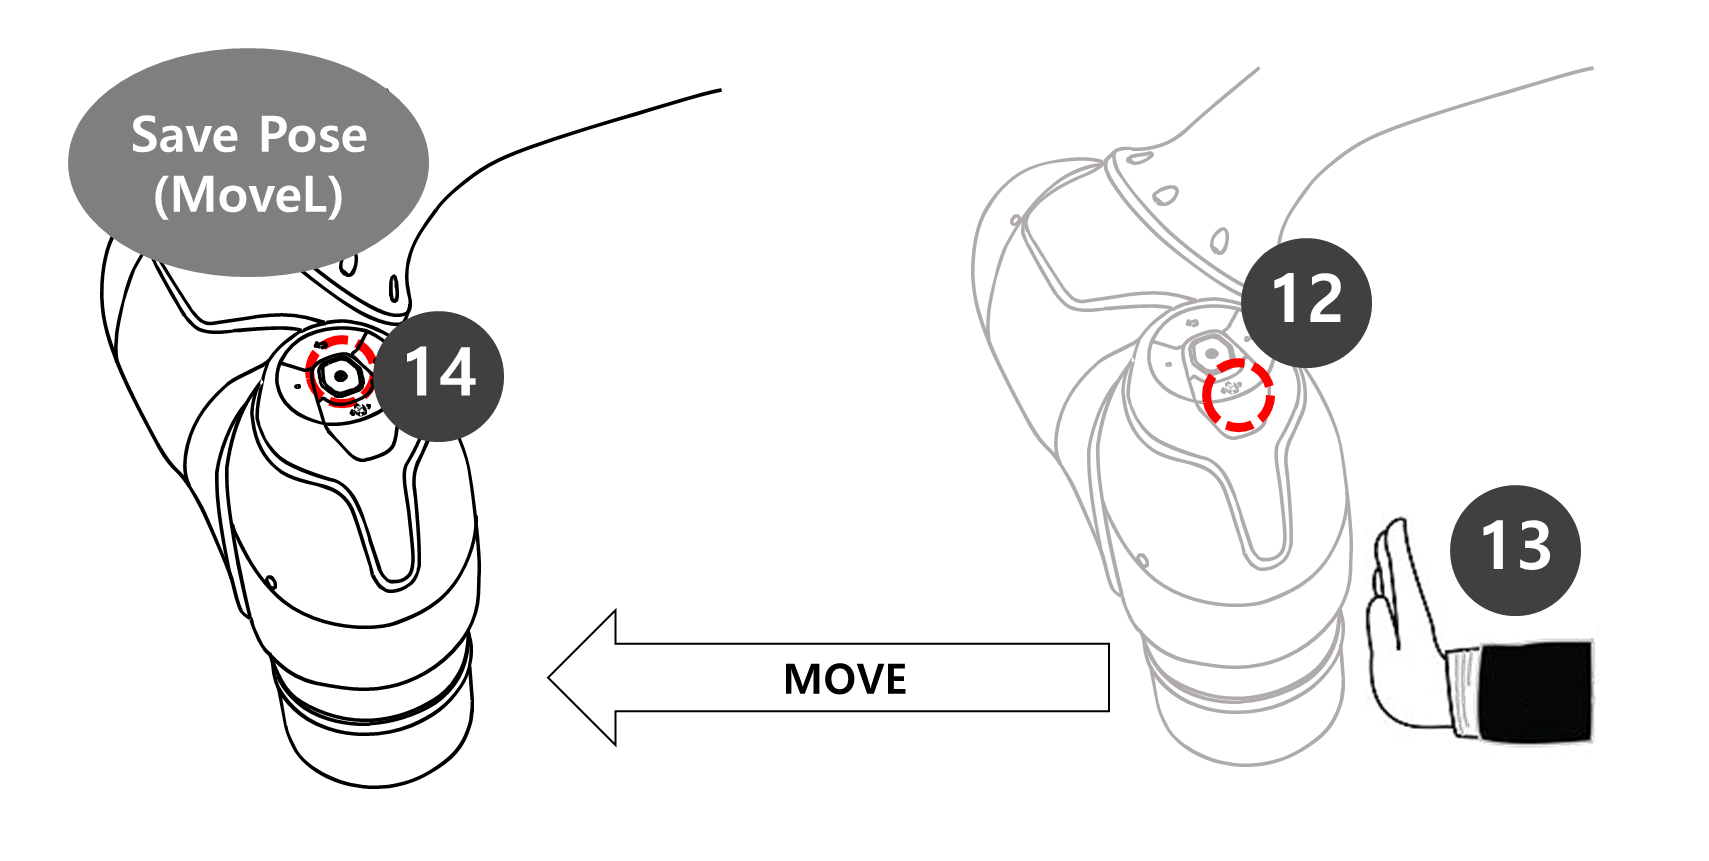
- Use one hand to press and hold the hand guiding button, which has a hand shape, located on the cockpit at the top of the robot end. Step 12 to 14 saves the pose of MoveL.
- There is no need to select MoveL of the task list. If the save pose button is pressed, the task list automatically moves to the task line.
- Use the other hand to push the robot to a safe location.
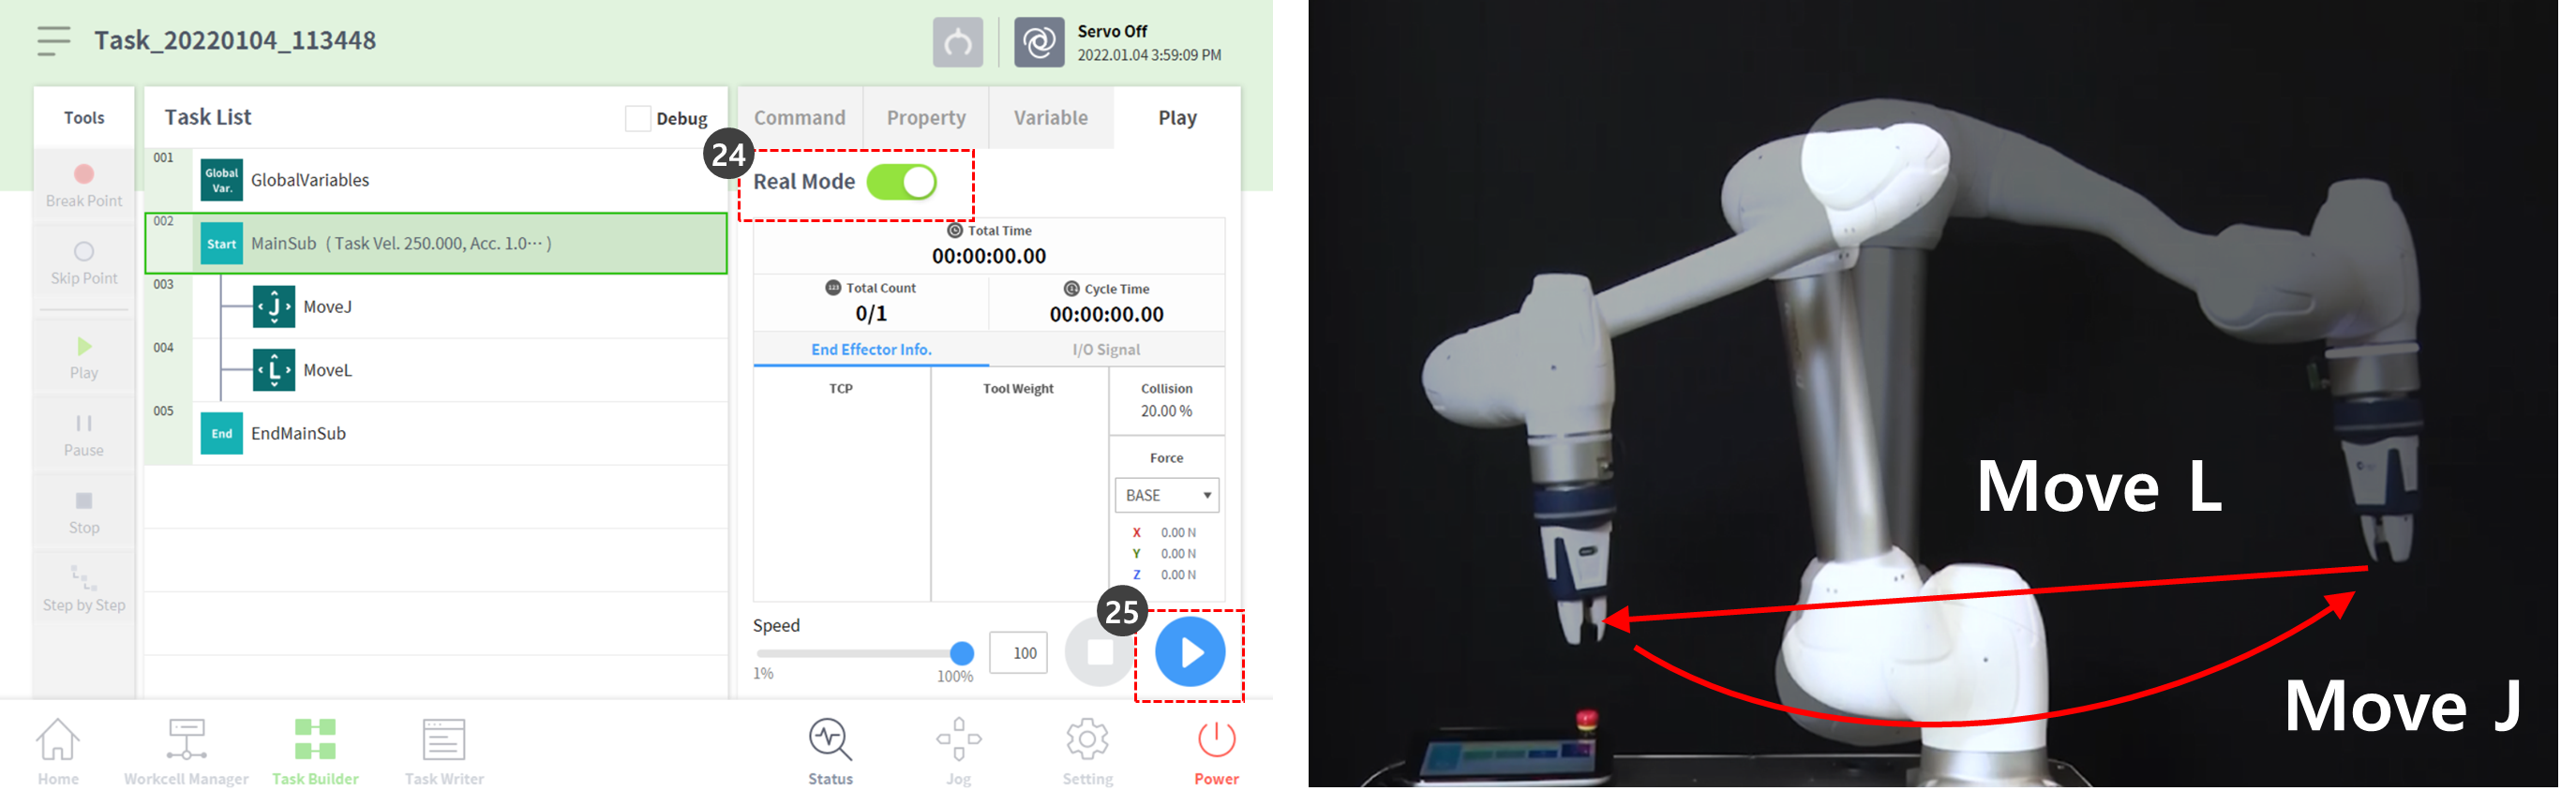
- Release the hand guiding button and press the save pose button.
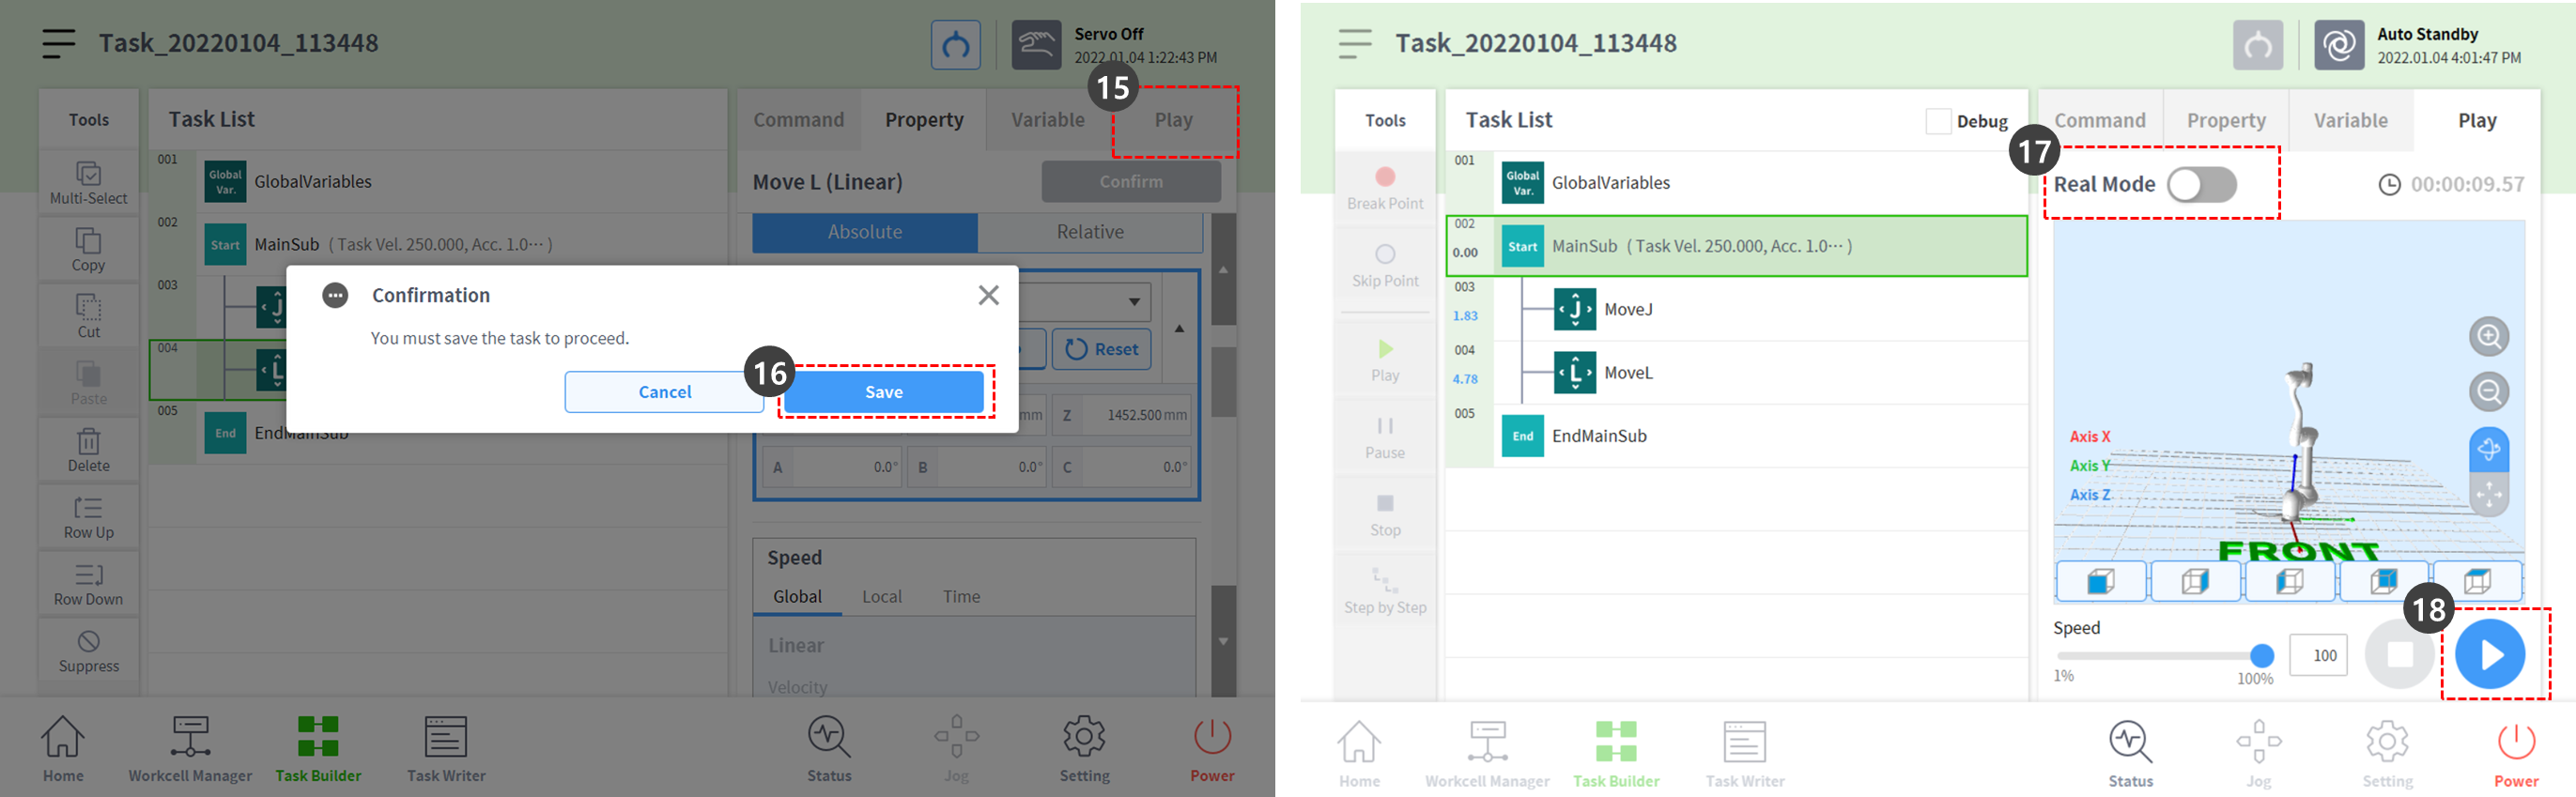
- Press the Play tab to perform the task.
- As the task is not saved, a popup window asking to save the task is displayed. Press Save.
- Set the real mode toggle button to disabled status (grey).
- If the real mode is disabled, the robot does not move and only the virtual robot in the screen simulator moves.
- Before performing the task, it is recommended to test the task in this simulation mode.
- Press the Play button at the bottom right.
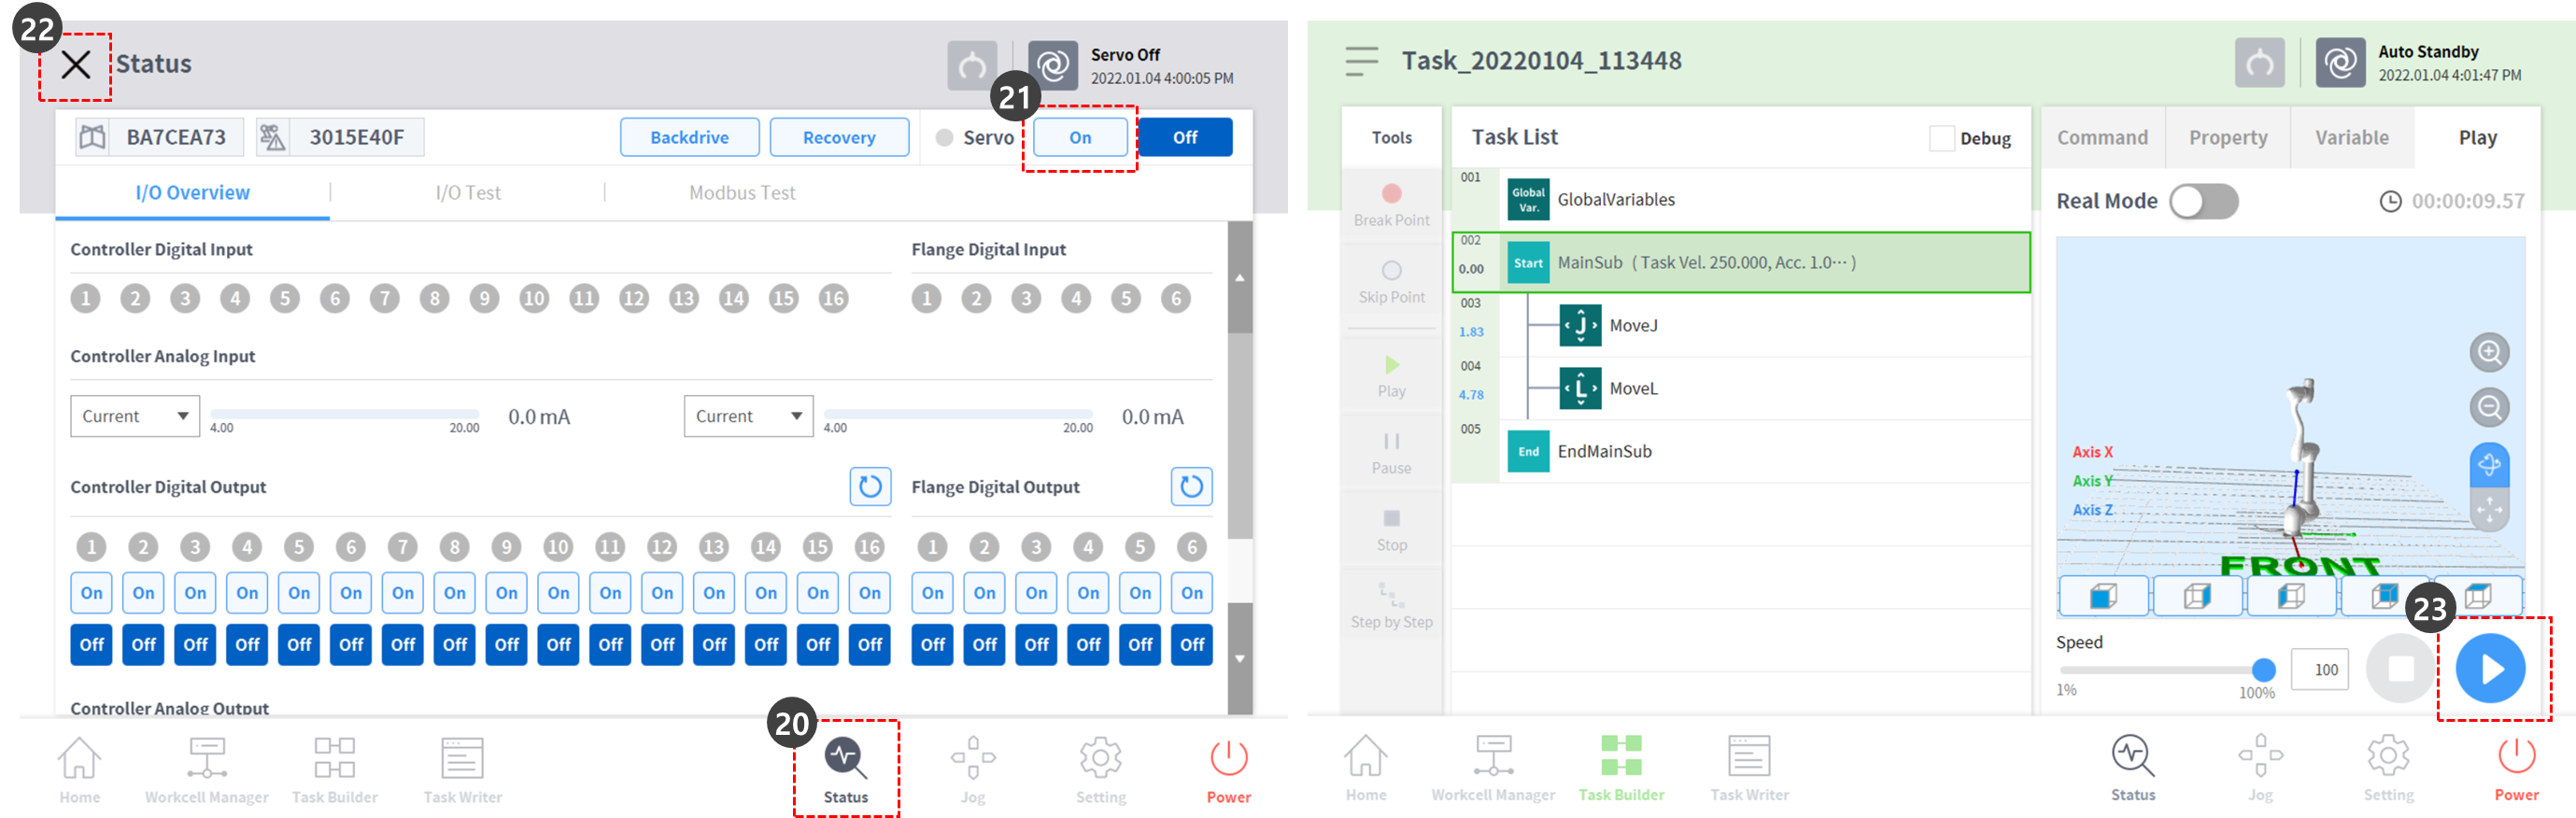
- An error message stating the robot is not ready is displayed. Press the X button to close the popup.

- The robot can only move in Servo On status.
- The Servo On and Servo Off of the robot can be turned on and off through Status > Servo.
- To set the robot in ready status, the robot must be set to servo on. Select the Status on the bar at the bottom.
- Press the Servo On button.
- Press the X at the top left to close the Status window.
- Press the Play button at the bottom right again. The robot will move successfully in the simulator.
- Set the real mode toggle button to enable status (green) to operate the actual robot.
- Press the Play button at the bottom right. The actual robot will successfully move.
Note
The save pose button of the cockpit performs the following function in the same order on the teach pendant screen.
- Press Property > Get Pose button to load the current pose information.
- Press the Confirm button to save changes in the command property.
- Select the next command.

With this, it is possible to quickly program tasks by adding multiple motion commands to the task list at once, moving the robot while pressing the hand guiding button on the cockpit, and pressing the get pose button.