
Setting the Robot Information
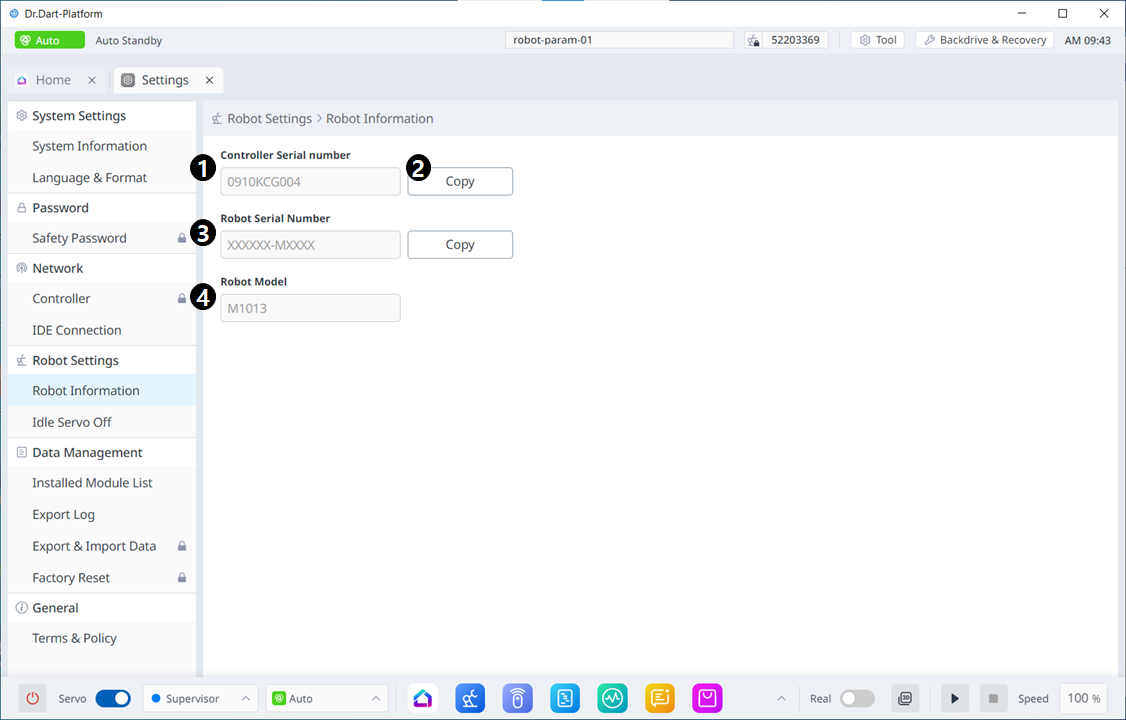
Menu
|
Items |
Description |
|
|---|---|---|
|
1 |
Controller Serial Number |
This is where the serial number of the controller is seen. |
|
2 |
Copy Controller Serial Number |
This button allows you to copy the serial number. |
|
3 |
Robot Serial Number |
This is where the serial number of the robot is seen. |
|
4 |
Robot Model |
This is where the robot model name is seen. |
Robot Idle Servo Off
If the robot is idle for a certain amount of time, the robot is automatically set to the Safety Off state. The default value is 5 minutes, but the time can be changed to a time the user prefers.
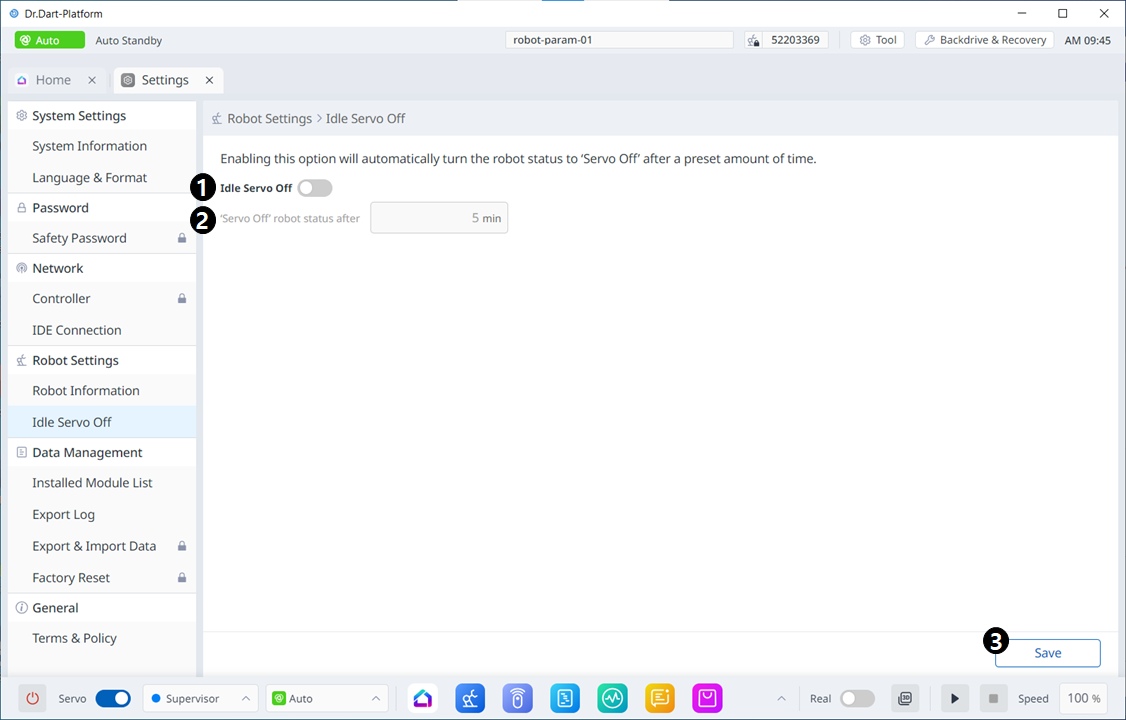
Menu
|
Items |
Description |
|
|---|---|---|
|
1 |
Enable Idle Servo Off |
This button allows you to enable idle servo off. |
|
2 |
Servo Off Setting |
This field is where you set the idle servo off in minutes. |
|
3 |
Save |
This button allows you to save the changed settings. |
Friction Calibration
This menu is only accessible for E and A series robots.
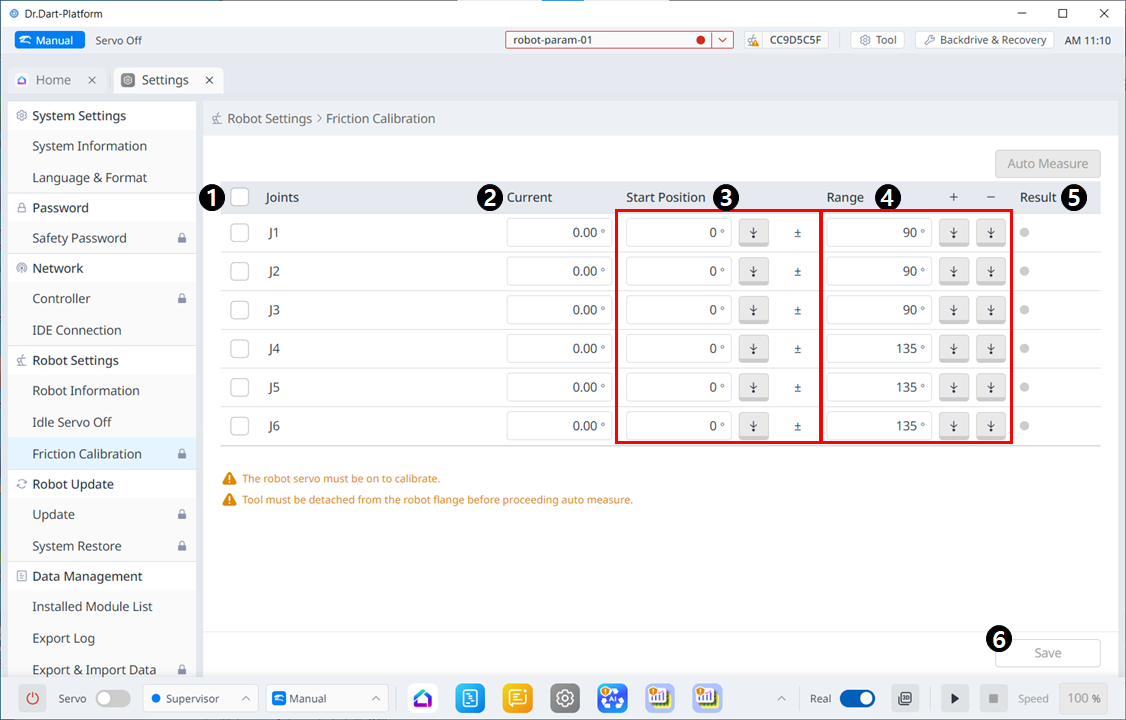
Menu
|
Items |
Description |
|
|---|---|---|
|
1 |
Joint Check Box |
Select the Joint to Auto Measure. |
|
2 |
Current |
Displays the current robot posture. |
|
3 |
Start Position |
Enter the posture at which the joint will start when performing Auto Measure. Unselected axes also require input. |
|
4 |
Range |
Enter the range in which the axis will move. Only checked axes allow input. |
|
5 |
Result |
Displays results for Auto measure. |
|
6 |
Save |
Measured results are applied to subordinates. |
Motion Power Limit
This menu is only accessible for H2017 and P3020 robots.
The robot automatically reduces its motion speed so that it does not exceed the set watt value. This feature is intended to reduce under-voltage errors caused by insufficient power during motions that require high power.
When you select a voltage, the default watt value for that voltage is entered automatically. If this value does not match your actual environment, you can change it within the watt value range.
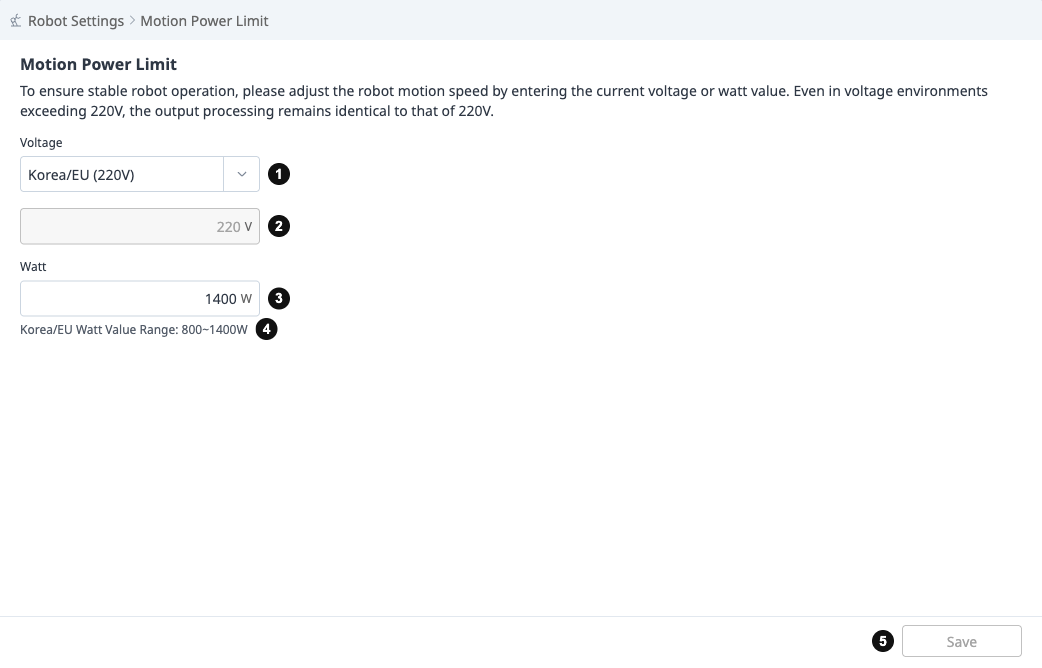
Menu
|
Items |
Description |
|
|---|---|---|
|
1 |
Voltage Selection |
Select the supply voltage of your environment: Korea/EU (220V), USA (120V), Japan (100V), Custom (100V~220V), or DC. |
|
2 |
Voltage |
Displays the selected voltage. You can enter a value only when Custom is selected. A value below 100V is changed to 100V, and a value above 220V is changed to 220V. This field is not displayed when DC is selected. |
|
3 |
Watt |
The maximum power (W) allowed for robot motion. A default value is entered automatically when you select a voltage, and you can change it within the watt value range. A value below or above the range is changed to the minimum or maximum value of the range. |
|
4 |
Watt Value Range |
Displays the range of watt values you can enter for the selected voltage. |
|
5 |
Save |
Saves the changed settings and applies them to the robot. This button is enabled only when there are changes. |
Voltage Options
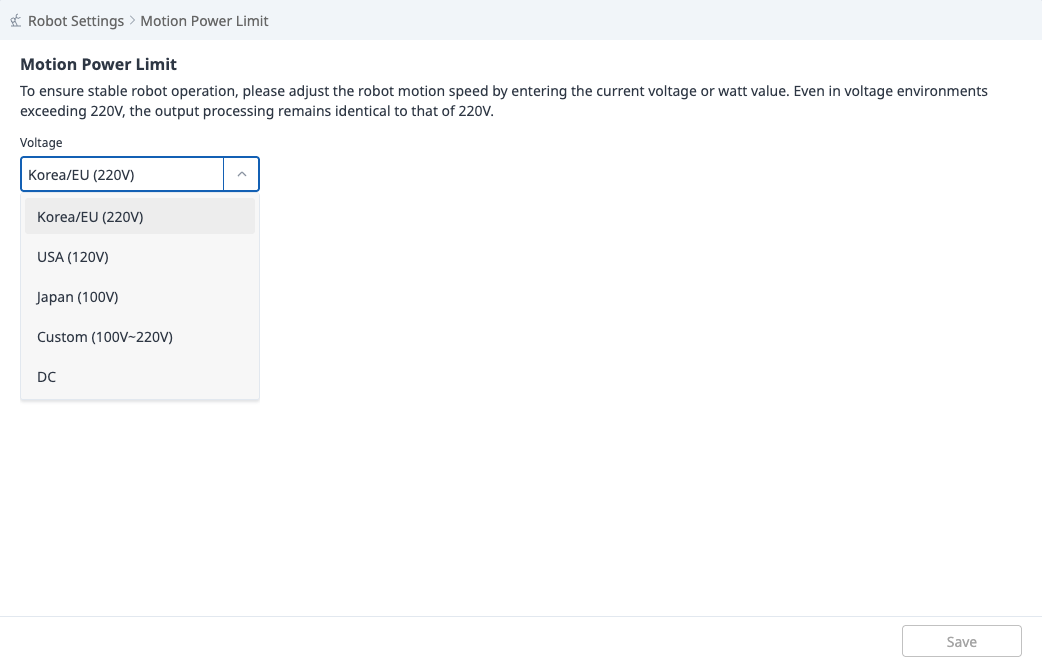
|
Option |
Voltage |
Default Watt |
Watt Value Range |
|---|---|---|---|
|
Korea/EU |
220V |
1400W |
800~1400W |
|
USA |
120V |
1050W |
800~1100W |
|
Japan |
100V |
850W |
800~950W |
|
Custom |
100~220V (user input) |
Calculated from the entered voltage (up to 1400W) |
800W ~ calculated value |
|
DC |
- |
1400W |
800~1400W |
Note
-
Voltages above 220V are handled the same as 220V. In this case, select Korea/EU (220V).
-
When you change the voltage under Custom, the watt value is reset to the maximum for that voltage. To change the watt value manually, enter the voltage first.