
Welding Command Property Settings
No. | Item | Description |
|---|---|---|
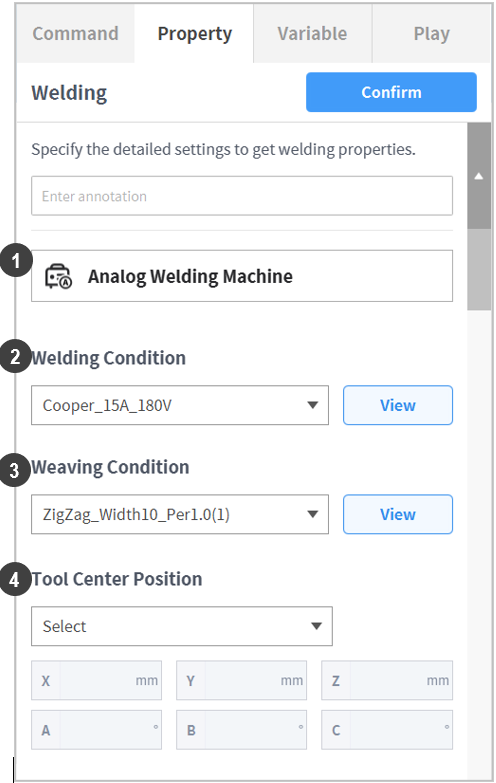
1 | Activated Welding Machine | The type and name of the currently activated welding machine is displayed.
|
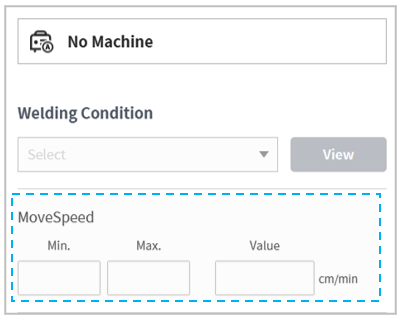
2 | Select Welding Condition | Select a condition from the welding condition list. To perform a task without activating the welding machine, movement speed (MoveSpeed) must be entered.
Press the View button to view/edit the settings of the selected welding condition. |
3 | Select Weaving Condition | Select a condition from the weaving condition list. Press the View button to view/edit the settings of the selected weaving condition. If no weaving condition is required, Not Used can be selected. However, in order to use the path offset function, a weaving condition must be selected. |
4 | Tool Center Point | Select the welding torch installed on the robot. Be aware that a welding path different from the settings may be created if an incorrect torch is selected. |
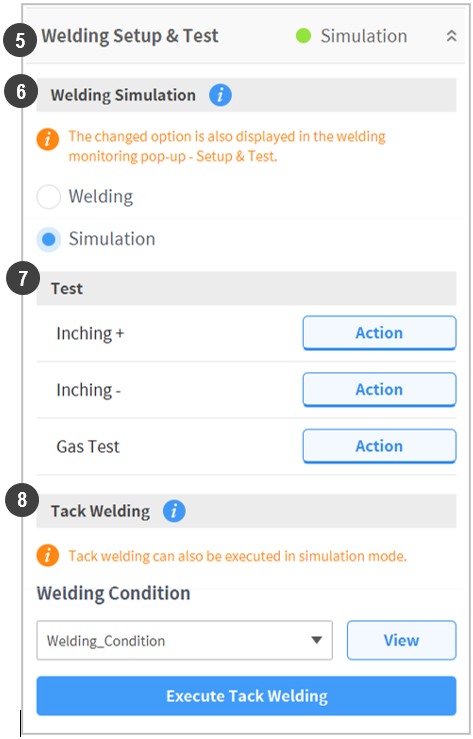
5 | Welding Settings & Test | Settings required for actual welding and their testing can be performed. The welding mode is also displayed. |
6 | Welding Simulation | Welding tasks can be performed (Play) without activating the welding machine. Before actual welding, execute simulation mode to check the path and weaving motion. This prevents unexpected failures during welding as it allows the operator to correct interferences or to adjust offsets on the welding path |
7 | Signal Test (Test) | Wire forward, reverse and gas tests can be performed. |
8 | Tack Welding | Select and perform a tack welding condition. A separate popup window will be displayed, and the button in the cockpit can be used. |
Note
If the operator does not want to use a weaving motion but wants to use an offset, setting P1 and P2 of a trapezoidal profile as (0, 0) and the weaving time/dwell time as both 0 will allow only the offset function to be used.