
Tack Welding
The tack welding function is provided for fixing the substrate to a designated location before the main welding. Welding conditions for tack welding must be created, and it is possible to perform tack welding by moving the robot quickly using direct teaching. Tack welding is available through the following two methods.
- TB/TW – Select Welding Command → Property Tab → Check Tack Welding Item
No.
Item
Description
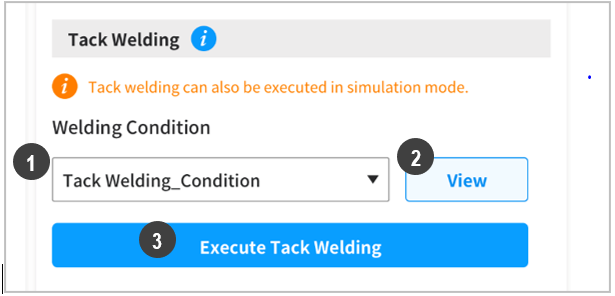
1
Select Welding Condition
Select a preset welding condition to use for tack welding, or save as a different name to use it later.
2
Confirm Welding Condition
Confirm the selected welding condition setting. This will display a popup.
3
Perform Tack Welding
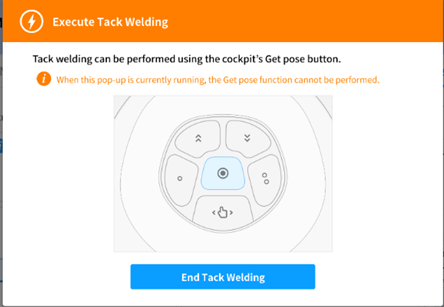
Popup Screen
A separate popup window is displayed, and tack welding is performed by moving the robot using direct teaching and the Get Pose button of the cockpit.
To end tack welding, press the End Tack Welding button.
Caution
- Tack welding can only be performed with the popup window displayed.
- Tack welding cannot be performed if the optional cockpit is not installed.
Welding Control Popup → Setup & Test Tab → Check Tack Welding Item

Caution
Once the Perform Tack Welding popup is displayed and the robot is moved using direct teaching, make sure to not confuse the Get Pose button or the cockpit button for tack welding. Movement using direct teaching is not available during tack welding.
Note
Setting the Point Lock (Orientation) and Angle Lock (Position) functions during direct teaching with the cockpit will make tack welding teaching easier.