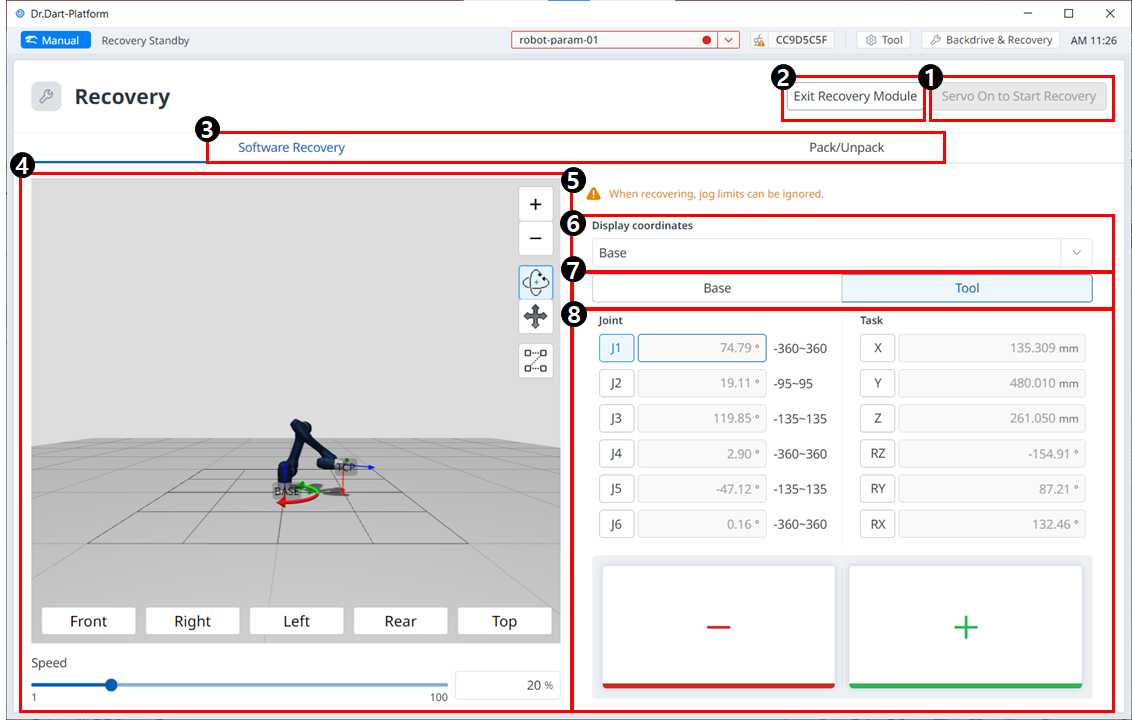
This is a button to enable the servo before entering Recovery mode.
2
Exit Recovery
This button allows you to exit the Recovery module.
3
Header
This section allows you to select either Software Recovery mode or pack/unpack mode.
4
3D Simulation
This area allows you to preview a 3D simulation of the set values.
5
Warning Message
This explains the precautions.
6
Display Coordinates
This is where you can set the coordinate based on Base or World.
7
Base/Tool Button
This is where you can set the value based on Base or Tool.
8
Joint/Task
This section allows you to enter the desired values to make the robot move.
To use the software recovery mode, follow these steps:
TaptheRecoverymenu in the Main Menu window.TheSoftware Recovery screen appears automatically in the Recovery window.
Tap each joint button on the right side of the Software Recovery screen, and use, buttons to set the position.Or press buttons of the cockpit to adjust the joint angle by direct teaching.
For definitions of the buttons in the cockpit, see Cockpit
Changes made to the setting are reflected on the simulation window on the left in real time.
When the setting is complete, tap theX button on the top left to close the window.
Caution
Software repair mode is not available when the joint angle limit is exceeded by 3 degrees.
JavaScript errors detected
Please note, these errors can depend on your browser setup.
If this problem persists, please contact our support.