Tool Shape
MANDATORY EASY 5 MIN
The shape of the tool installed on the flange can be set by adding a tool shape Workcell Item.
The Tool Shape can be set in Robot Parameters module > Tool Settings > Tool Shape. For more information, see Tool Shape setting.
- The robot determines space limit violation status based on the TCP (Tool Center Point) of the robot end and the robot body. If the actual robot has a tool shape larger than the set TCP, a tool shape Workcell Item must be added to protect the workpiece and tool.
- Take caution as the zone the robot can maneuver will decrease if the tool shape is set too large.
The tool shape item is only available after it is registered (Confirmed) and the toggle switch is enabled. The activated tool shape Item can be set as the standard tool shape by pressing the set tool icon (
- Set of the tool setting is the same as set of Other Commands. Set command can be used when changing the Tool Shape while a task is being performed. For more information, refer to Task Editor Module .
Note
- Up to fifty different tool shapes can be registered.
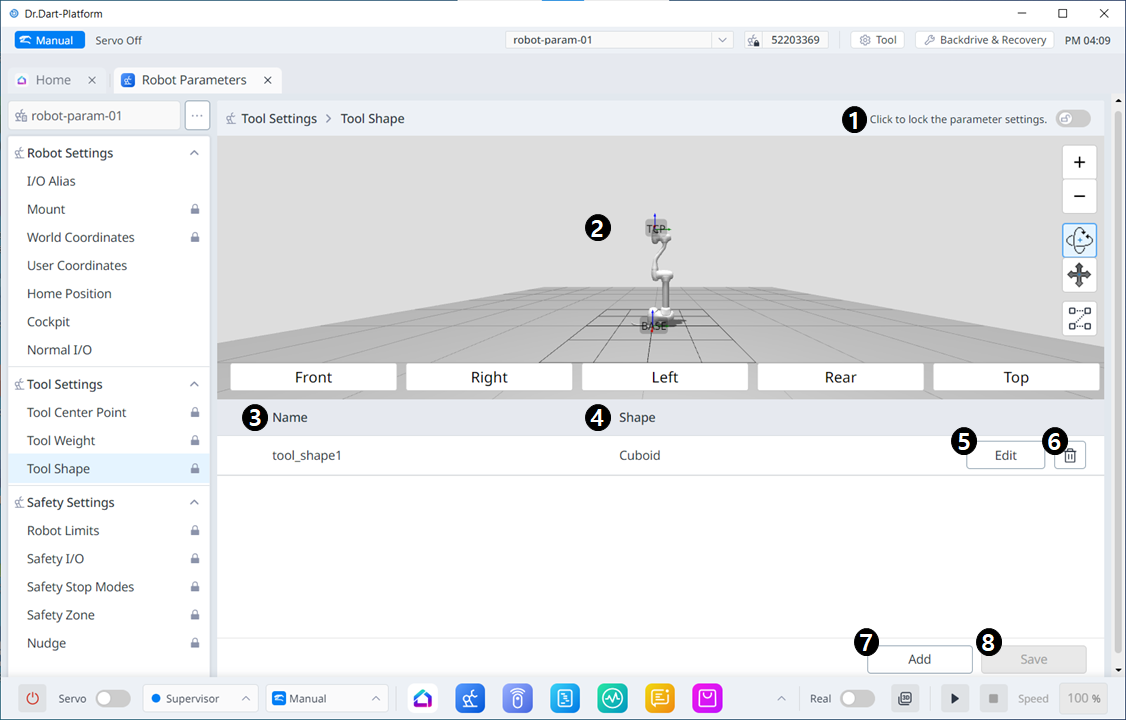
Menu Items
| Item | Description | |
|---|---|---|
| 1 | Lock Toggle Button | Used to lock the set value. The safety password is required for modification. |
| 2 | 3D Simulation | This is where you can 3D Simulate the result of the configured Tool Shape. |
| 3 | Whether to enable Tool Shape | This button allows you to select whether to enable each Tool Shape. |
| 4 | Tool Shape Name | The name of the configured Tool. |
| 5 | Tool Shape Form | The shape of the configured Tool. |
| 6 | Editing Tool Shape | This button allows you to edit the configured Tool Shape. |
| 7 | Deleting Tool Shape | This button allows you to delete the selected Tool Shape. |
| 8 | Adding Tool Shape | A tool shape can be added. |
| 9 | Applying | This button allows you to apply the Tool Shape after setting it. |
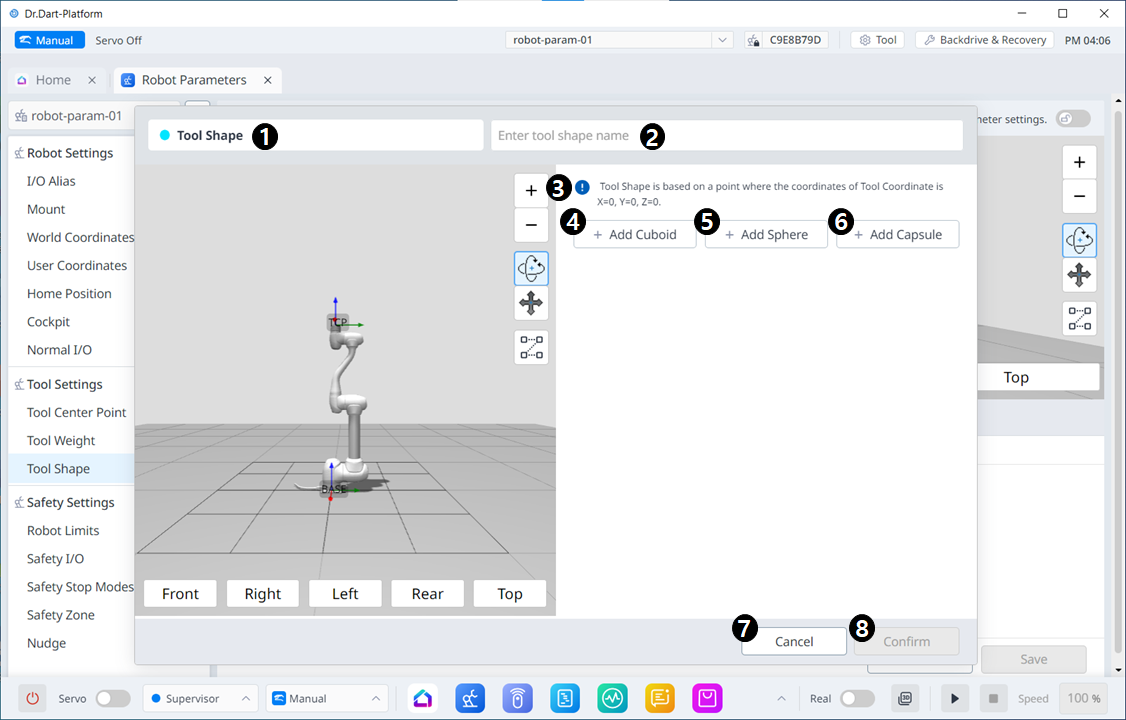
Menu Items
| Item | Description | |
|---|---|---|
| 1 | Tool Shape | This indicates that this pane is a Tool Shape pop-up. |
| 2 | Entering a Name | This is a field where the name of the Tool Shape can be entered. |
| 3 | Cautionary Message | A note of caution when setting up |
| 4 | Add New Cuboid | This button allows you to add a cuboid. |
| 5 | Add New Sphere | This button allows you to add a sphere. |
| 6 | Add New Capsule | This button allows you to add a capsule. |
| 7 | Cancel | This button allows you to cancel the setting. |
| 8 | Confirm | This button allows you to confirm the setting. |
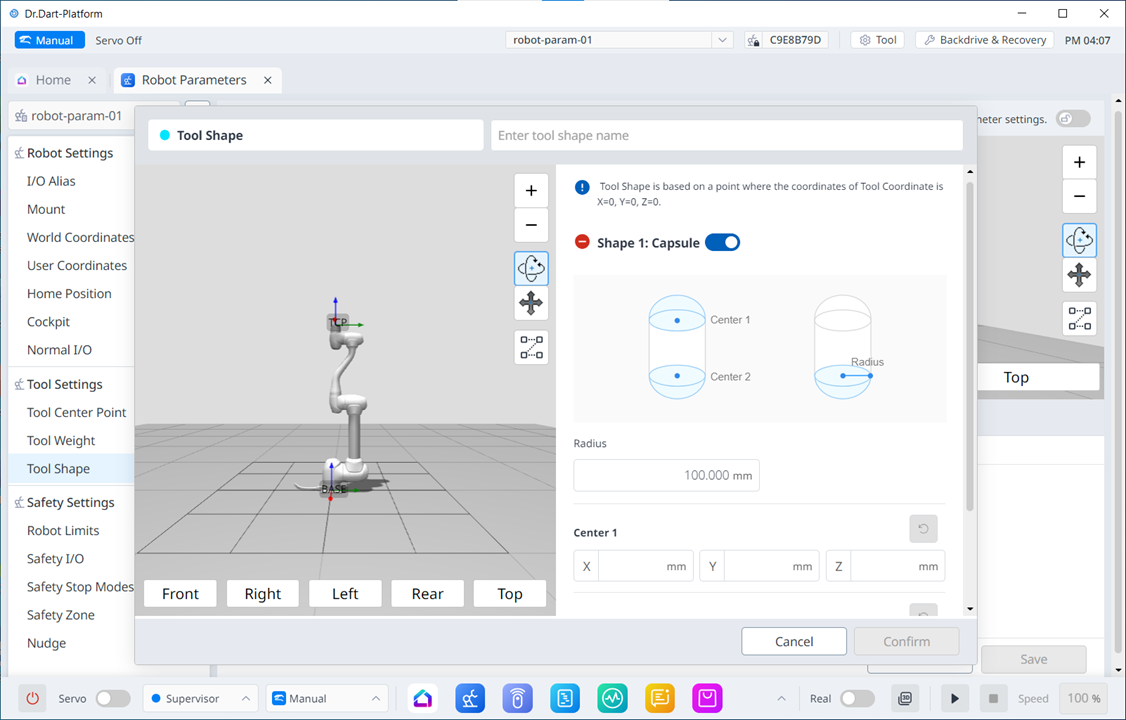
Once the cube/sphere/capsule is added, the display is seen as below.