Skill - Try Pick & Place samples
OPTIONAL NORMAL 20 MIN
This sample is created in the Task Builder. The Task Writer does not support the skill function.
Caution
- Before trying the sample, make sure to read and follow Precautions for Use. For more information, refer to PART 1. Safety Manual.
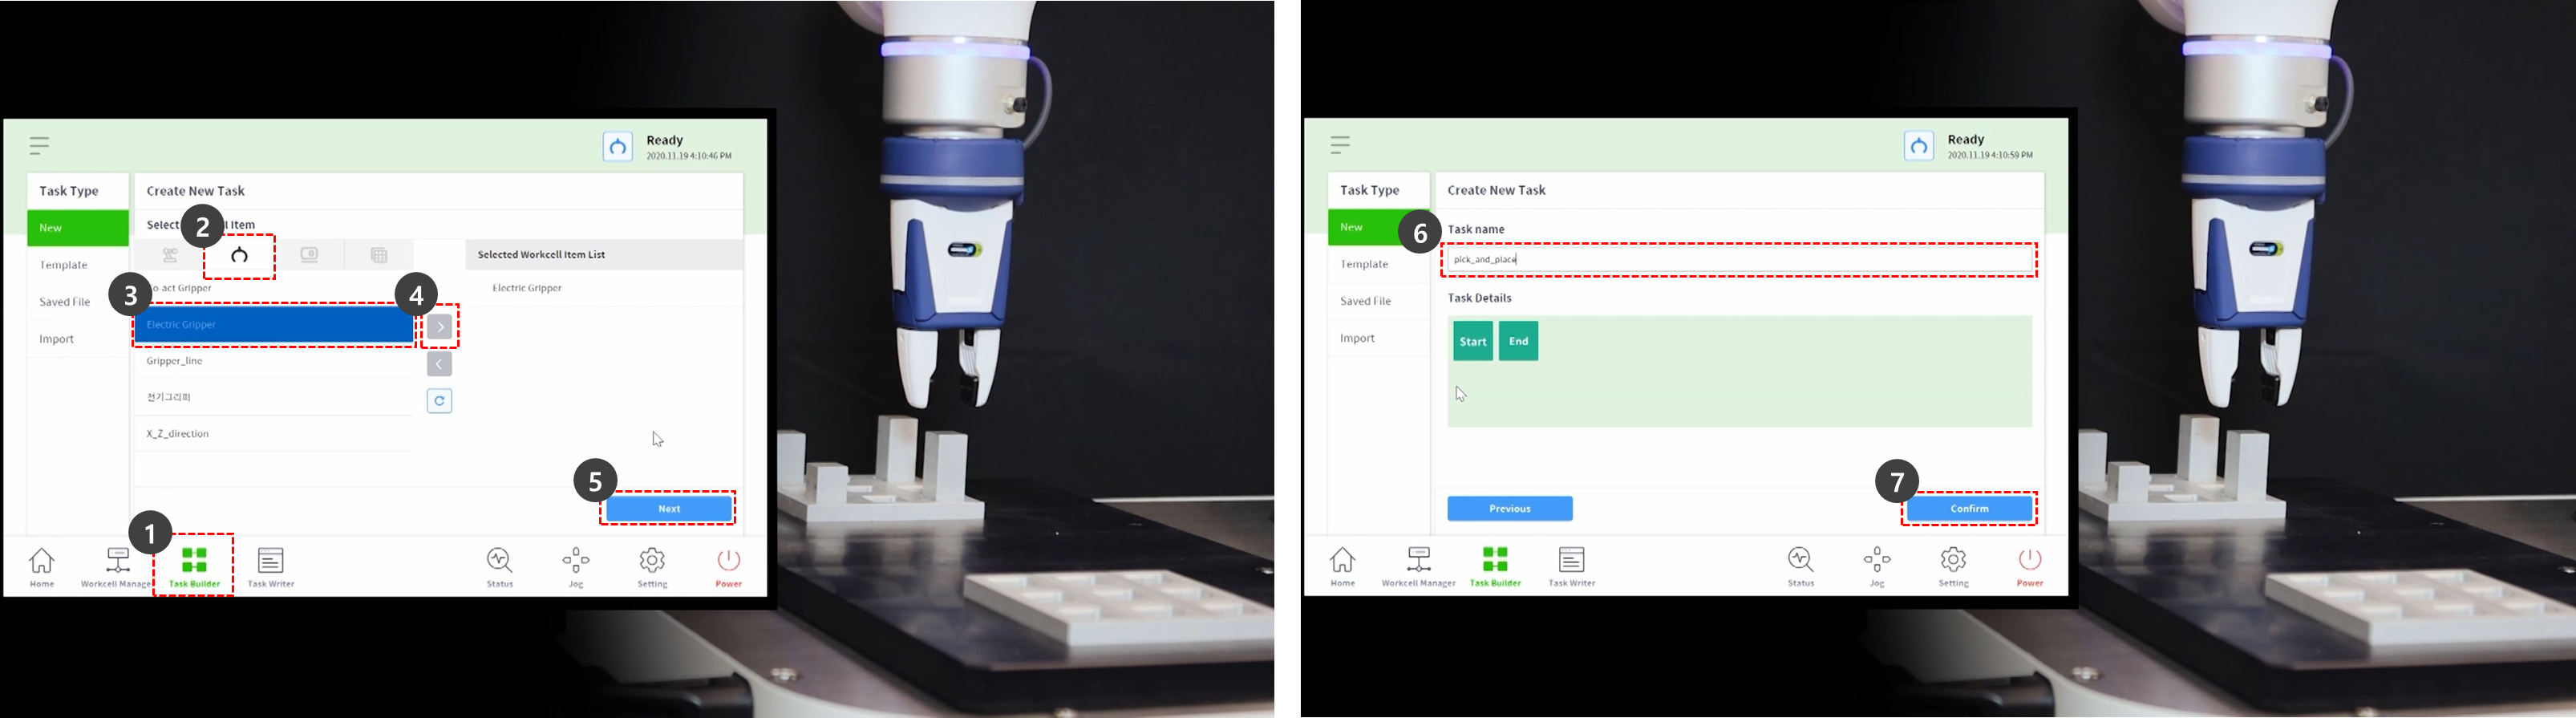
- Select the Task Builder from the bottom menu.
- Select the Select Workcell Item > Gripper icon.
- Select the gripper registered as a Workcell Item. This sample cannot be tried if there is no gripper registered as a Workcell Item.
- Press the > button to register the Workcell Item as the selected Workcell Item.
- Press the Next button.
- Enter the task name.
- Press Confirm.
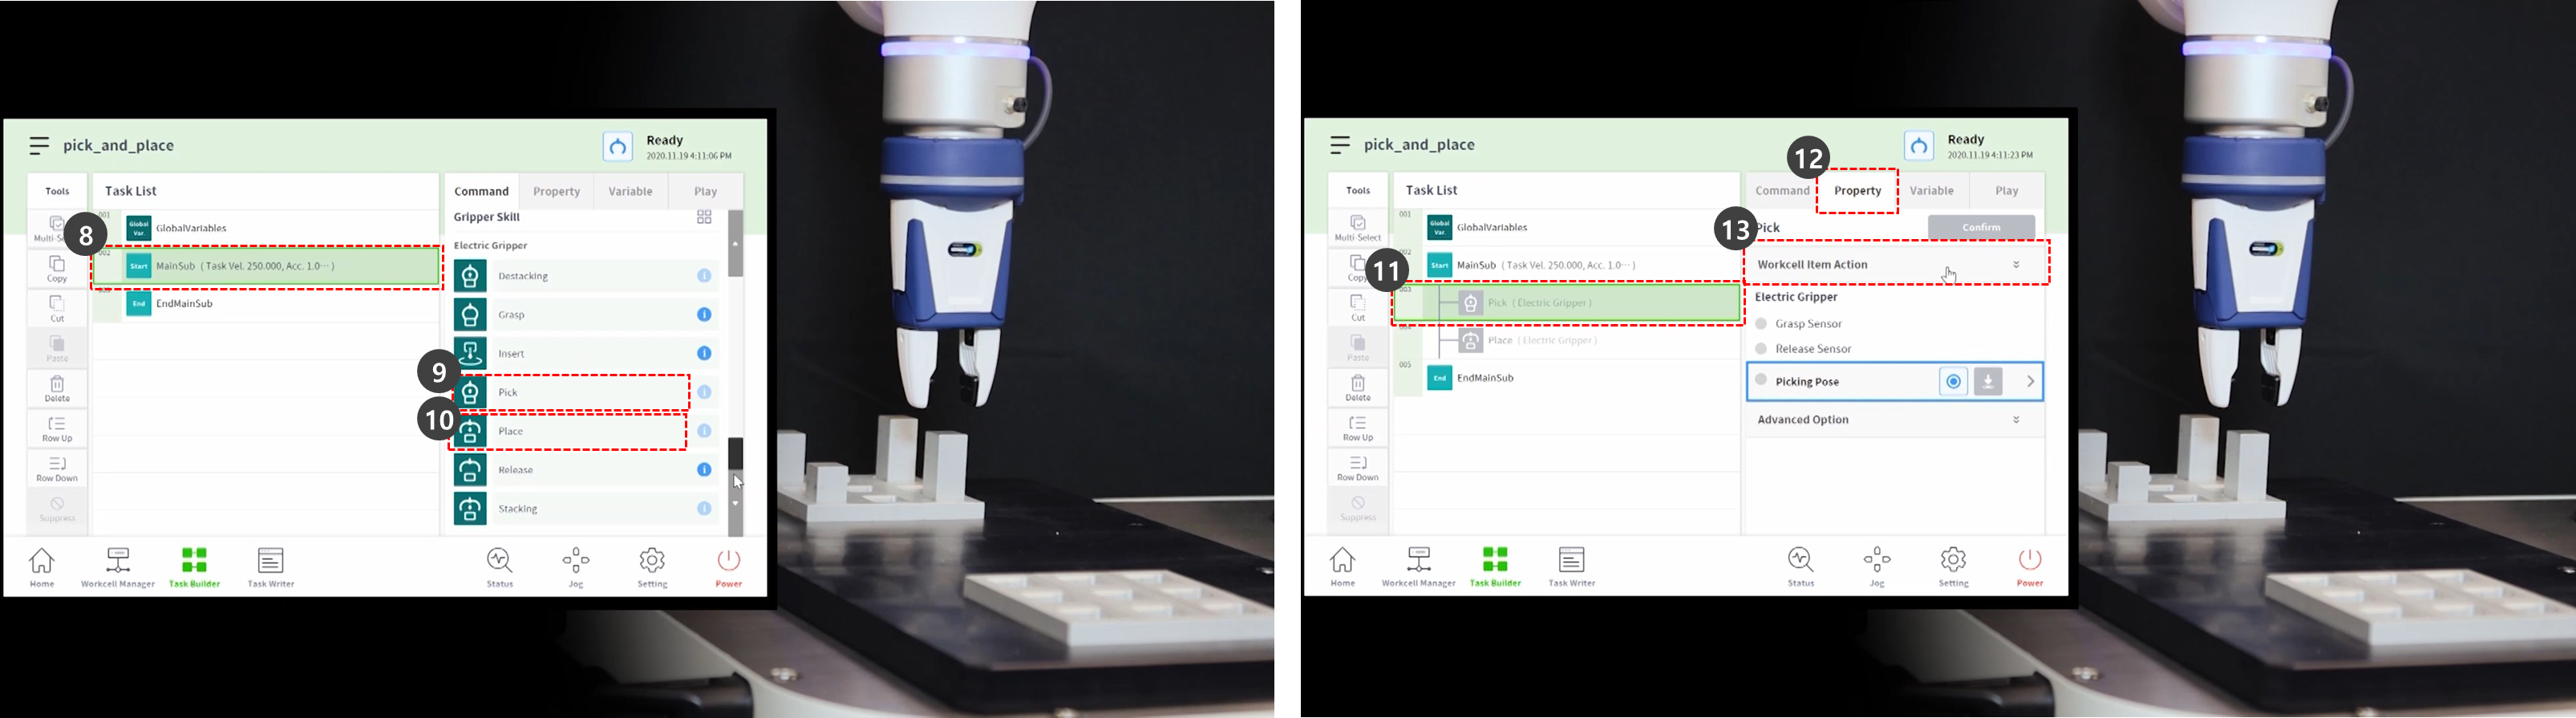
- Select the MainSub command from the second line of the task list. A new command is added to the next line of the selected line.
- Add the Pick skill command.
- Add the Place skill command.
- Select the Pick command from the third line of the task list.
- Select the Property tab.
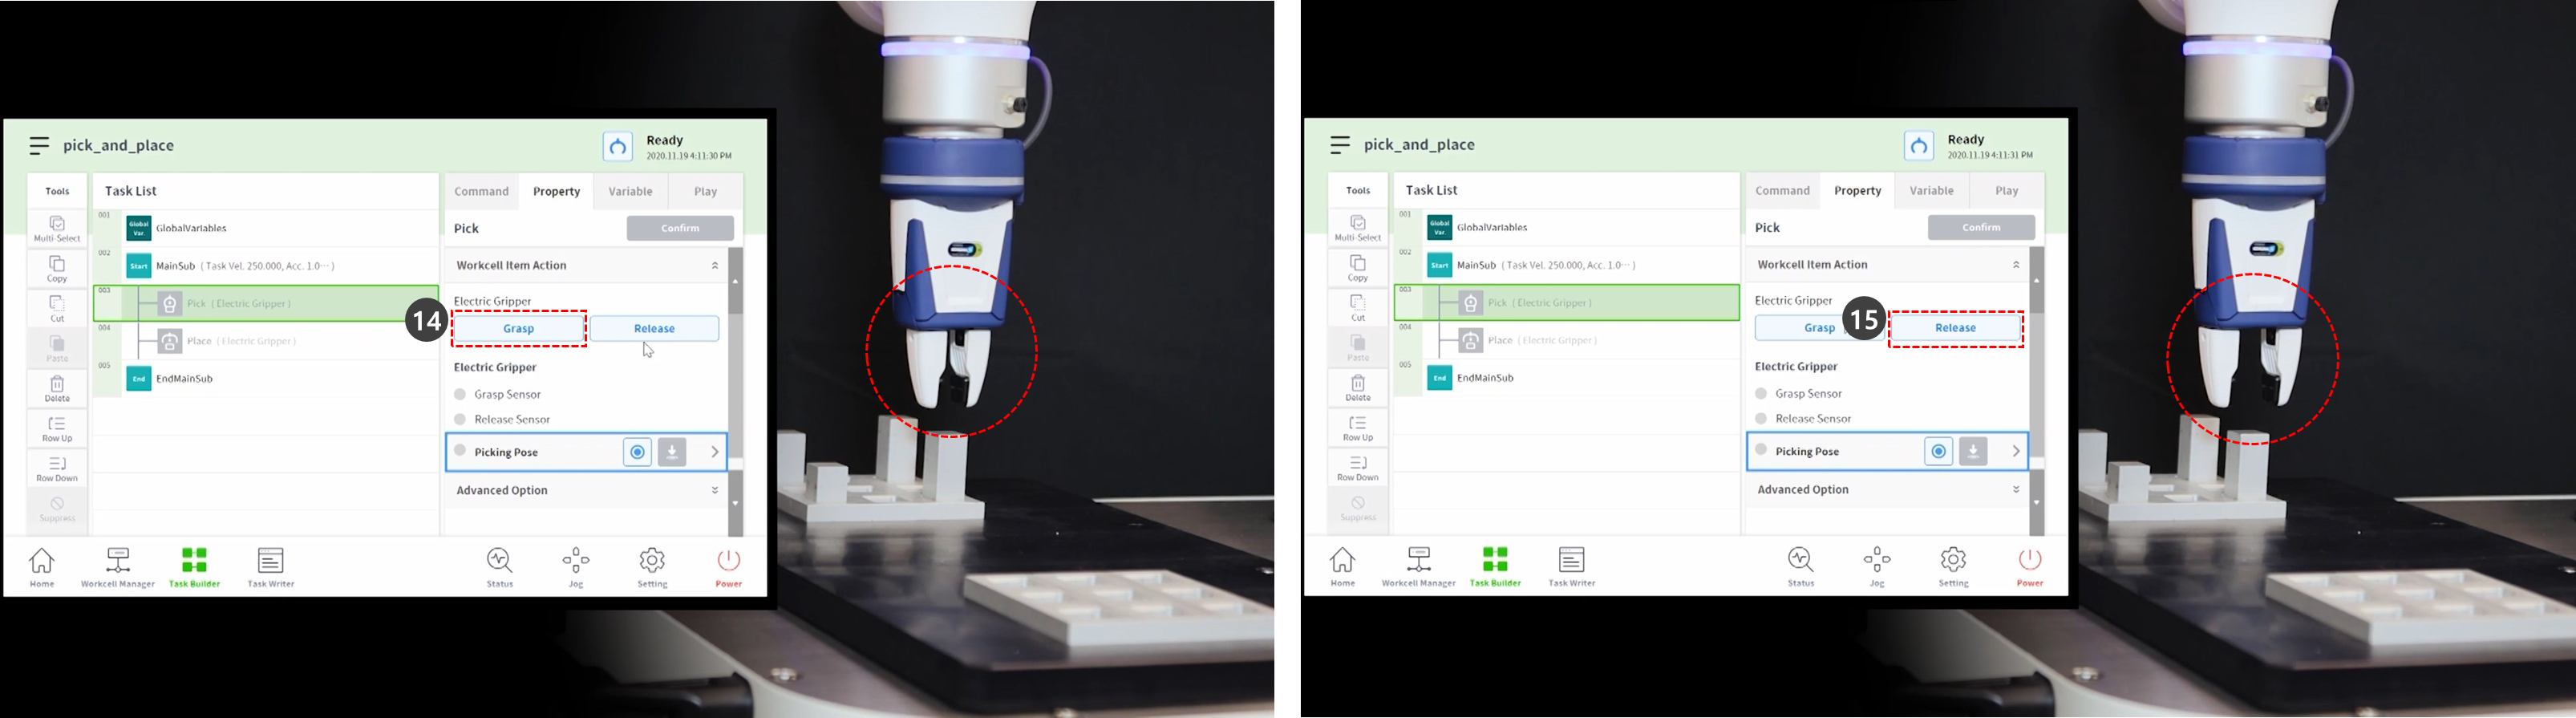
- Press the Workcell Item Action to expand the menu. If the gripper Workcell Item is selected, gripper action can be tested during Workcell Item action.
- To test the gripper, press the Grasp button and perform grasp motion.
- To test the gripper, press the Release button and perform release motion.
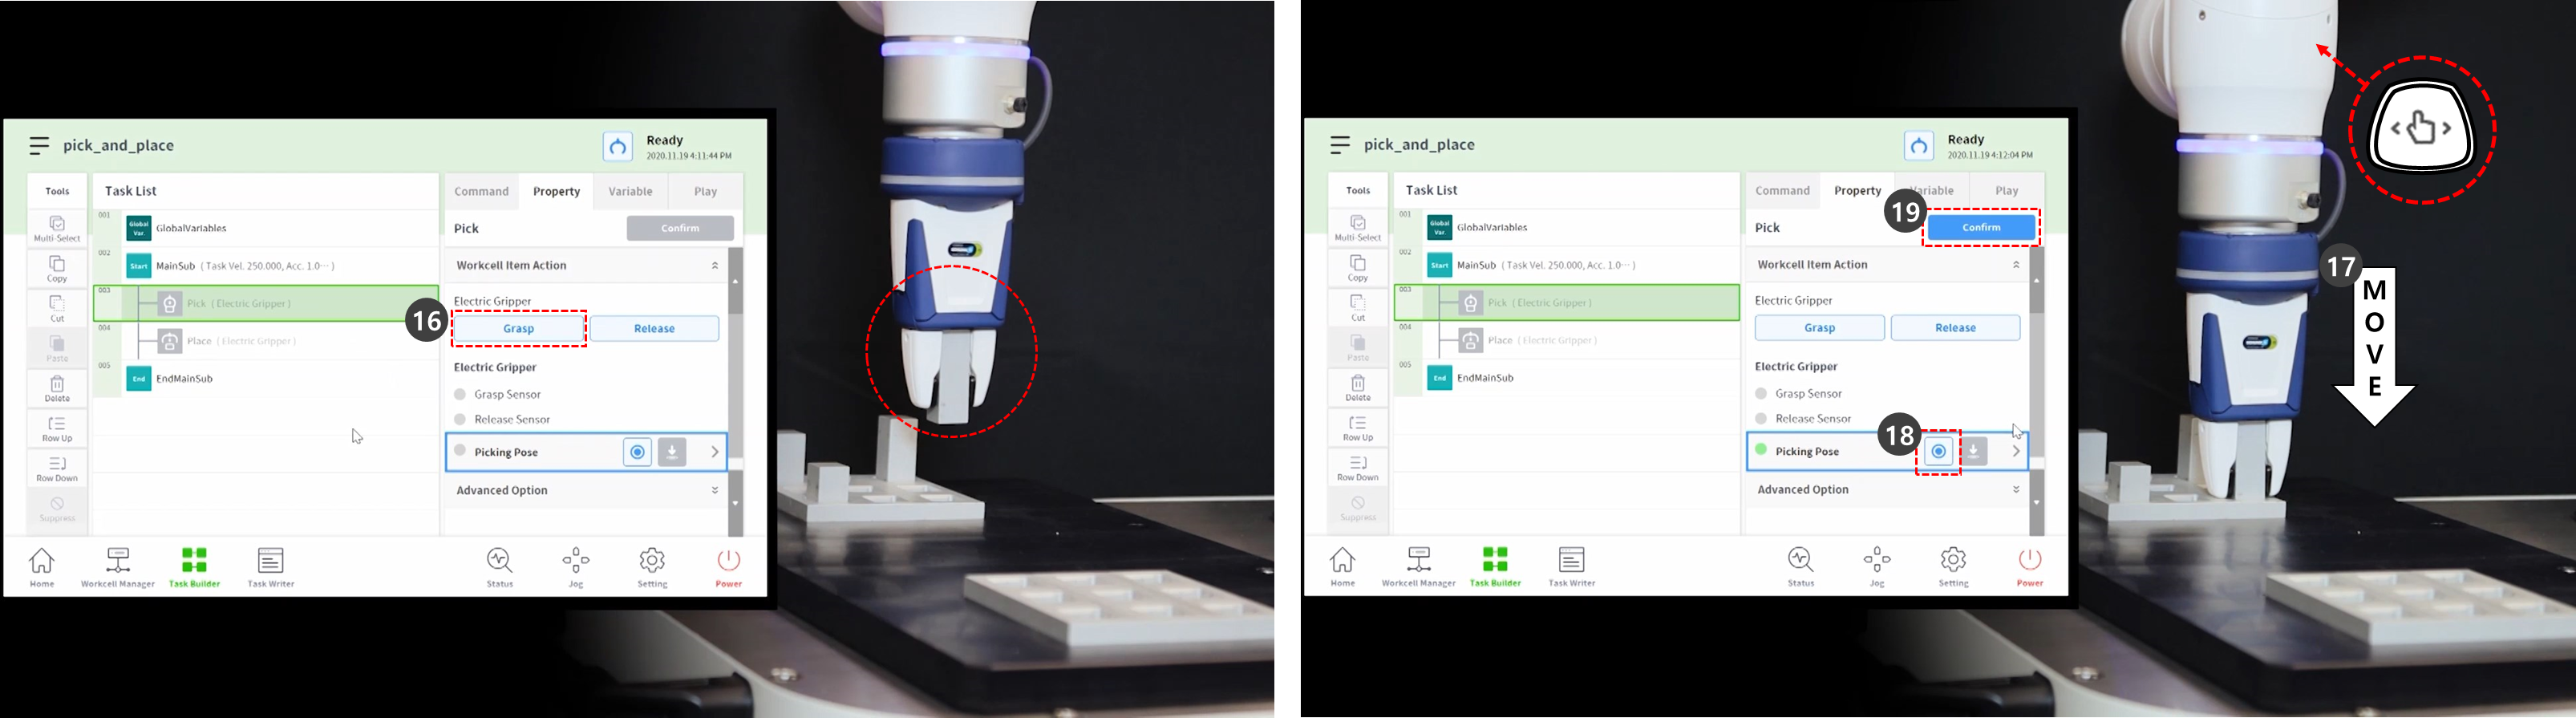
- In case of light workpieces, place the workpiece in the gripper and press the Grasp button to make the robot hold the workpiece. Performing teaching while the gripper is holding a workpiece can help establish an accurate position.
- However, having the robot hold a workpiece during teaching is not mandatory but an example.
- In the case of heavy workpieces, dangerous situations can occur as the gripper can lose the workpiece.
- In the case of heavy workpieces, the Tool Weight of the Tool Settings must include the tool weight and the workpiece weight.
- Use direct teaching to move the robot to the point where Pick will be performed.
- Press and hold the hand guiding button in the cockpit to move the robot.
- Press the Get Pose button of the Picking Pose.
- Press the Confirm button.
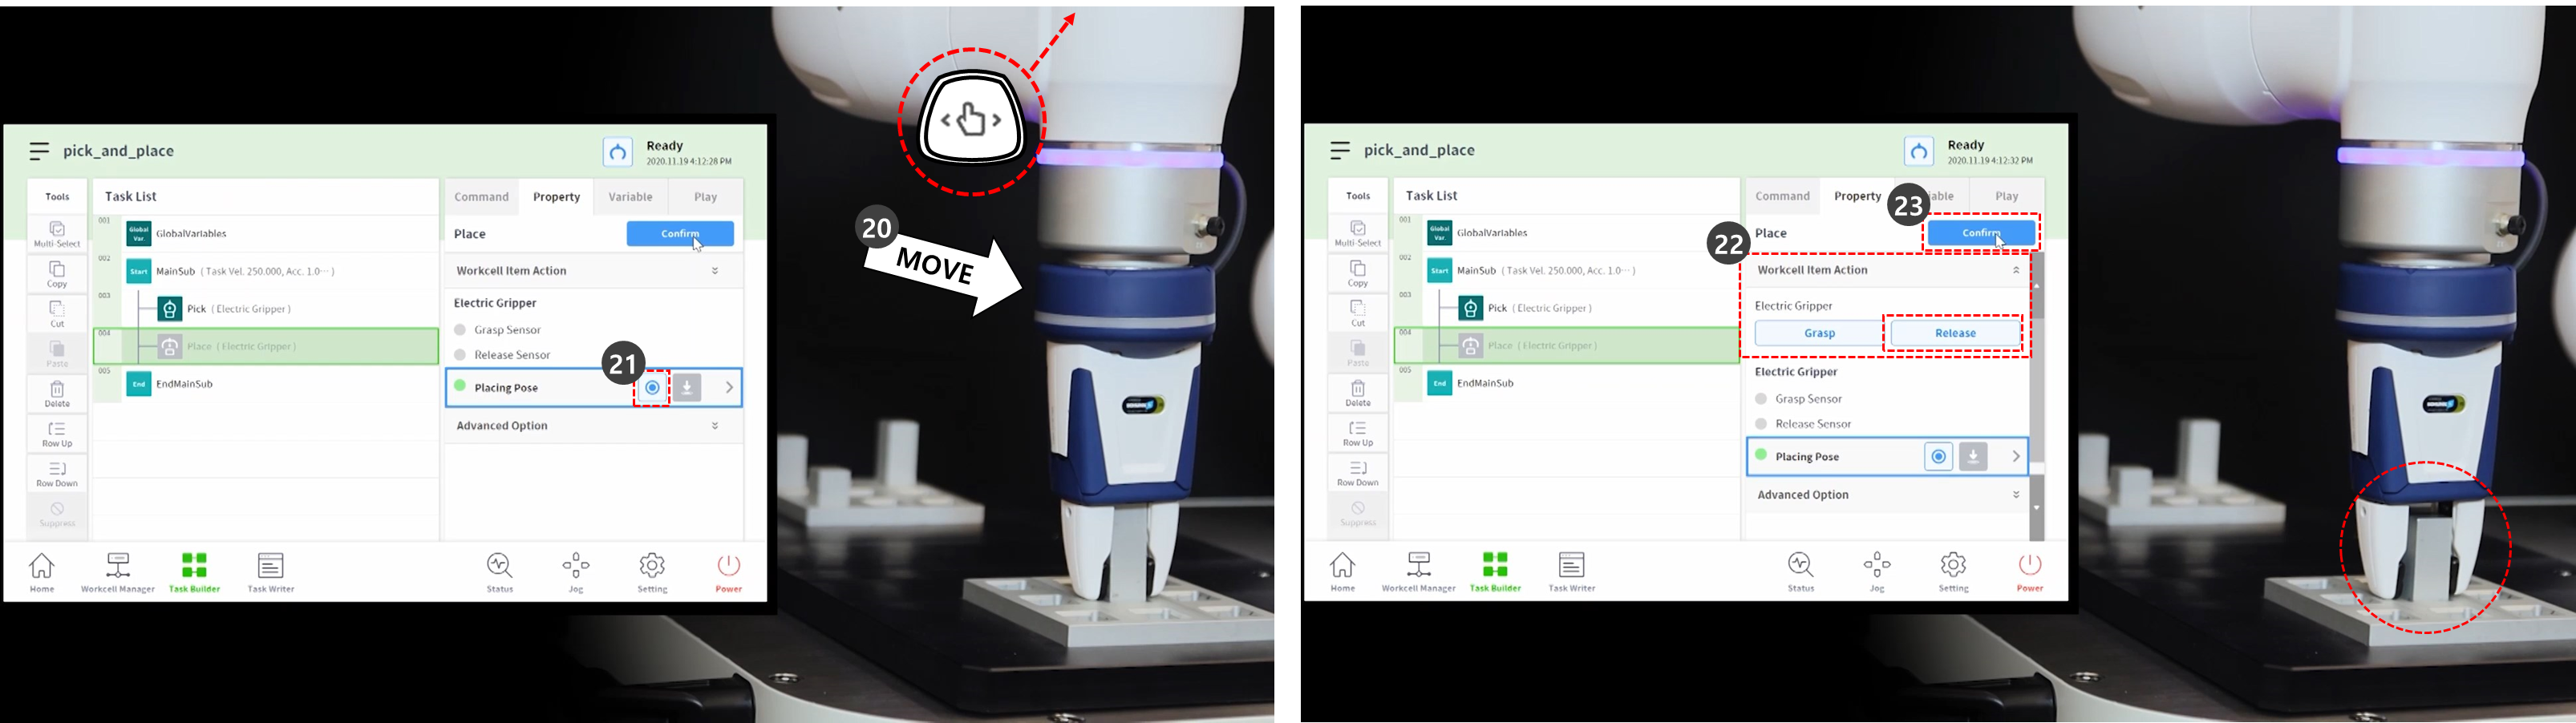
- Use direct teaching to move the robot to the point where Place will be performed.
- Press the Get Pose button of the Placing Pose.
- To release the workpiece from the gripper, press the Release button.
- Press the Confirm button.
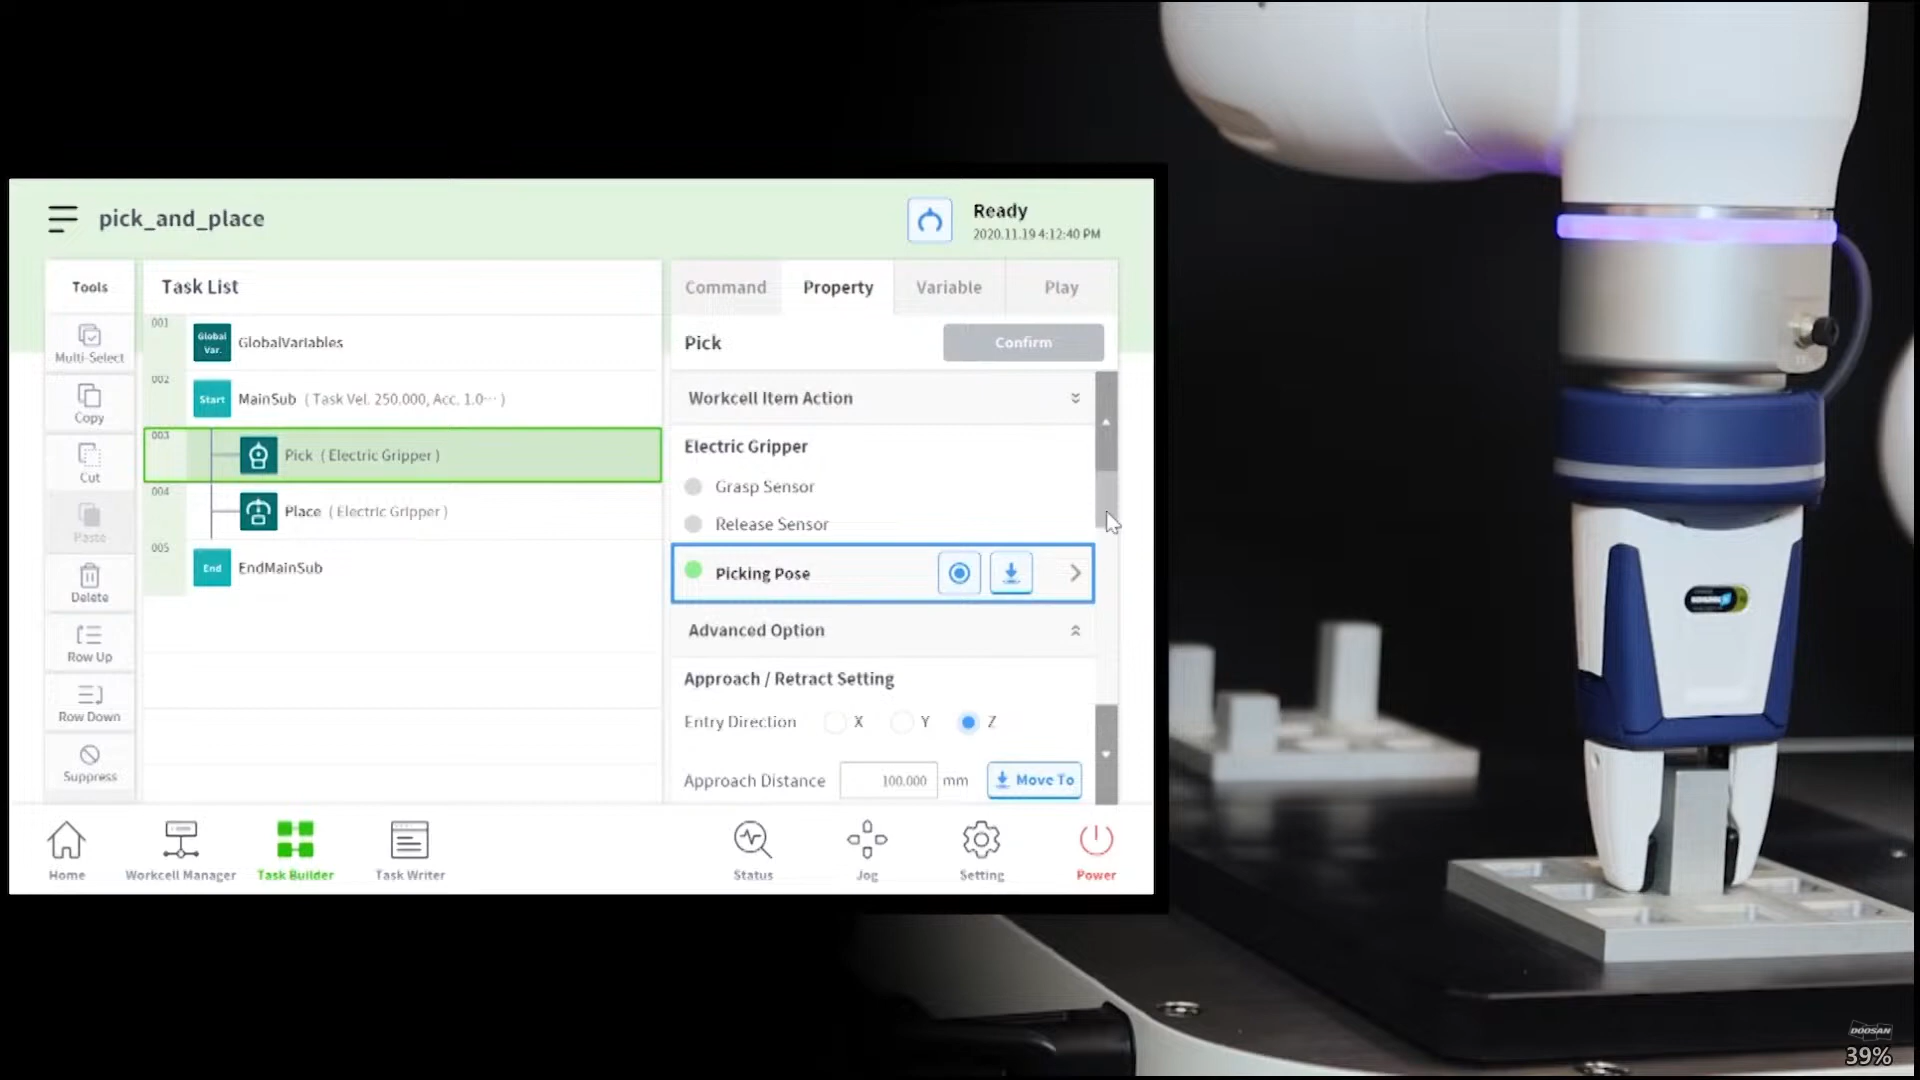
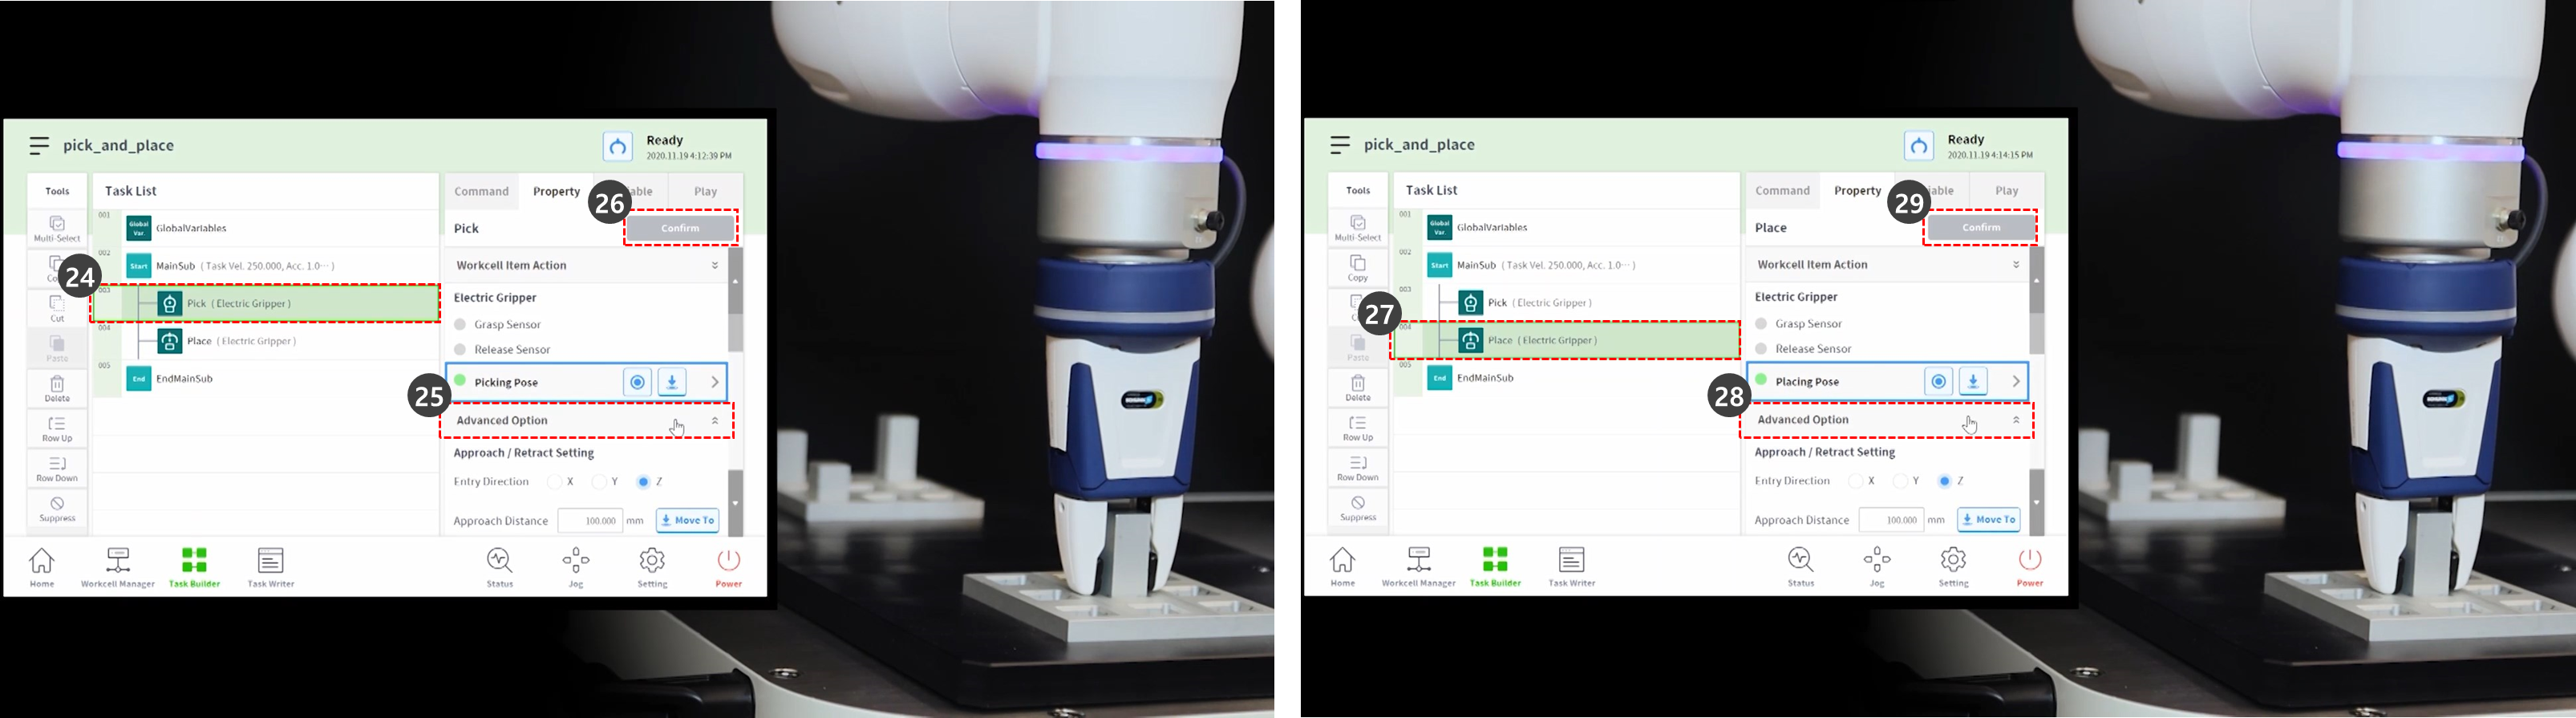
- To set detailed settings of Pick and Place skill commands, select the Pick command in the third line of the task list.
- Press the Advanced Option to expand the menu and set as following: Use default values for items not described below.
- Entry Direction: Z-axis
- It sets the direction for entering the Pick position.
- Approach Distance: 100 mm
- It sets the distance right before the robot approaches the Pick position. It secures sufficient approach distance.
- Retract Distance: 100 mm
- It sets the distance after the robot retracts in the set direction from the Pick position. It secures sufficient retract distance.
- Approach Speed: 100 mm/s
- It sets the approach speed lower than the default value when the robot approaches an object.
- Compliance Control: Enabled (green)
- Sensing Contact: Enabled (green)
- It enables Compliance Control and contact detection functions.
- Contact Force: 10N
- Contact Tolerance: 10 mm
- Force: 15N
- Scratch Offset: 2mm
- Release Gripper Before Picking: Enabled (green)
- It sets the gripper in the Release state before approaching the pick location.
- Tool Weight: None
- If the workpiece is not light, the workpiece weight and tool weight must be summed, be added as a Tool Weight Workcell Item, and be selected.
- Entry Direction: Z-axis
- Press the Confirm button.
- Select the Place command from the fourth line of the task list.
- Press the Advanced Option to expand the menu and set as following: Use default values for items not described below.
- Entry Direction: Z-axis
- Approach Distance: 100 mm
- Retract Distance: 100 mm
- Approach Speed: 100 mm/s
- Compliance Control: Enabled (green)
- Sensing Contact: Enabled (green)
- It enables Compliance Control and contact detection functions.
- Contact Force: 10N
- Contact Tolerance: 10 mm
- Force: 15N
- Tool Weight: None
- Press the Confirm button.
- Use direct teaching to move the robot to the point where Pick&Place will start.
- Move a workpiece to the Pick location.
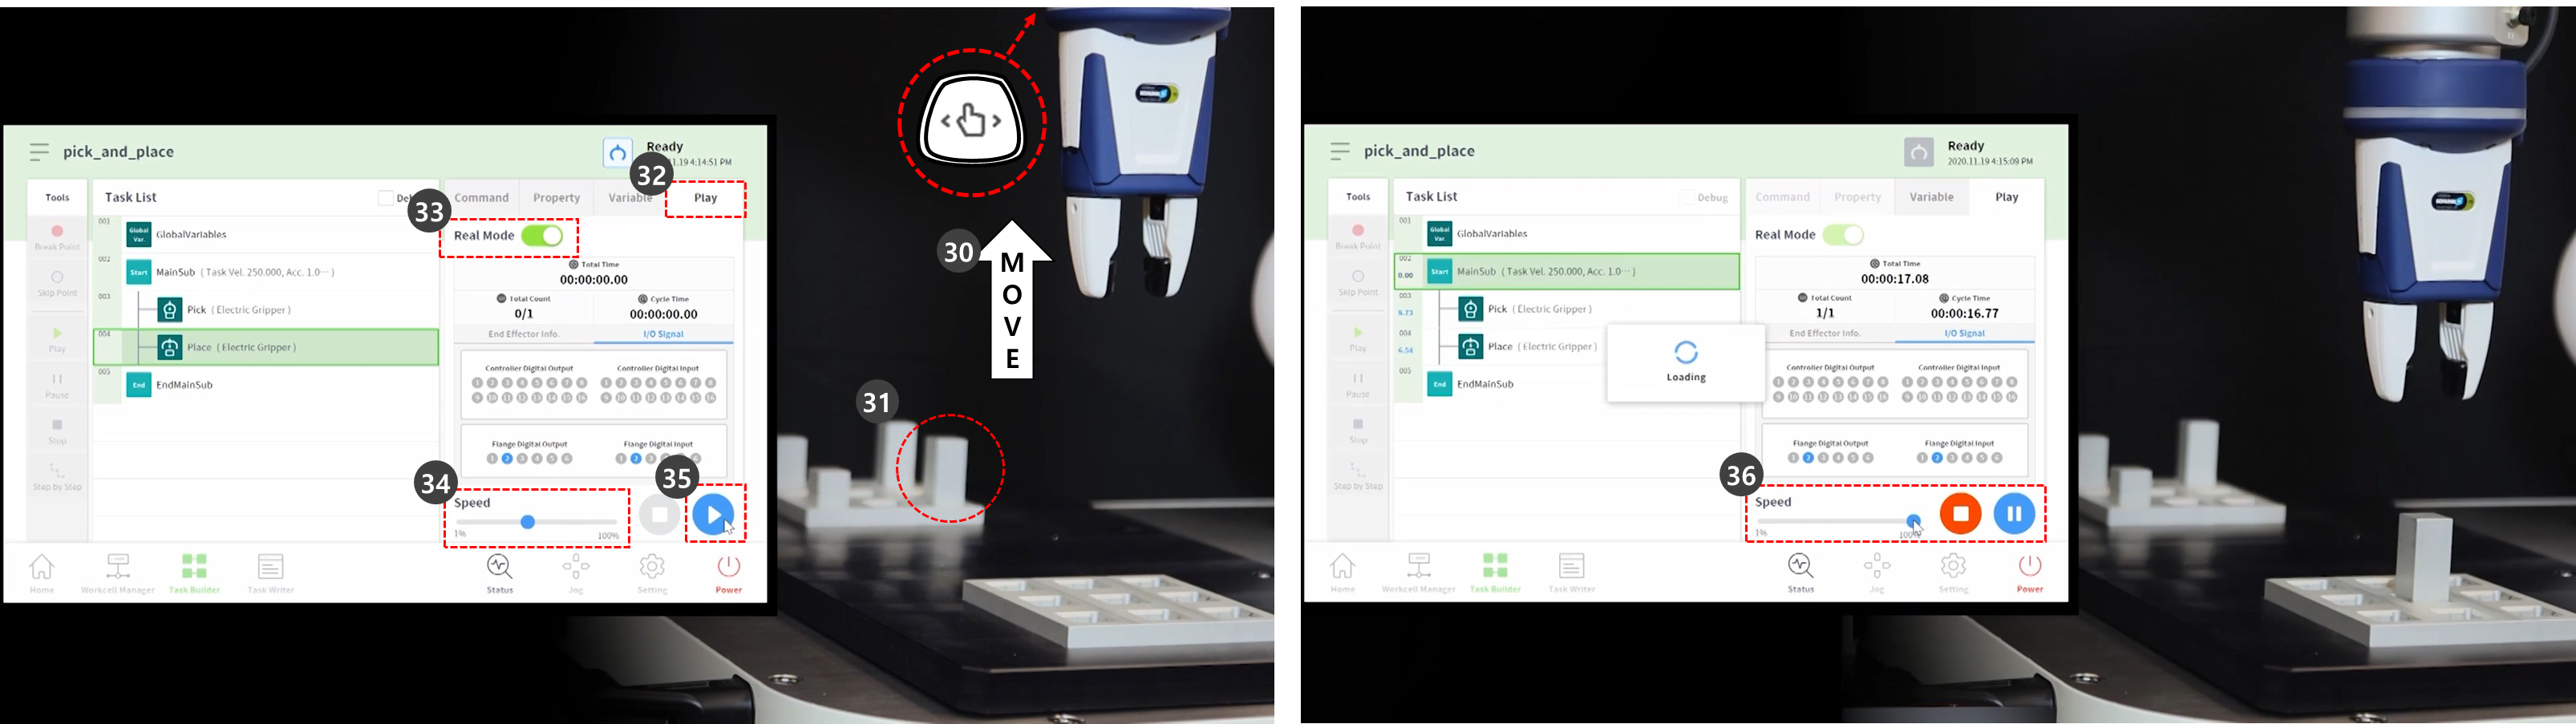
- Select the Play tab.
- Enable the Real Mode toggle button.
- Adjust the speed slide bar to 10-30%.
- This speed slide bar adjusts the set speed of all commands to the selected %.
- When a task is executed for the first time after its creation, executing it at a low speed may prevent unexpected risks.
- Press the Play button.
- If the task is completed without issues, adjust the speed back to the default, 100%, and test again.