Try Compliance command samples
OPTIONAL NORMAL 20 MIN
This sample is created in the Task Writer. This sample can be tried almost the same way in the Task Builder.
Caution
- Before trying the sample, make sure to read and follow Precautions for Use. For more information, refer to PART 1. Safety Manual.
Note
- If there is external torque 15Nm or higher when enabling or disabling compliance control, the robot stops the program due to the JTS (Joint Torque Sensor) error.
- Stiffness change can be executed regardless of the external torque size.
- During compliance control, joint motions, such as MoveJ command, cannot be executed.
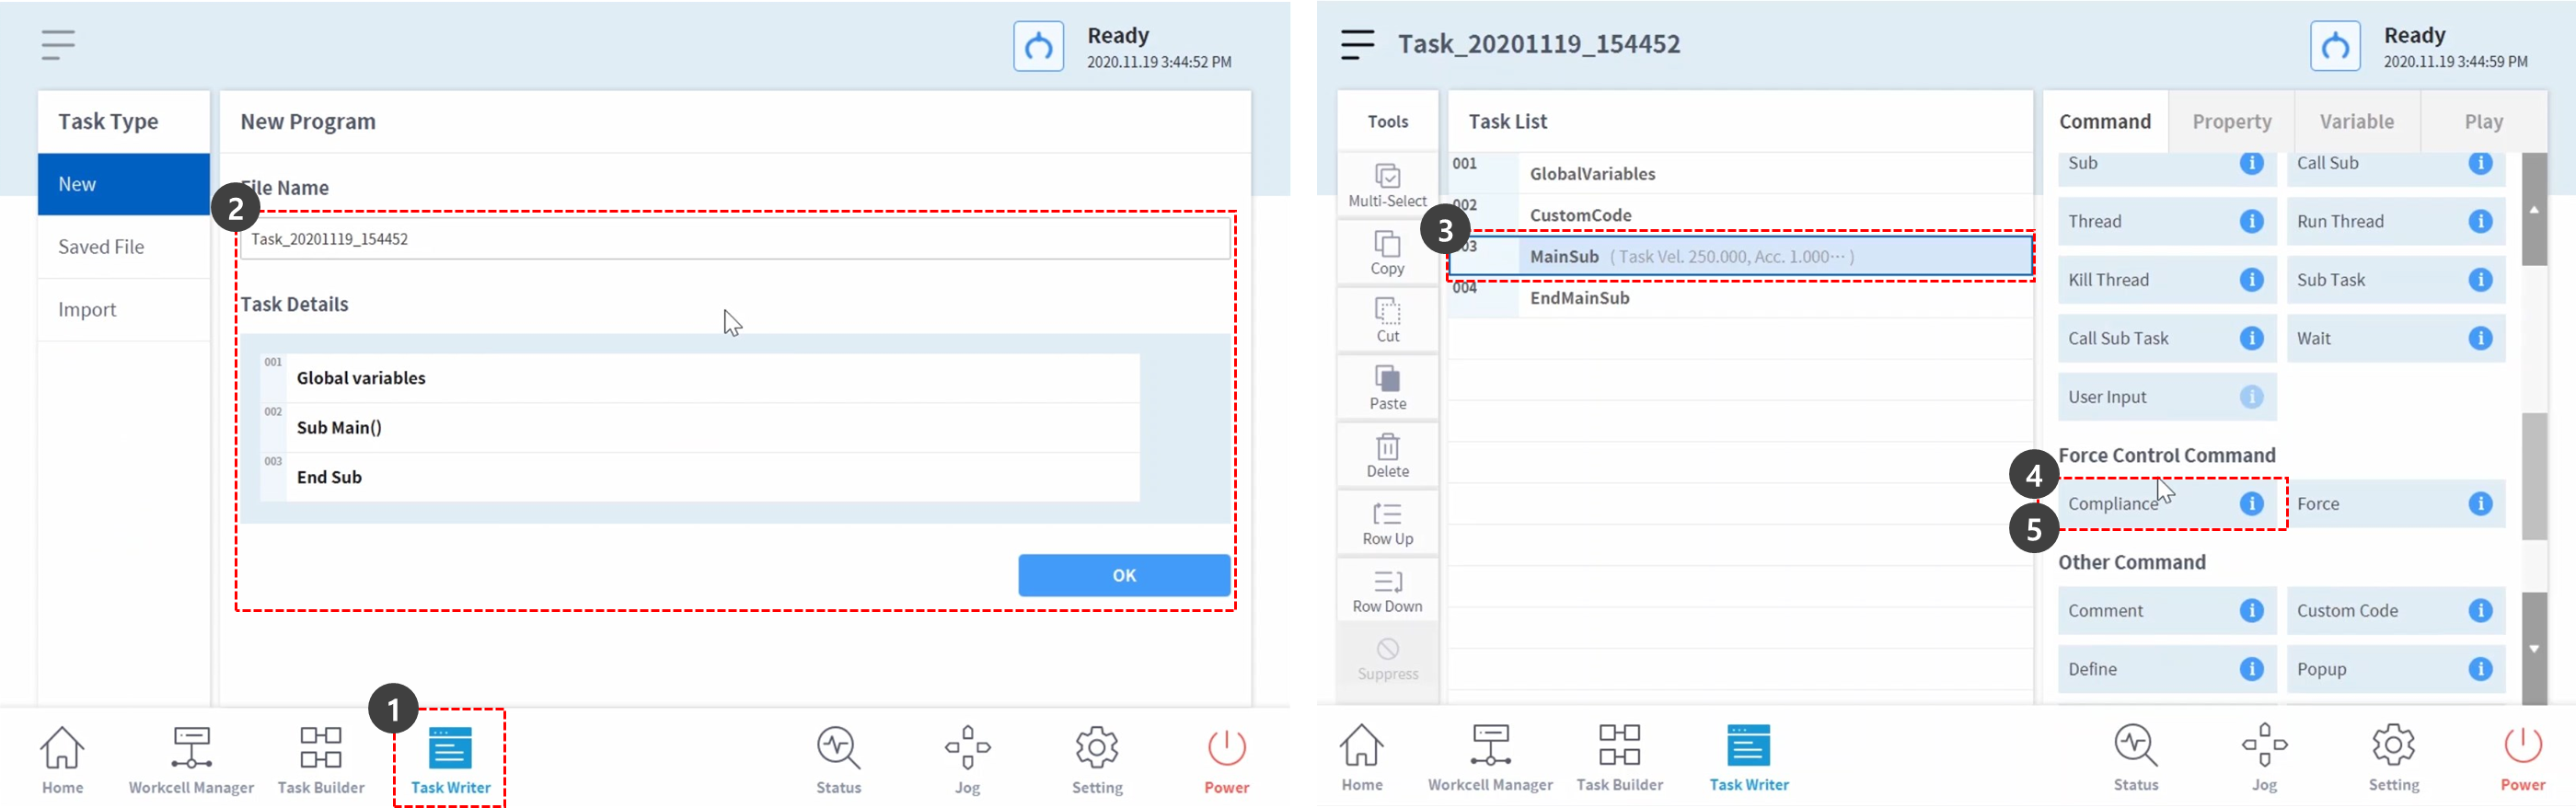
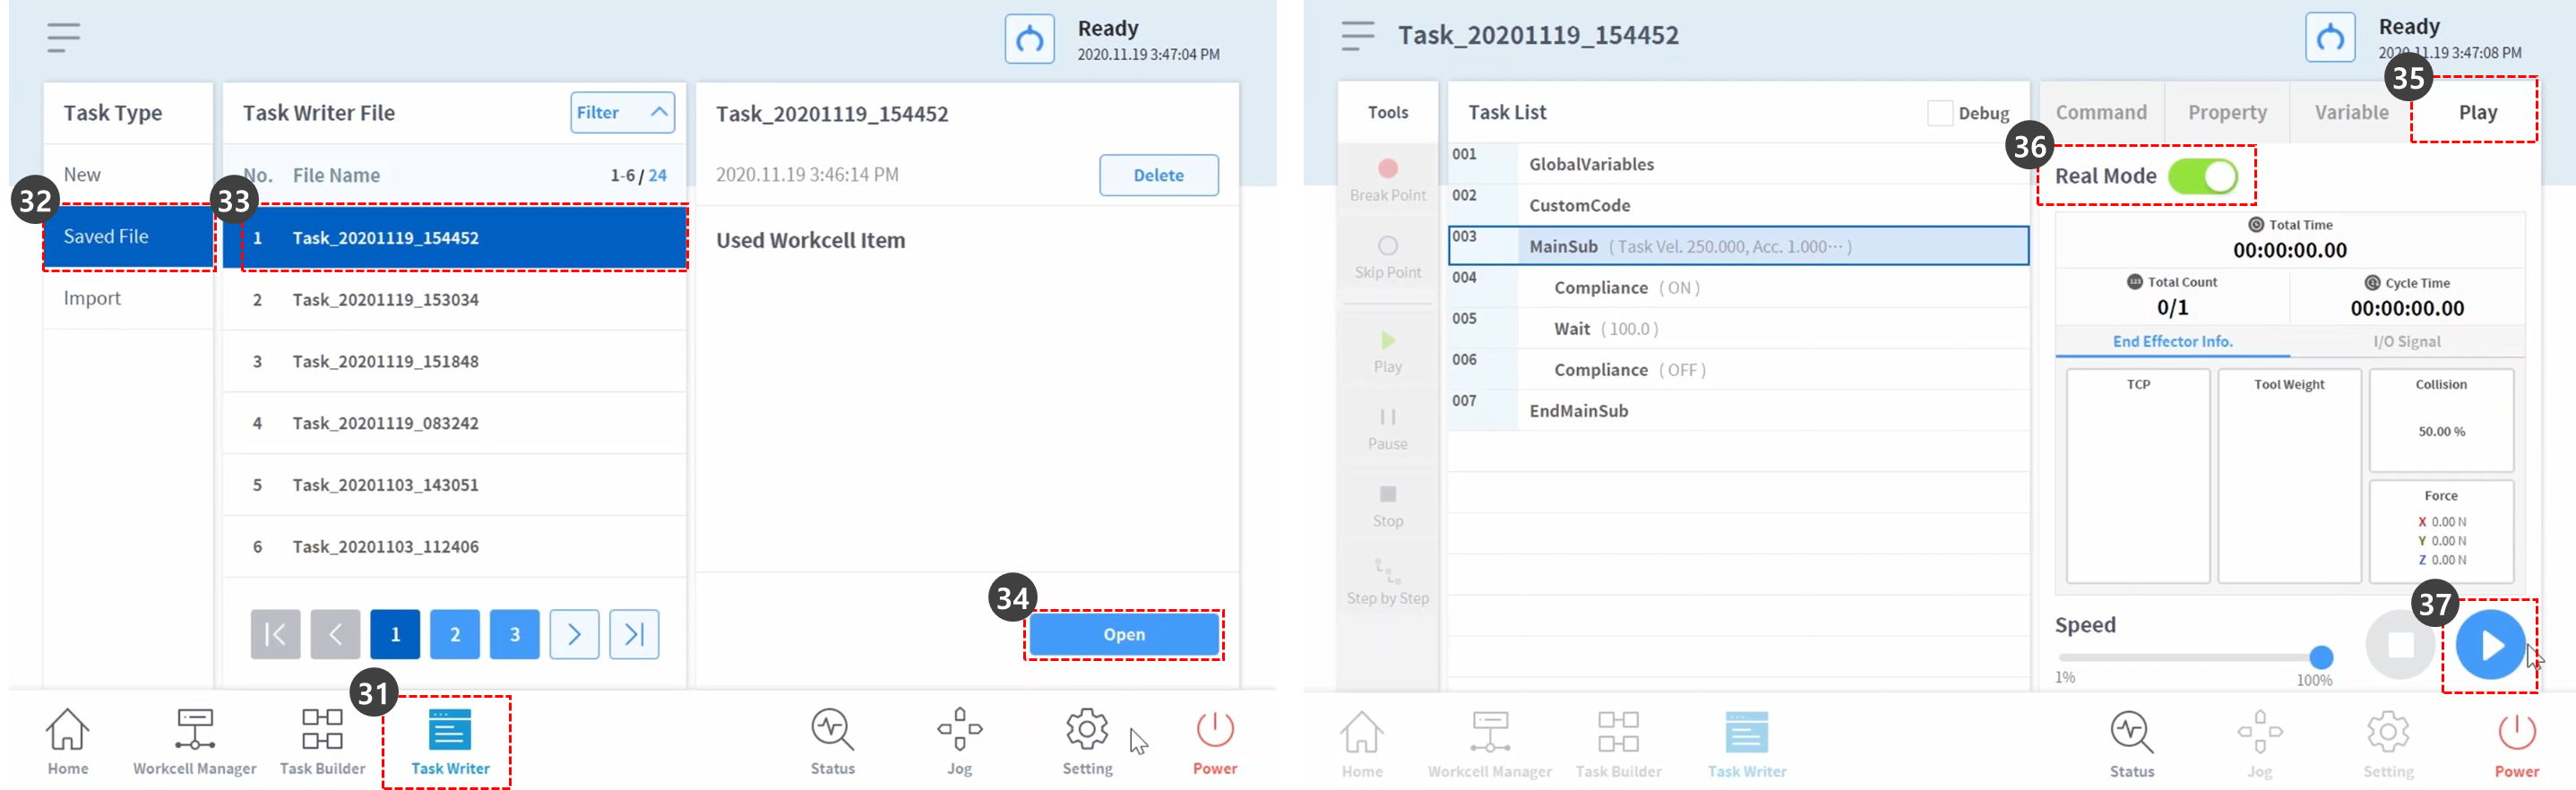
- Select the Task Writer from the bottom menu.
- Enter the task name and press the OK button.
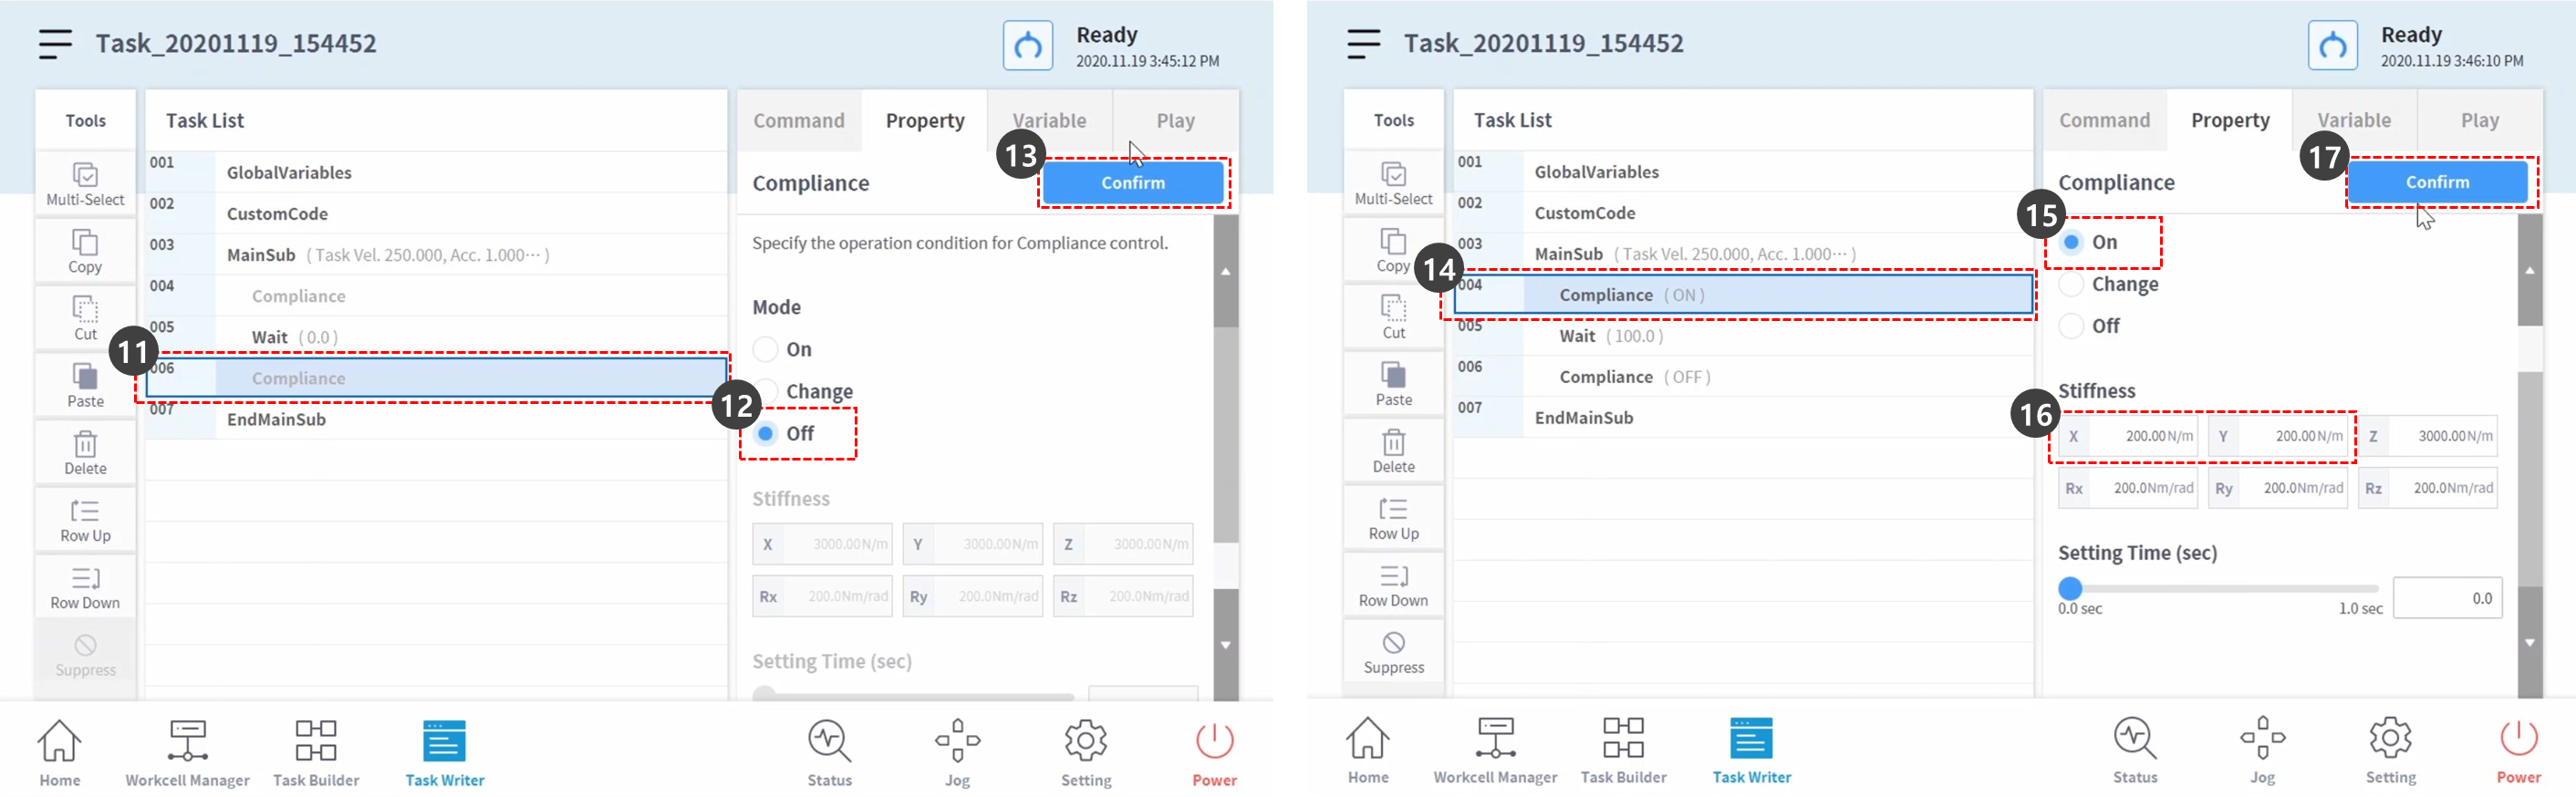
- Select the MainSub command from the third line of the task list. A new command is added to the next line of the selected line.
- Add Compliance Command. This command is planned to be used for enabling Compliance Control.
- Add another compliance control. This command is planned to be used for disabling Compliance Control.
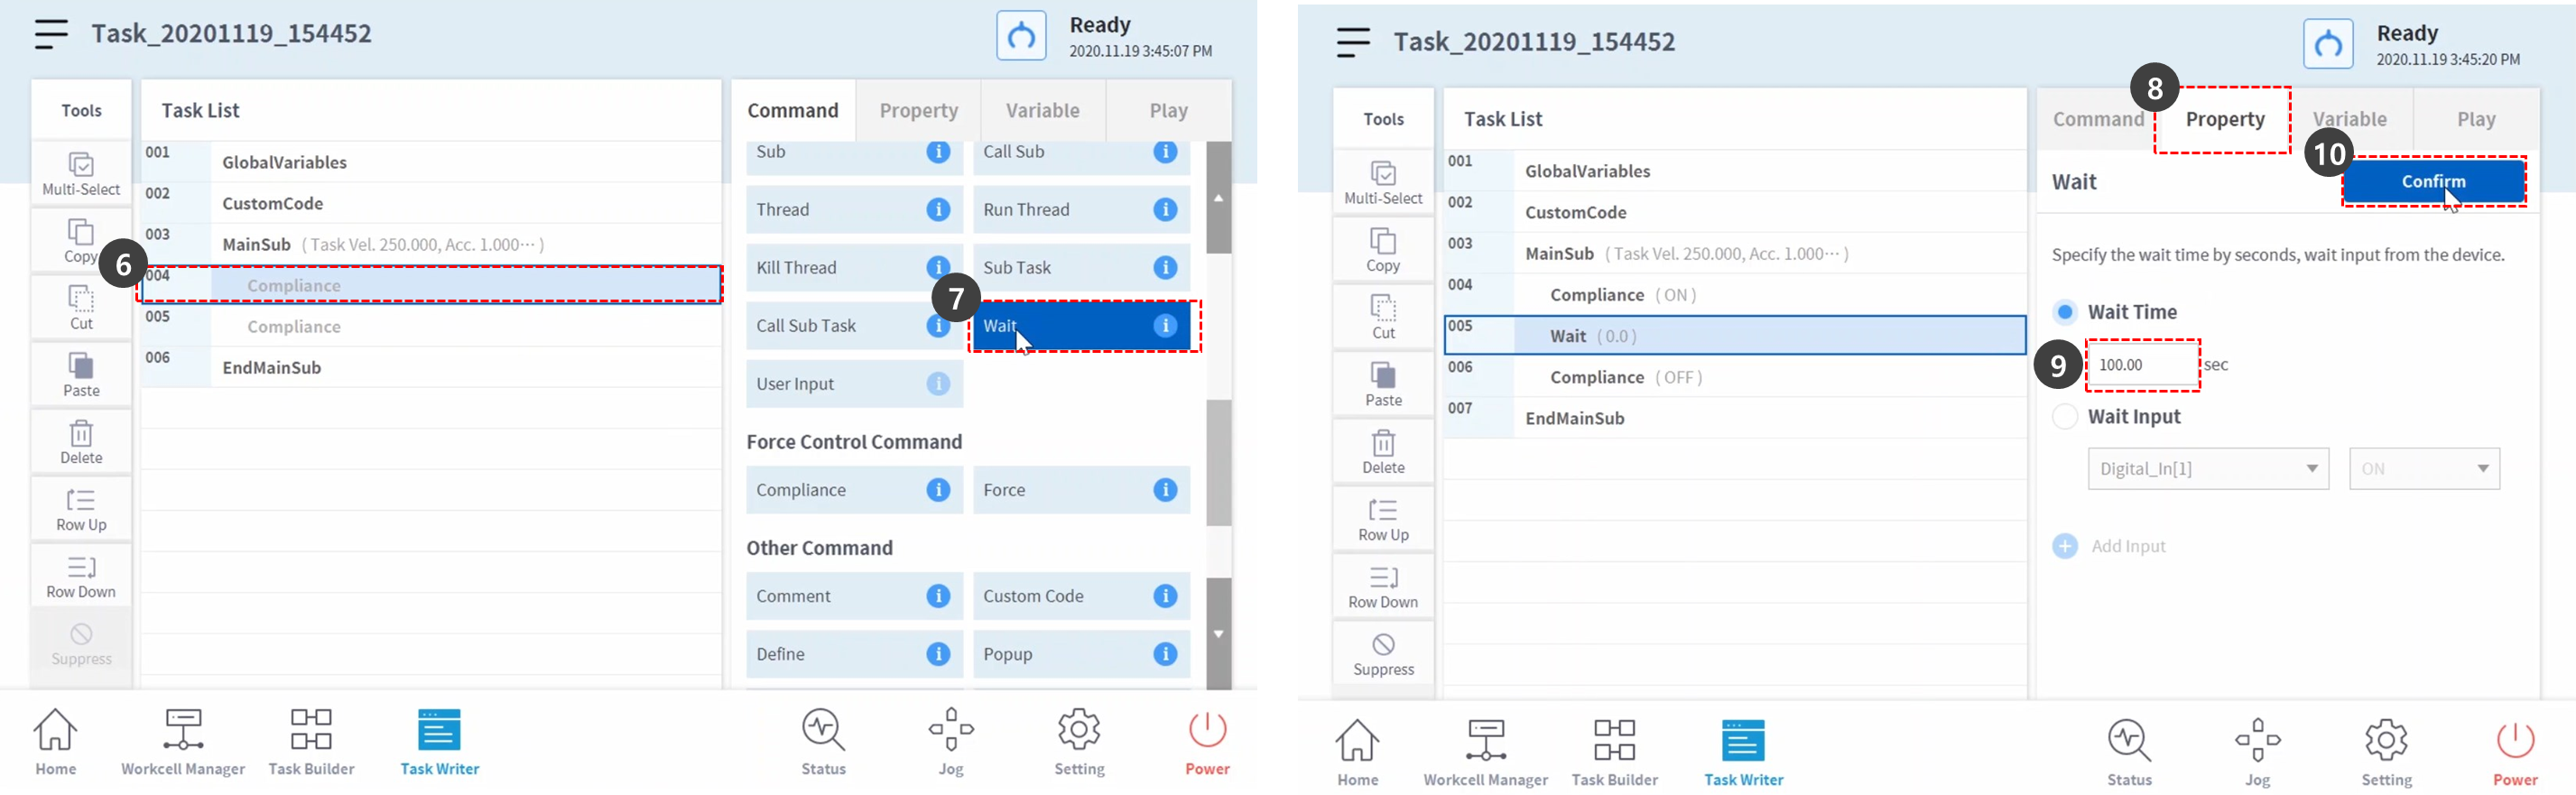
- Select the Compliance Command on the fourth line. A new command is added to the next line of the selected line.
- Add Wait command.
- Select the Property tab.
- Set the wait time as the following:
- Wait Time: 100 sec
- Press the Confirm button.
- Select the Compliance Command on the sixth line.
- Set the mode in the property as the following: Mode Off disables compliance control.
- Mode: Off
- Press the Confirm button.
- Select the Compliance Command on the fourth line.
- Set the Mode in the Property as the following: Mode On enables Compliance Control.
- Mode: On
- Set the Stiffness as the following: Lower the stiffness of X and Y direction for softer reactions in X and Y directions.
- X: 200 N/m
- Y: 200 N/m
- Z: 3000 N/m (default)
- Rx, Ry, Rz: 200 Nm/rad (default)
- Press the Confirm button.
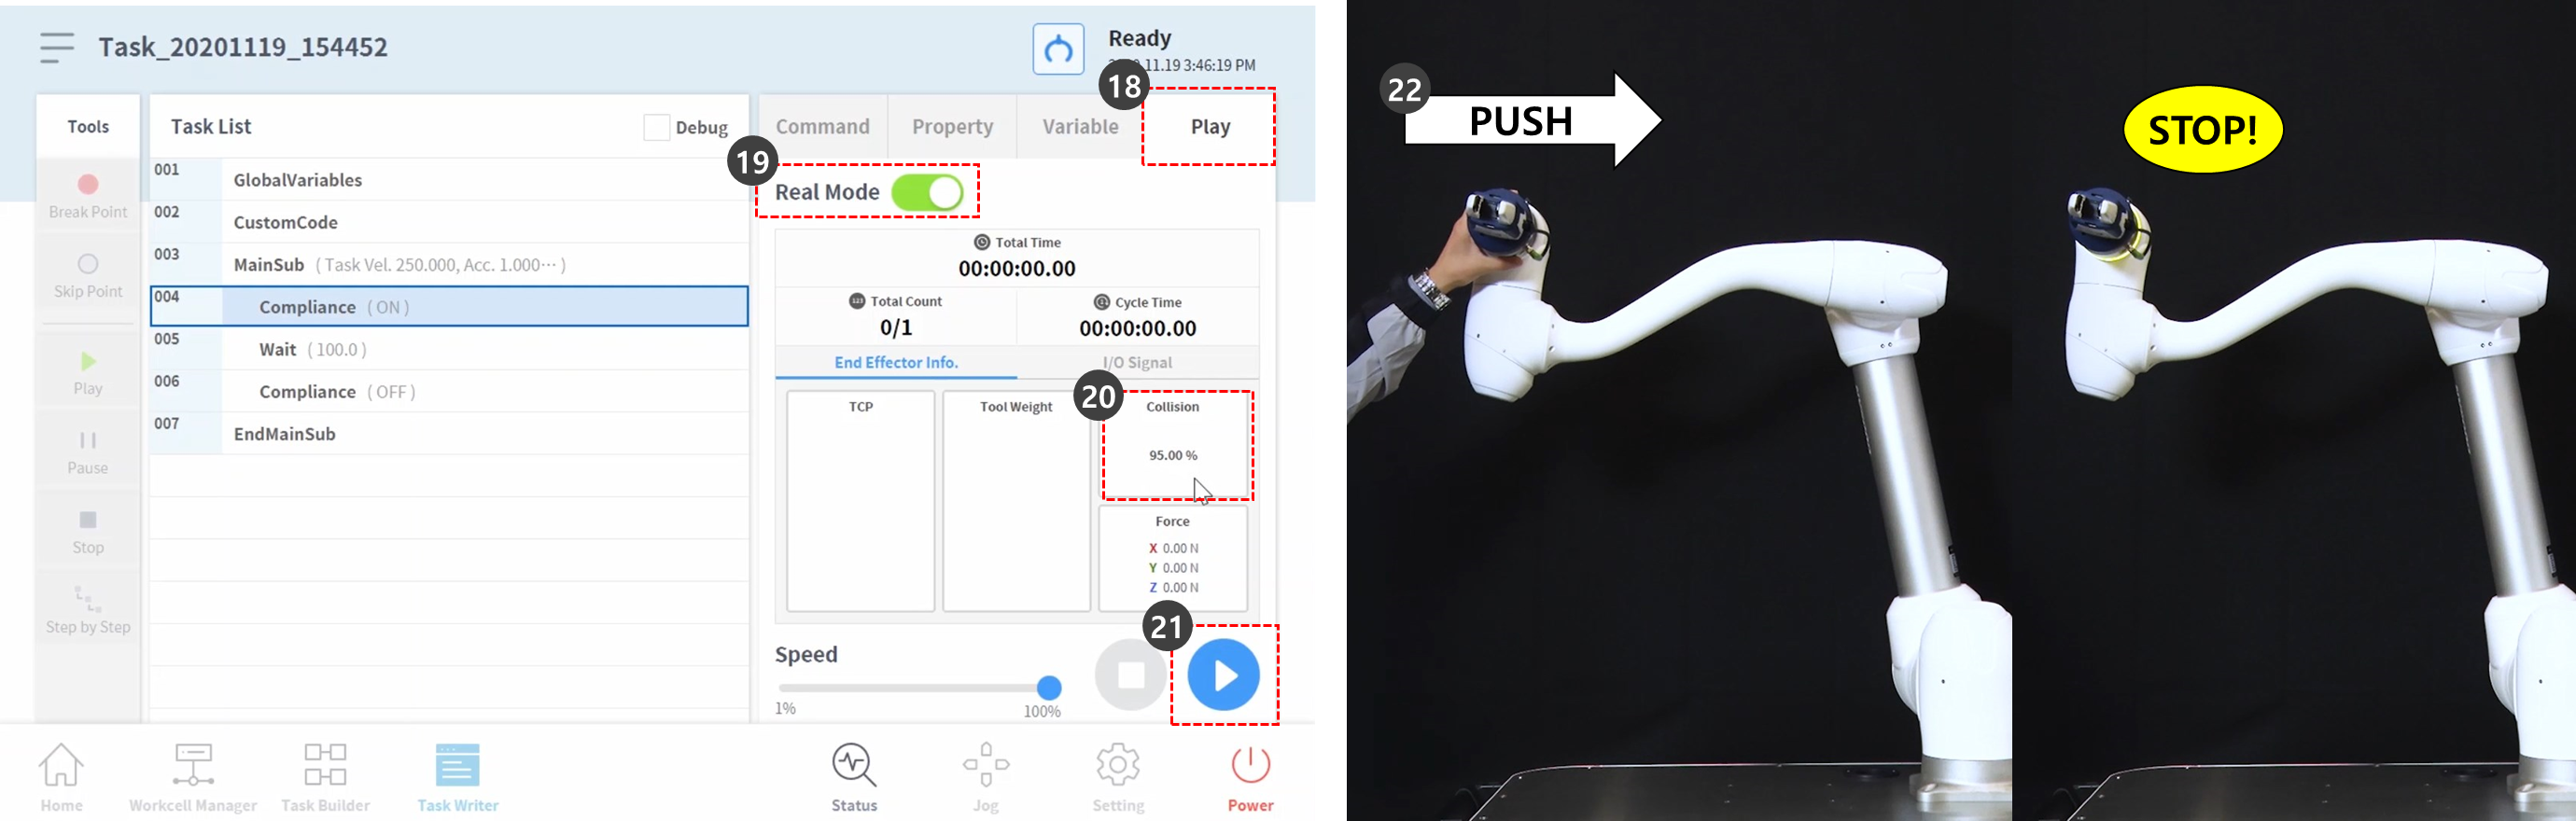
- Select the Play tab.
- Enable the Real Mode toggle button.
- Once the toggle button becomes enabled, the button lights up green.
- This sample will deliberately activate the Safety Stop to explain the reason to lower Collision Sensitivity during Compliance control. The Collision Sensitivity of this sample is 95%. In cases with such high collision sensitivity, the robot reacts to collisions very sensitively.
- Upon collision, the robot is stopped by the Safety Stop.
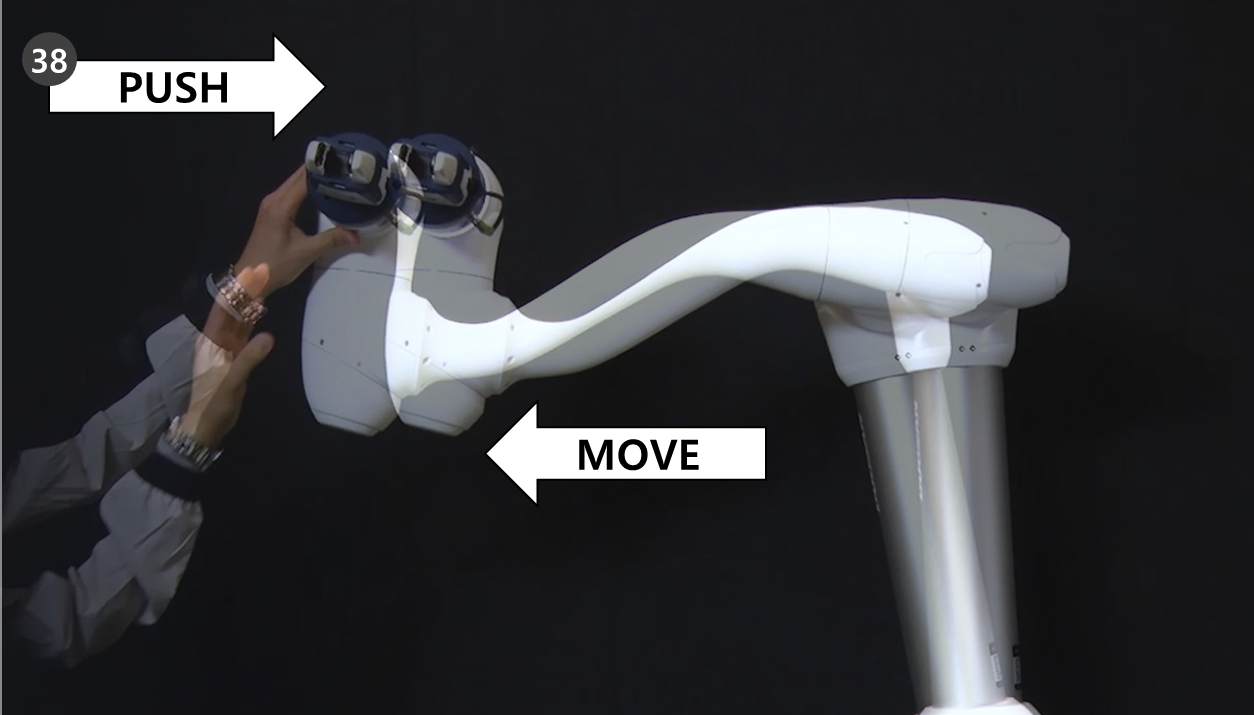
- Press the Play button.
- Hold the robot end and slowly push it in the robot body direction. The robot stops due to collision error. During Safety Stop due to collision, the robot LED lights up yellow.
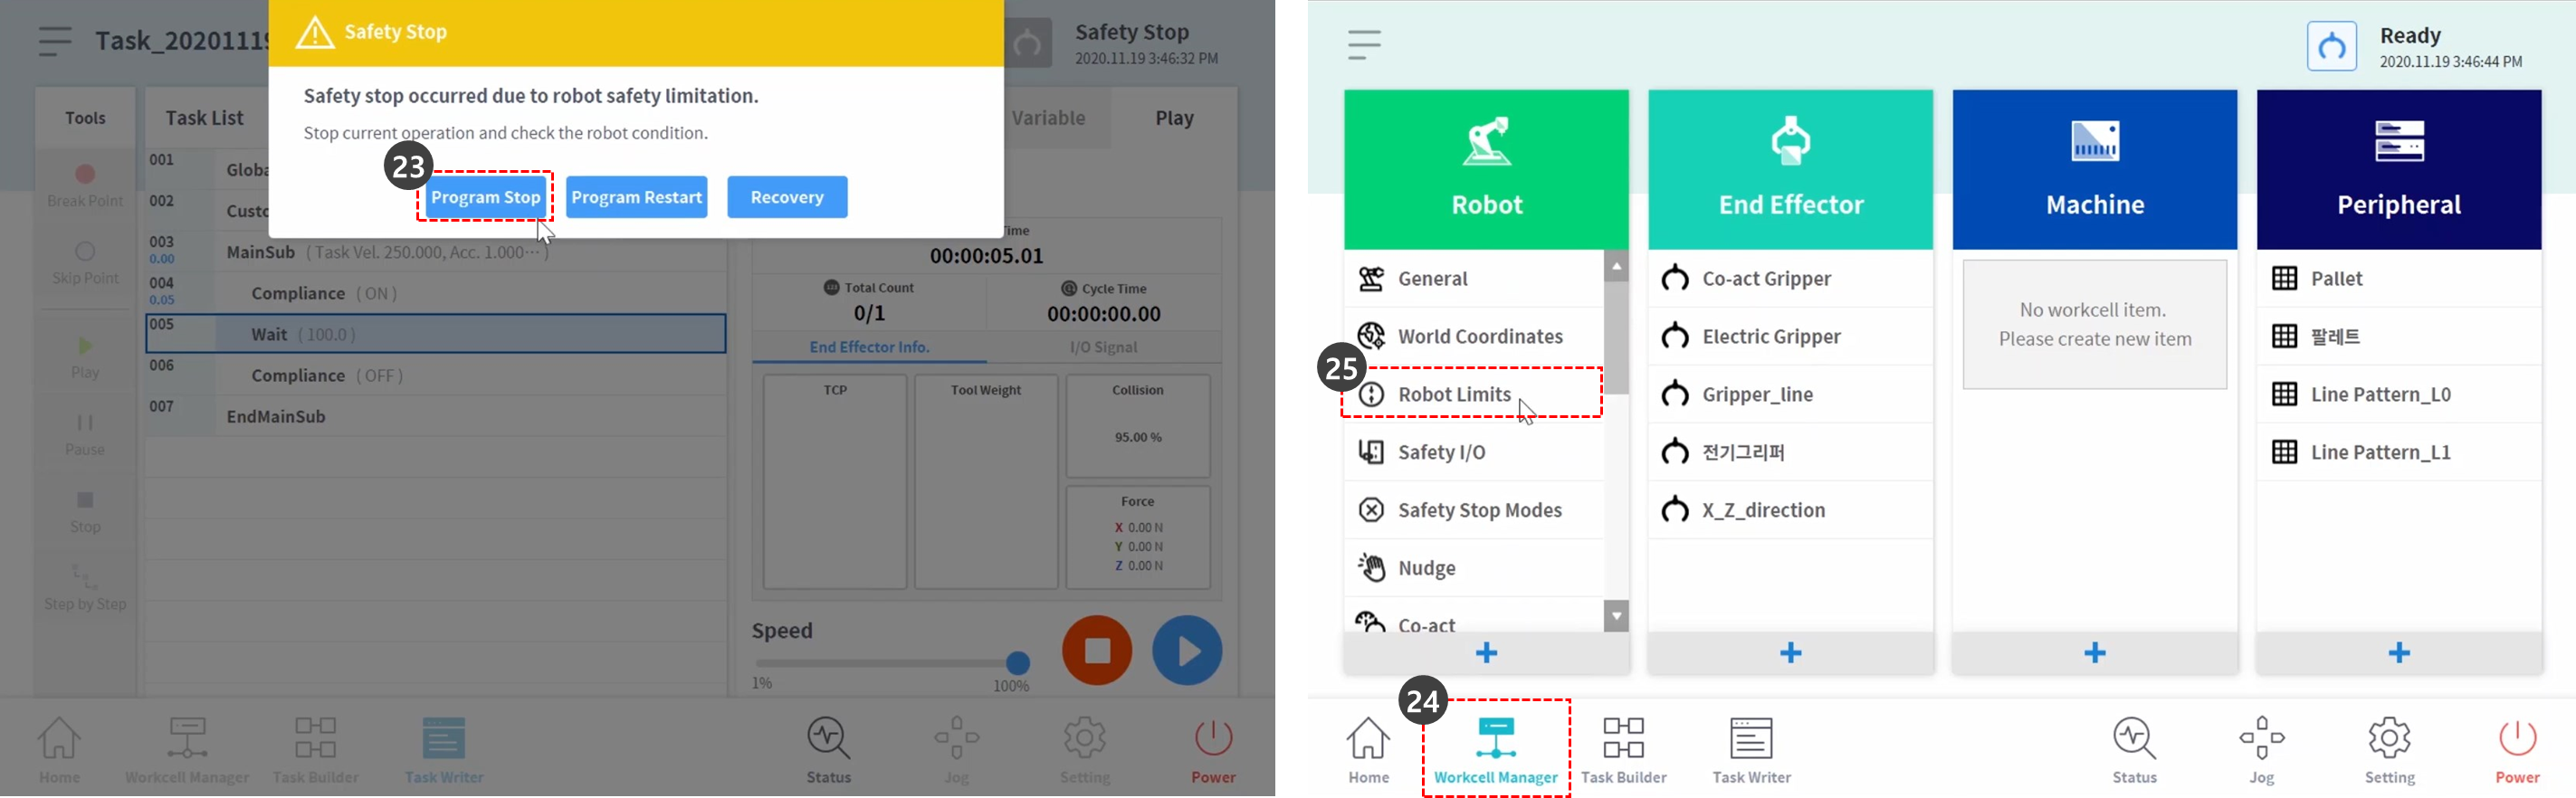
- Press the Program Stop button in the yellow safety stop warning window on the screen. The task program in progress is stopped.
- Select the Workcell Manager from the bottom menu.
- Select Robot > Robot Limits.
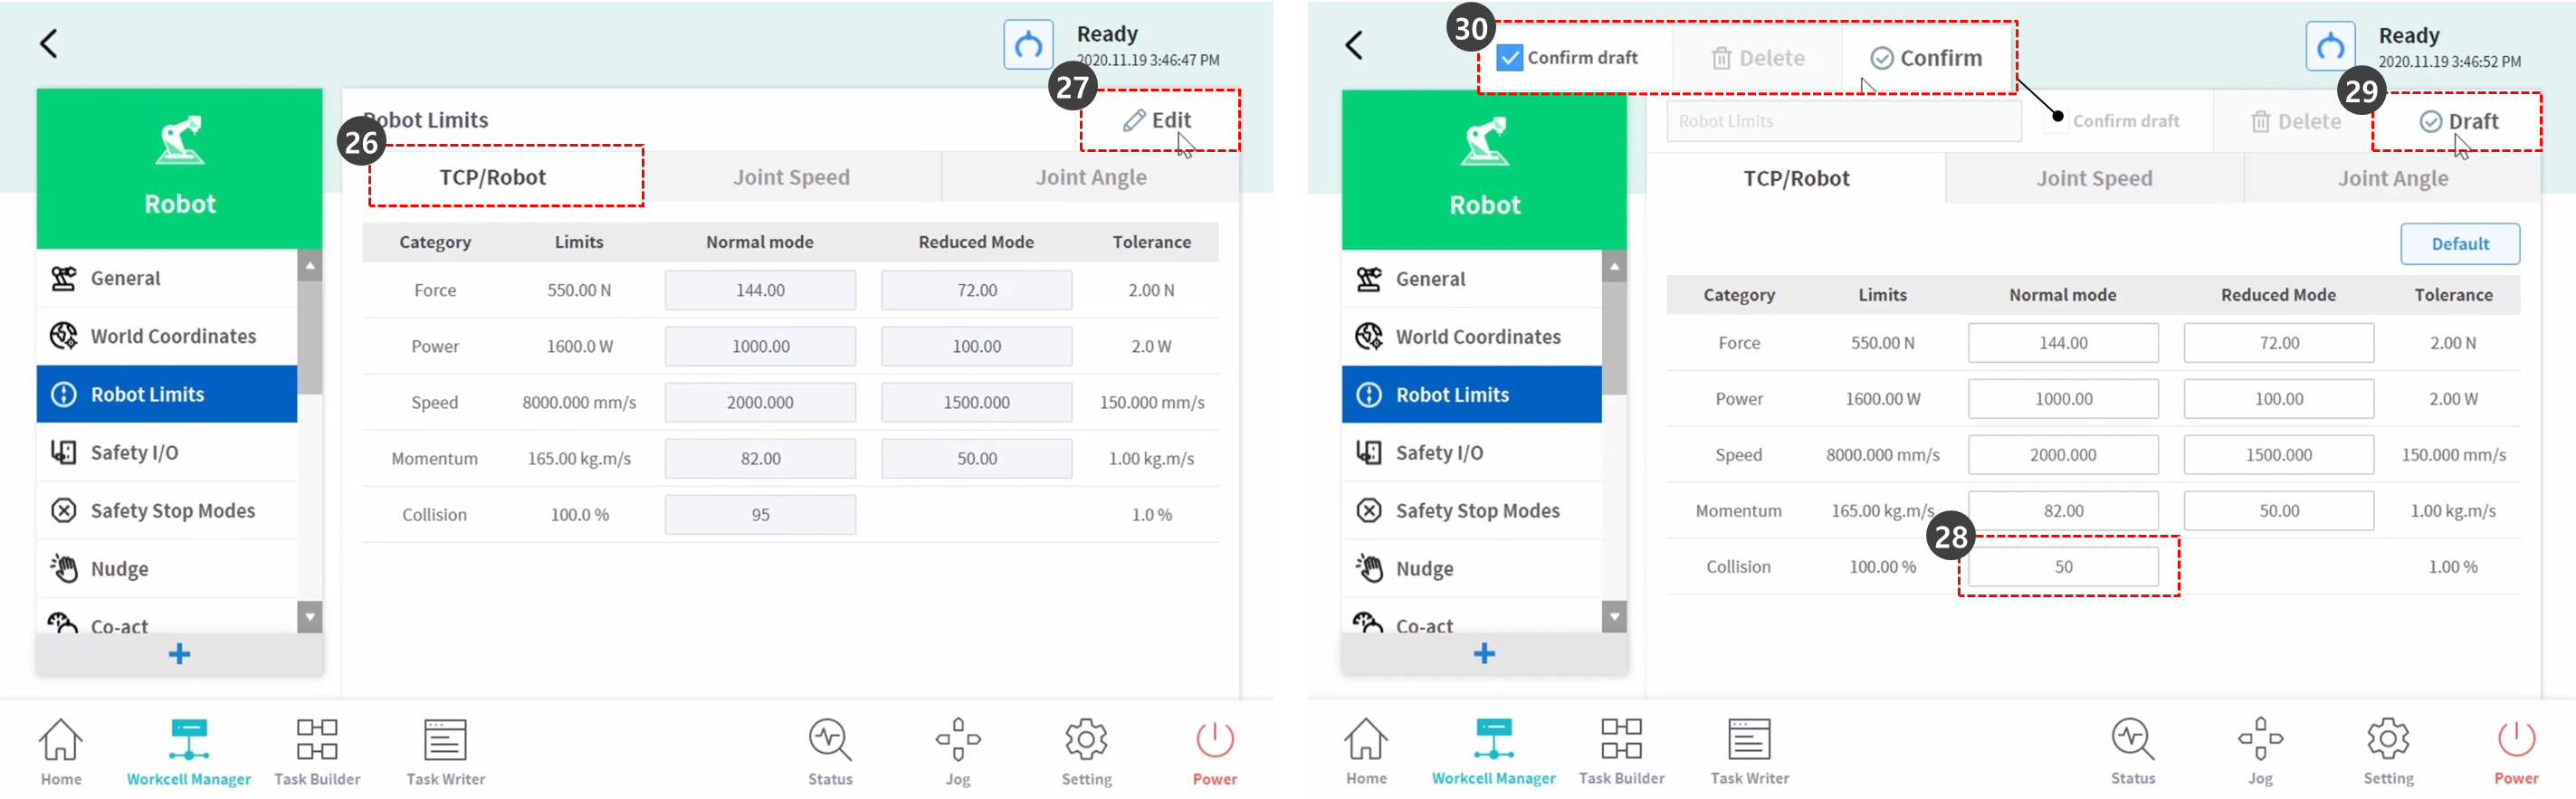
- Select the TCP/Robot tab.
- Press the Edit button.
- Set the Collision Sensitivity as the following:
- Normal mode: 50 %
- Press the Draft button.
- Check the Confirm draft checkbox and press the Confirm button.
- Select the Task Writer from the bottom menu.
- Select the Saved file on the screen left.
- Check whether the first task file name is the task name in Step 2 before selecting. The last saved task is located on the top of the Task Writer file list.
- Press the Open button.
- Select the Play tab.
- Enable the Real Mode toggle button.
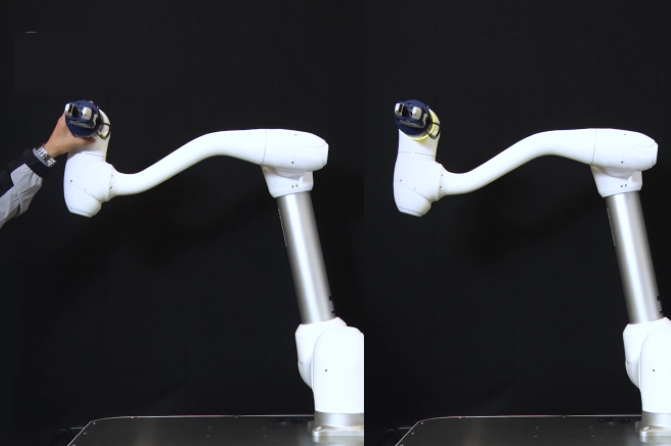
- Press the Play button.
- Hold the robot end and slowly push it in the robot body direction. The robot moves due to the pushing force and returns to its original position.