Remote Control Module
The Remote Control module enables remote control to be executed for tasks that you have already created.
In Operator authority, you can start Remote Control Mode, but you cannot modify the IO settings. IO settings can only be changed with Administrator authority.
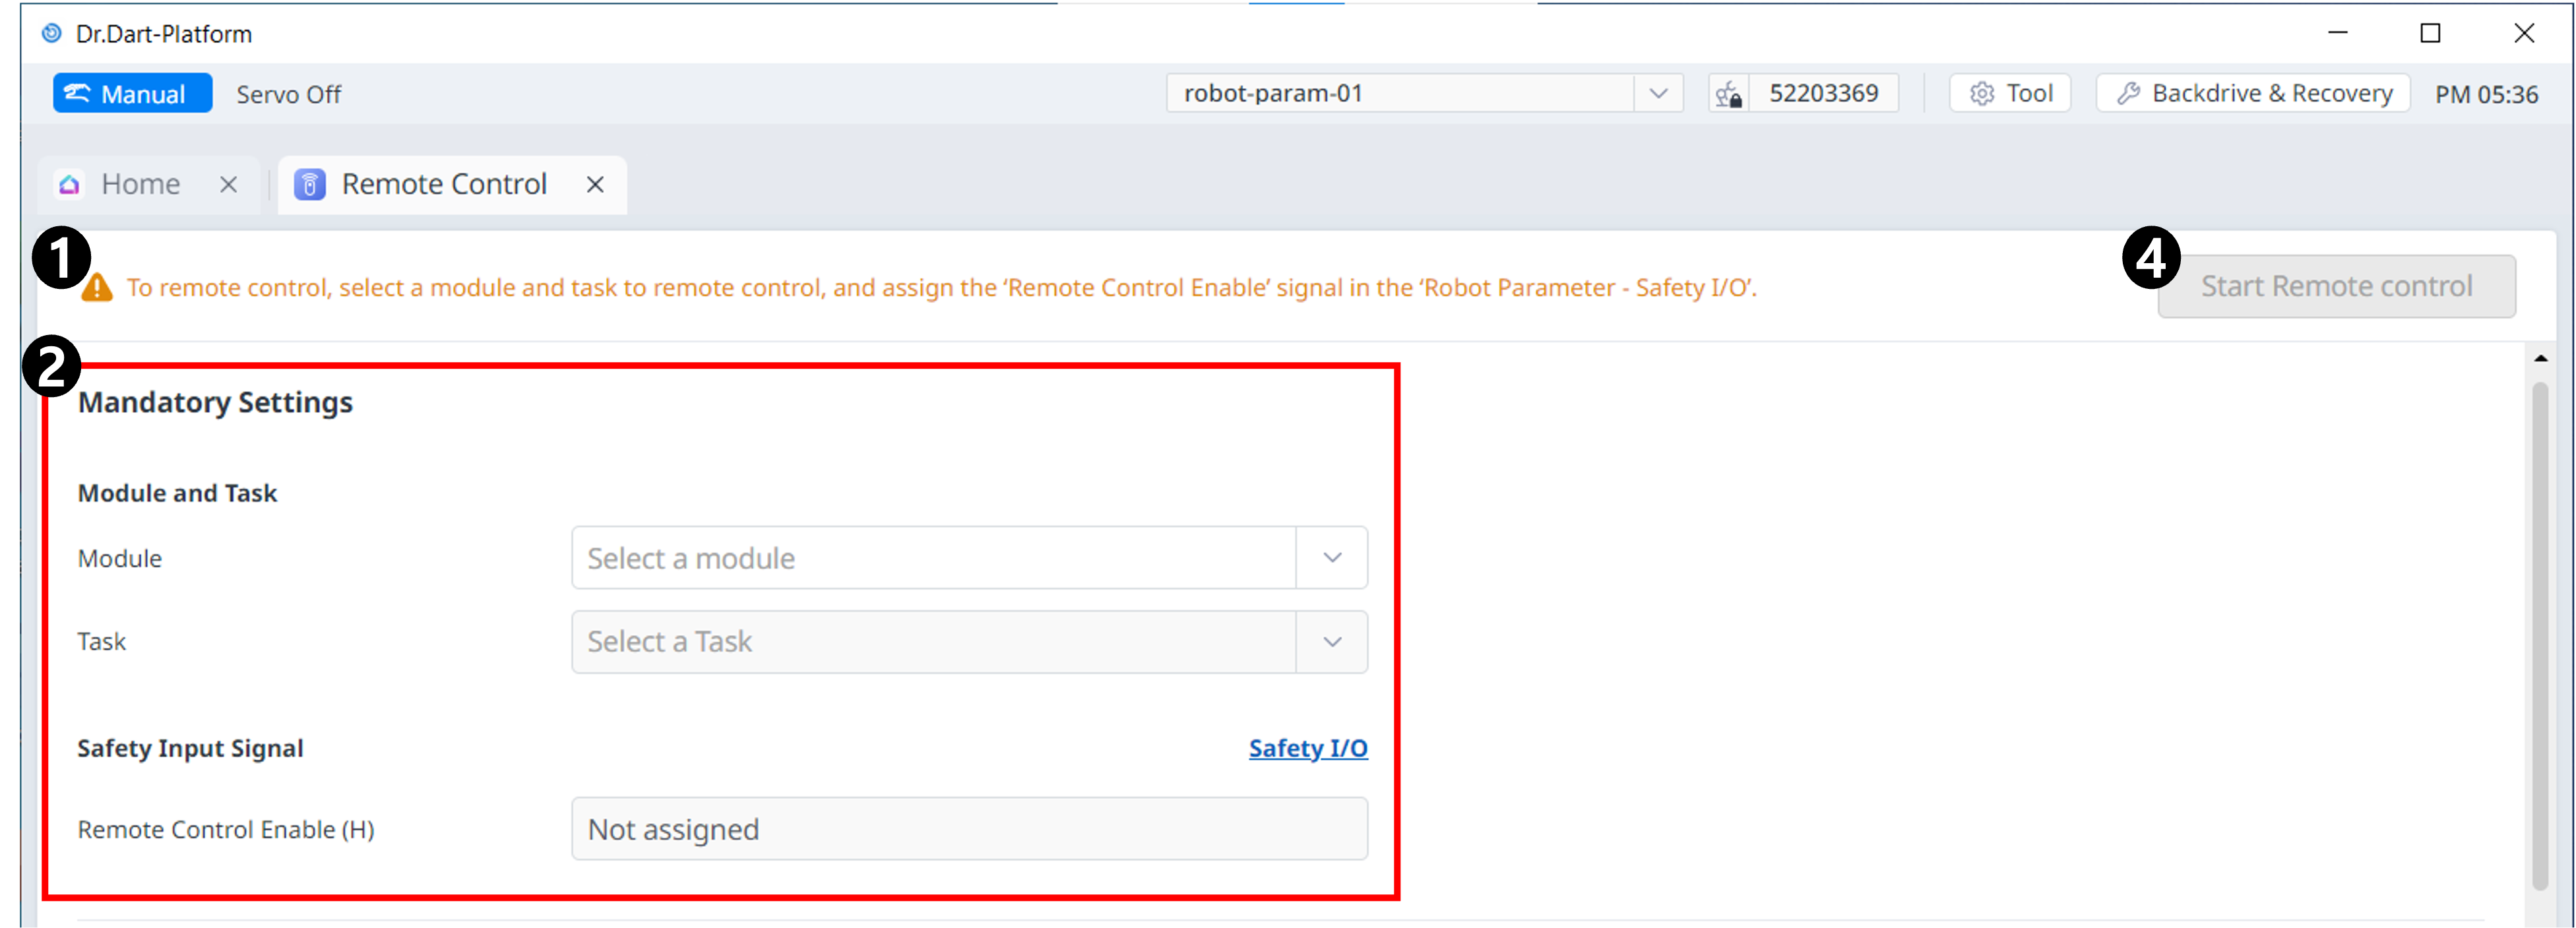
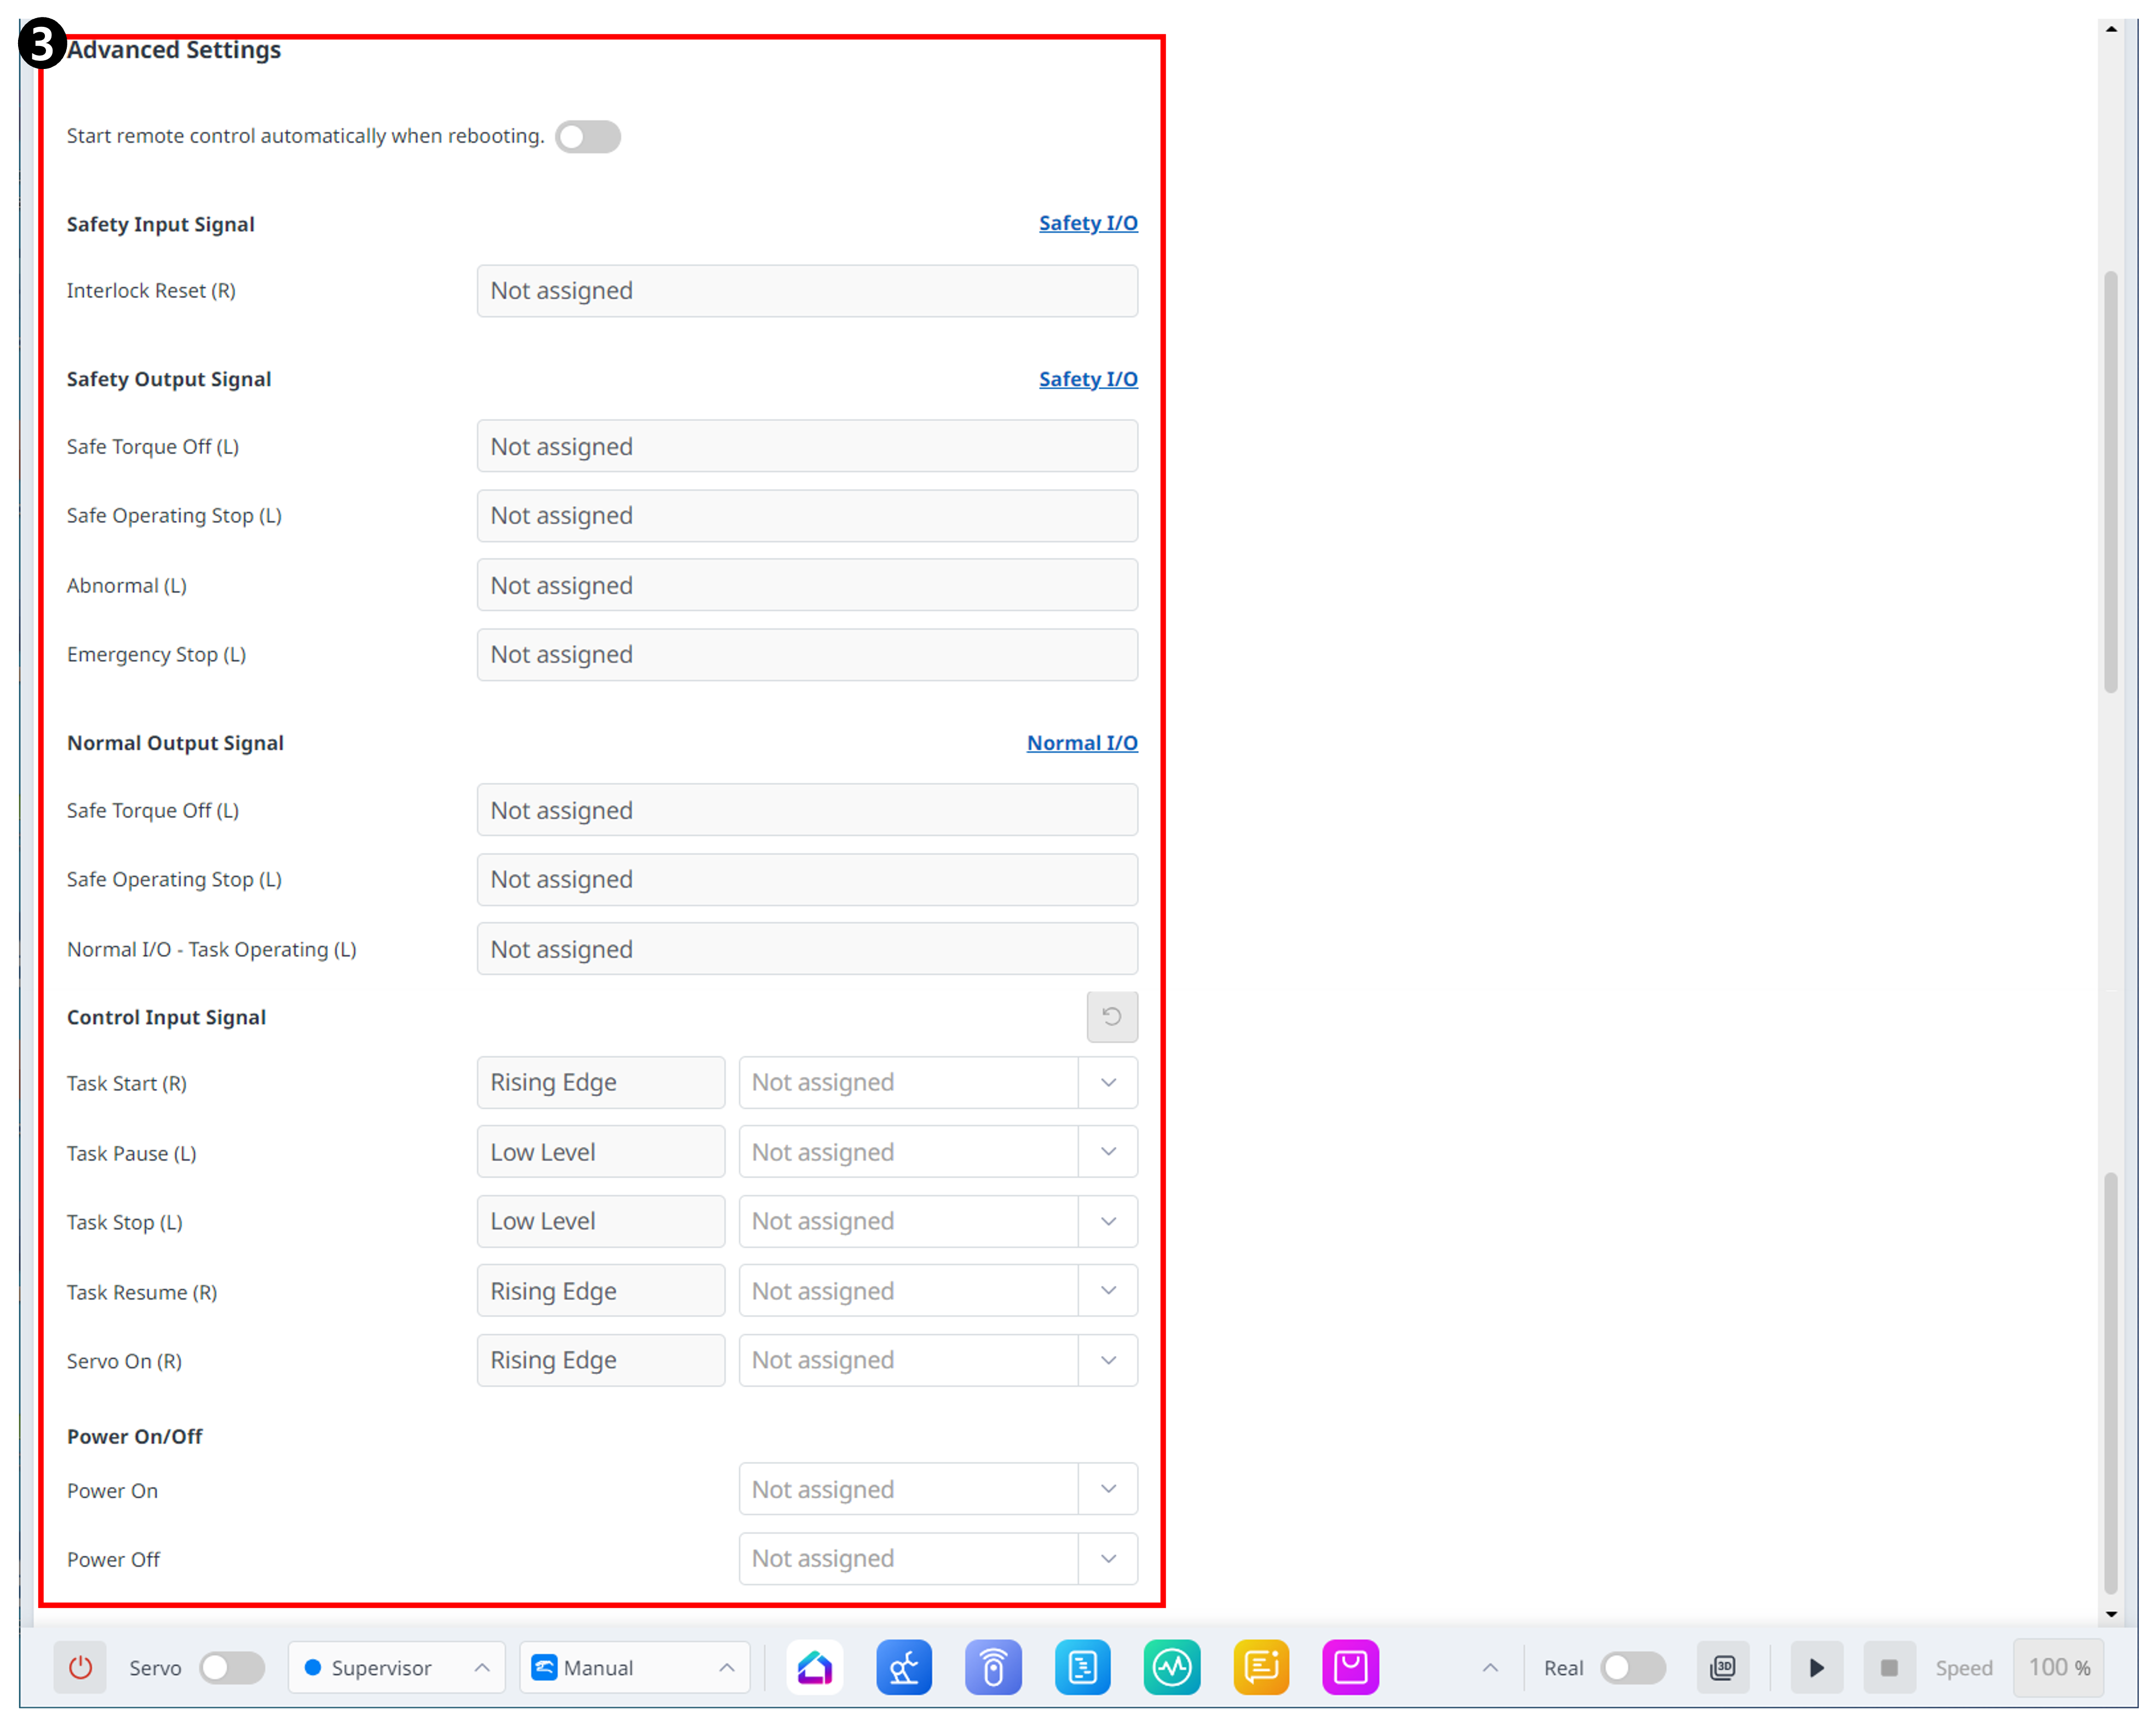
Menu
Items | Description | |
|---|---|---|
| 1 | Warning | This will show the necessary precautions when using the module. |
| 2 | Mandatory Settings | This is a mandatory setting for remote control. You can set modules and tasks and set safe input signals. |
| 3 | Advanced Settings | This allows for advanced settings for remote control. You can set each port for the task to start/pause/stop/resume/servo on. If remote control is set to run automatically after rebooting, it will run as soon as Dart-Platform reboots. |
| 4 | Start Remote Control | This button allows you to start remote control after all settings have been completed. |
Configuration Items
Mandatory Settings
In Mandatory Settings, you must configure the items essential for running remote control.
These settings must be completed to enable the Remote Control function.
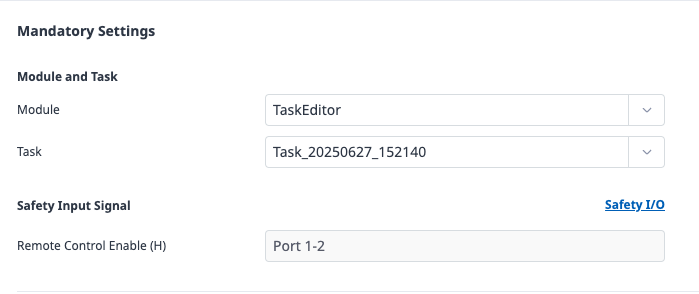
Select Module and Task
Select the module that supports remote control, and specify the task to control within that module.
Safety Input Signal
Configure the Remote Control Enable signal.
You can specify this in the Safety I/O tab of the Robot Parameter module.
Advanced Settings
In Advanced Settings, you can additionally configure optional features necessary for remote control operation.
These settings are optional, and if they are not configured, the basic Remote Control function will still be available.
Start remote control automatically when rebooting

When the toggle button is set to ON, the system will automatically enter the Remote Control Mode screen after the robot is rebooted.
Advanced Signal Settings
All of the following signals are optional.
General Precautions
These are not mandatory items.
The same port and signal cannot be assigned redundantly.
Safety Input Signal

Configure the Interlock Reset signal for initializing connected devices.
This operates identically to the Interlock Reset setting under Safety I/O > Interlock Reset in the Robot Parameter module.
Safety Output Signals
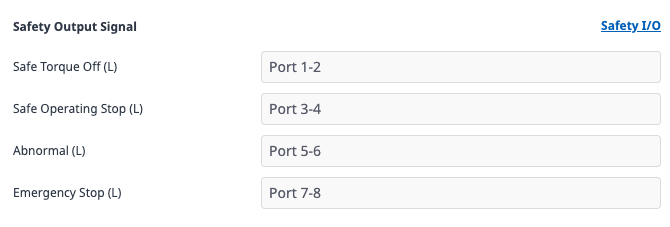
You can assign output ports for STO, SOS, and Emergency Stop signals.
If STO, SOS, or Emergency Stop are already configured in the Safety Output Signals section of the Robot Parameter module, those settings will apply.
Note
For detailed information on each signal, please refer to the Safety Signal I/O section.
Normal Output Signals

You can assign output ports for STO, SOS, and Task Operating signals.
If the same signals are already configured in the General Output Signals section of the Robot Parameter module, those settings will apply.
Control Input Signals
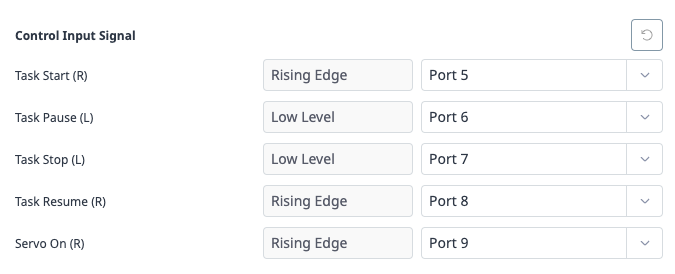
You can assign input ports for Start, Stop, Pause, Resume, and Servo On commands.
Press the Reset button to clear the control input signal configuration.
Power On/Off

You can configure input ports for Power On/Off.
The description displayed next to each signal port indicates the operating condition of that signal.
Rising Edge
The input signal is activated when it rises.
For example, the Task Start signal is triggered when the input rises from 0V to 24V.
When retrying, you must first return the signal to 0V before raising it again.
Low Level
The Stop signal takes priority over the Start signal.
For example, if the Stop signal is at a low level, the Task Start signal will be ignored, and a Remote IO signal ignored message will be displayed.
