
Remote Control Mode Operation Steps
1. Create a program
You must create a program to control remotely in advance.
Create a task in the Task Editor module.
Save the task when the creation is complete.
2. Mandatory Settings
In the Remote Control module, you must configure the following required items:
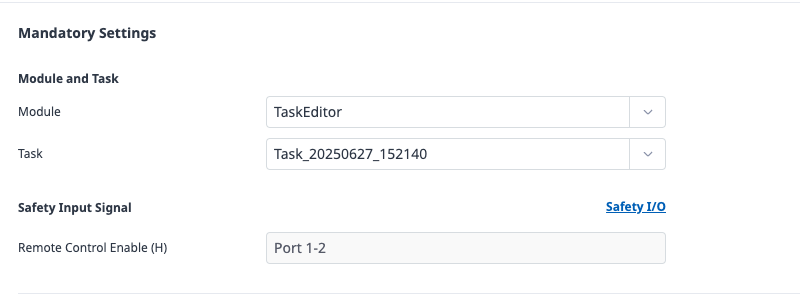
Select Modules and Tasks
Select the module and task to execute from the list.
Specify Remote Control Enable signals
In the Safety I/O menu of the Robot Parameter module, select the Remote Control Enable signal and assign the port to use.
Remote control mode cannot be executed if required settings are not completed.
3. Advanced Settings (Optional)
If necessary, you can specify advanced settings.
If not configured, this feature remains disabled and has no impact on remote control operation.
Automatically start on reboot

When this option is enabled, the system will automatically enter the remote control screen when the robot power is turned on.
Safety Output Signals

Assign output ports for STO (Safe Torque Off) and SOS (Safely Operating Stop) signals.
Note
For more information on each signal, please refer to the Safety Signal I/O.
Control Input Signals
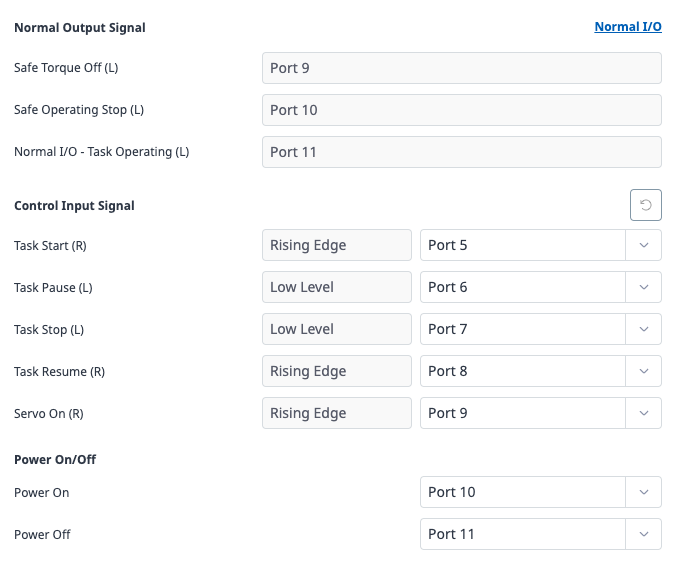
Set the digital input port for Start, Stop, Pause, Resume commands.
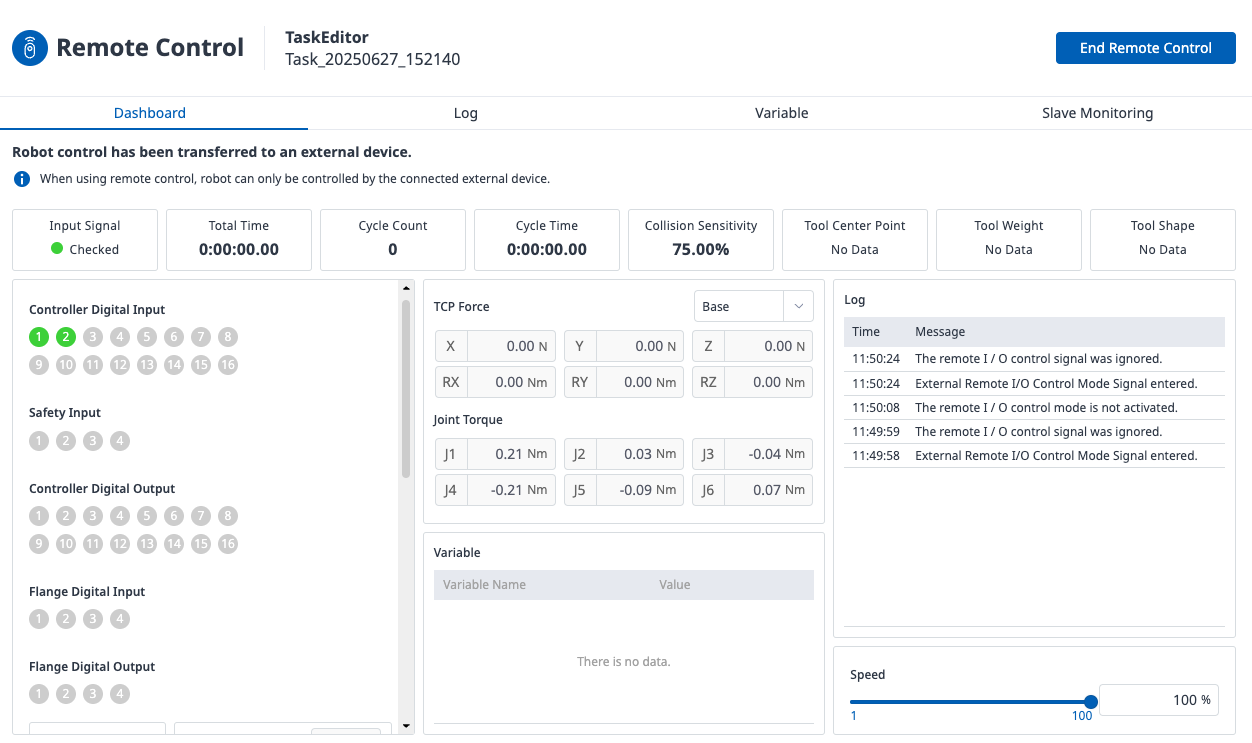
4. Entering remote control mode
Once the setup is complete, you can enter Remote Control Mode.
In the Remote Control Module screen, click the Start Remote Control button.
5. Execute Remote Control
Execute the designated program remotely and monitor its status.
For example, if you want to execute a designated task on the robot after entering Remote Control mode, you can first activate the servo by sending a Servo On (rising edge) signal to the assigned port, then send a Task Start (rising edge) signal to run the task selected in the required settings.
These signals are optional, so the robot can enter Remote Control mode without them. However, to use these optional functions within the mode, you must assign the necessary ports and apply the corresponding signals correctly.