
Visual Servoing
기능
Provides an example of operating Visual servoing. The example files was written in python.
- Directory of .py files
~/ros2_ws/src/doosan-robot2/dsr_example2/example/example/simple ~/ros2_ws/src/doosan-robot2/dsr_example2/example/example/demo
Paramaters of dsr_bringup2
인수명 | 자료형 | 기본값 | 설명 |
|---|---|---|---|
name | - | dsr01 | ROBOT name space . single robot : dsr01 . multi robot: dsr01, dsr02, dsr03, dsr04 … |
host | - | 127.0.0.1 | Robot controller IP . Emulator : 127.0.0.1 . Real robot controller : 192.168.137.100 |
port | - | 12345 | port |
mode | - | virtual | Robot operation mode - virtual : virtual mode - real : real mode |
model | - | m1013 | M-Series Robot model . m0609, m0617, m1013, m1509 A-Series Robot model . a0509, a0912 E-Series Robot model . e0509 H-Series Robot model . h2017, h2515 |
color | - | white | Robot color . white or blue |
gui | - | none | Rviz2 Activation Status . True: Rviz2 activated . False: Rviz2 deactivated |
Option
You can change the simulation environment by modifying the visual_servoing.sdf files.
You can use depth data by utilizing the /rgbd_camera/depth_image topic.
Example
1. Robot controller default IP/Port
- IP : 127.0.0.1 , port = 12345

2. launch (Start the simulation)
To activate the camera for marker recognition, execute the launch file of the visualservoing example.
$ ros2 launch visualservoing dsr_bringup2_visual_servoing_gazebo.launch.py mode:=virtual host:=127.0.0.1 port:=12345 name:=dsr01 model:=m1013

3. Move to the home position
Move to the home position to perform visual servoing.
$ ros2 run visualservoing joint90

4. Run the visual servoing example
$ ros2 launch visualservoing visual_servoing_gz.launch.py
Camera Calibration Method
1. Modify the camera_calibration.sdf file used in camera_calibration.launch.py. Adjust it according to the performance of the camera you are using.
2. Install the package required for camera calibration.
$ sudo apt install ros-humble-camera-calibration
$ sudo apt install ros-humble-image-pipeline
3. Run camera_calibration.launch.py.
$ ros2 launch visualservoing camera_calibration.launch.py4. Run Camera Calibration node.
$ ros2 run camera_calibration cameracalibrator --pattern chessboard --size 6x8 --square 0.02 image:=/rgbd_camera/image5. Rotate and move the checkerboard uploaded to Gazebo until the calibration button is activated.
6. Click the calibration button, then click the save button and apply the result displayed in the terminal (where the Camera Calibration node is run) to the rgbd_camera_gz.yaml file.
Note
If there is not enough RAM capacity, a build error might occur. Please increase the memory capacity by setting up a swap.
To run Gazebo faster, modify the update_rate in dsr_controller2_gz.yaml.
(Path: doosan-robot2/dsr_controller2/config/dsr_controller2_gz.yaml)
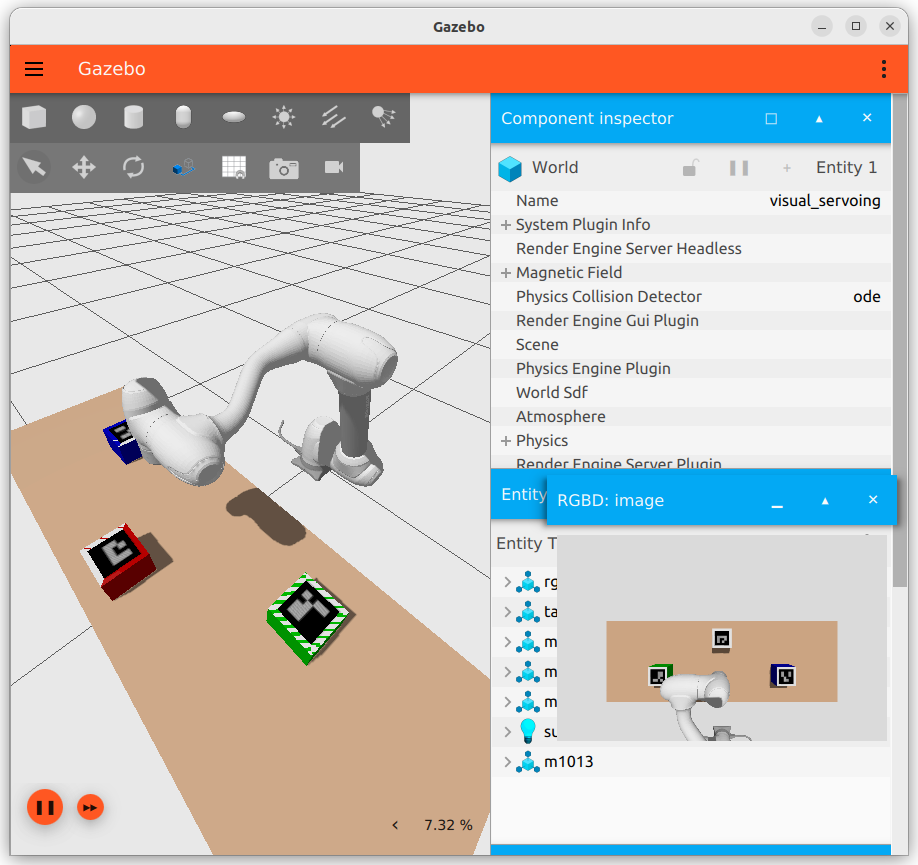
Figure 6.2 visual servoing