
Save and Load Lighting/Exposure/Gain/Focus Setting
No. | Item | Description |
|---|---|---|
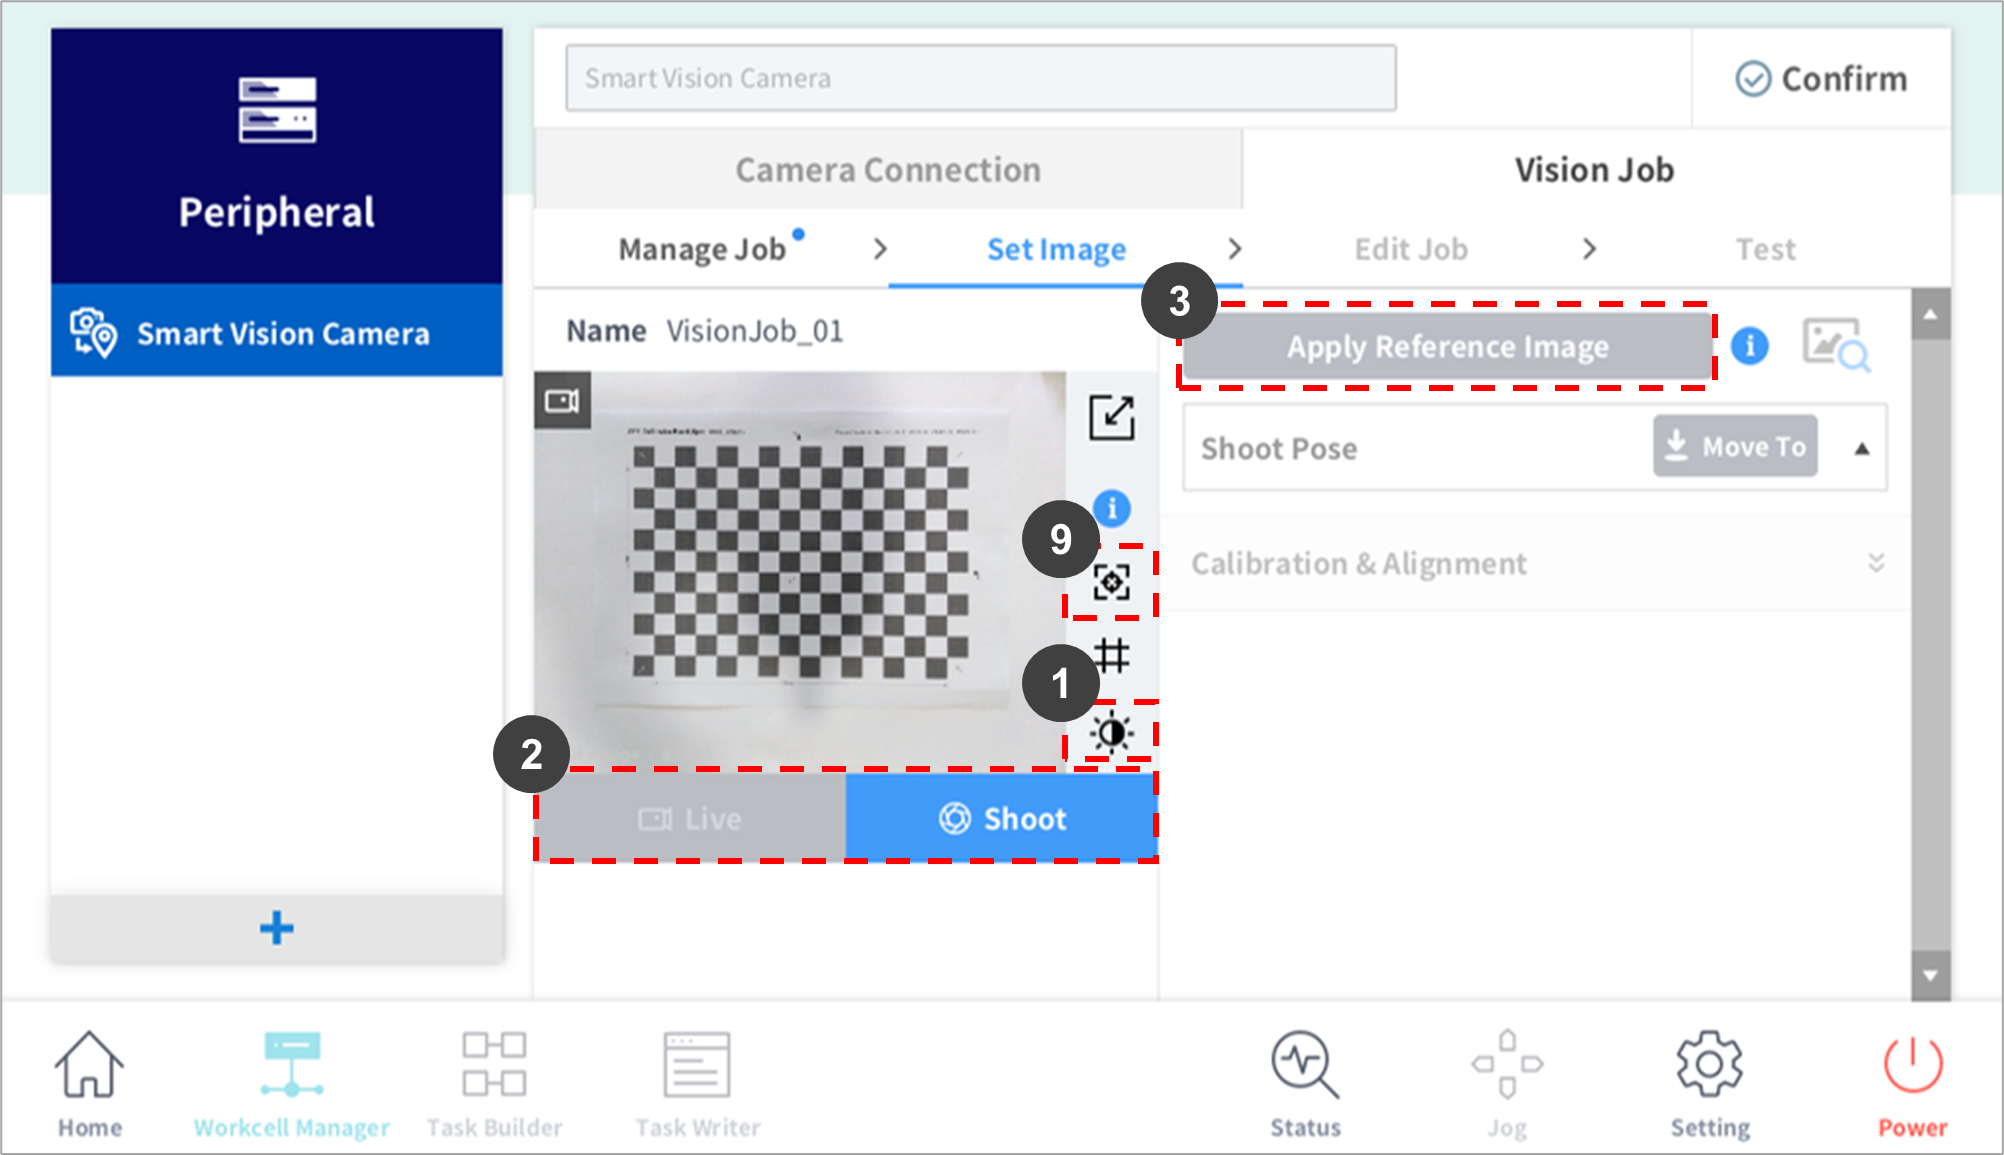
1 | Image Brightness Setting | Displays the LED LIGHT/CAMERA BRIGHTNESS select button. |
2 | Live/Shoot |
|
3 | Apply Reference Image |
|
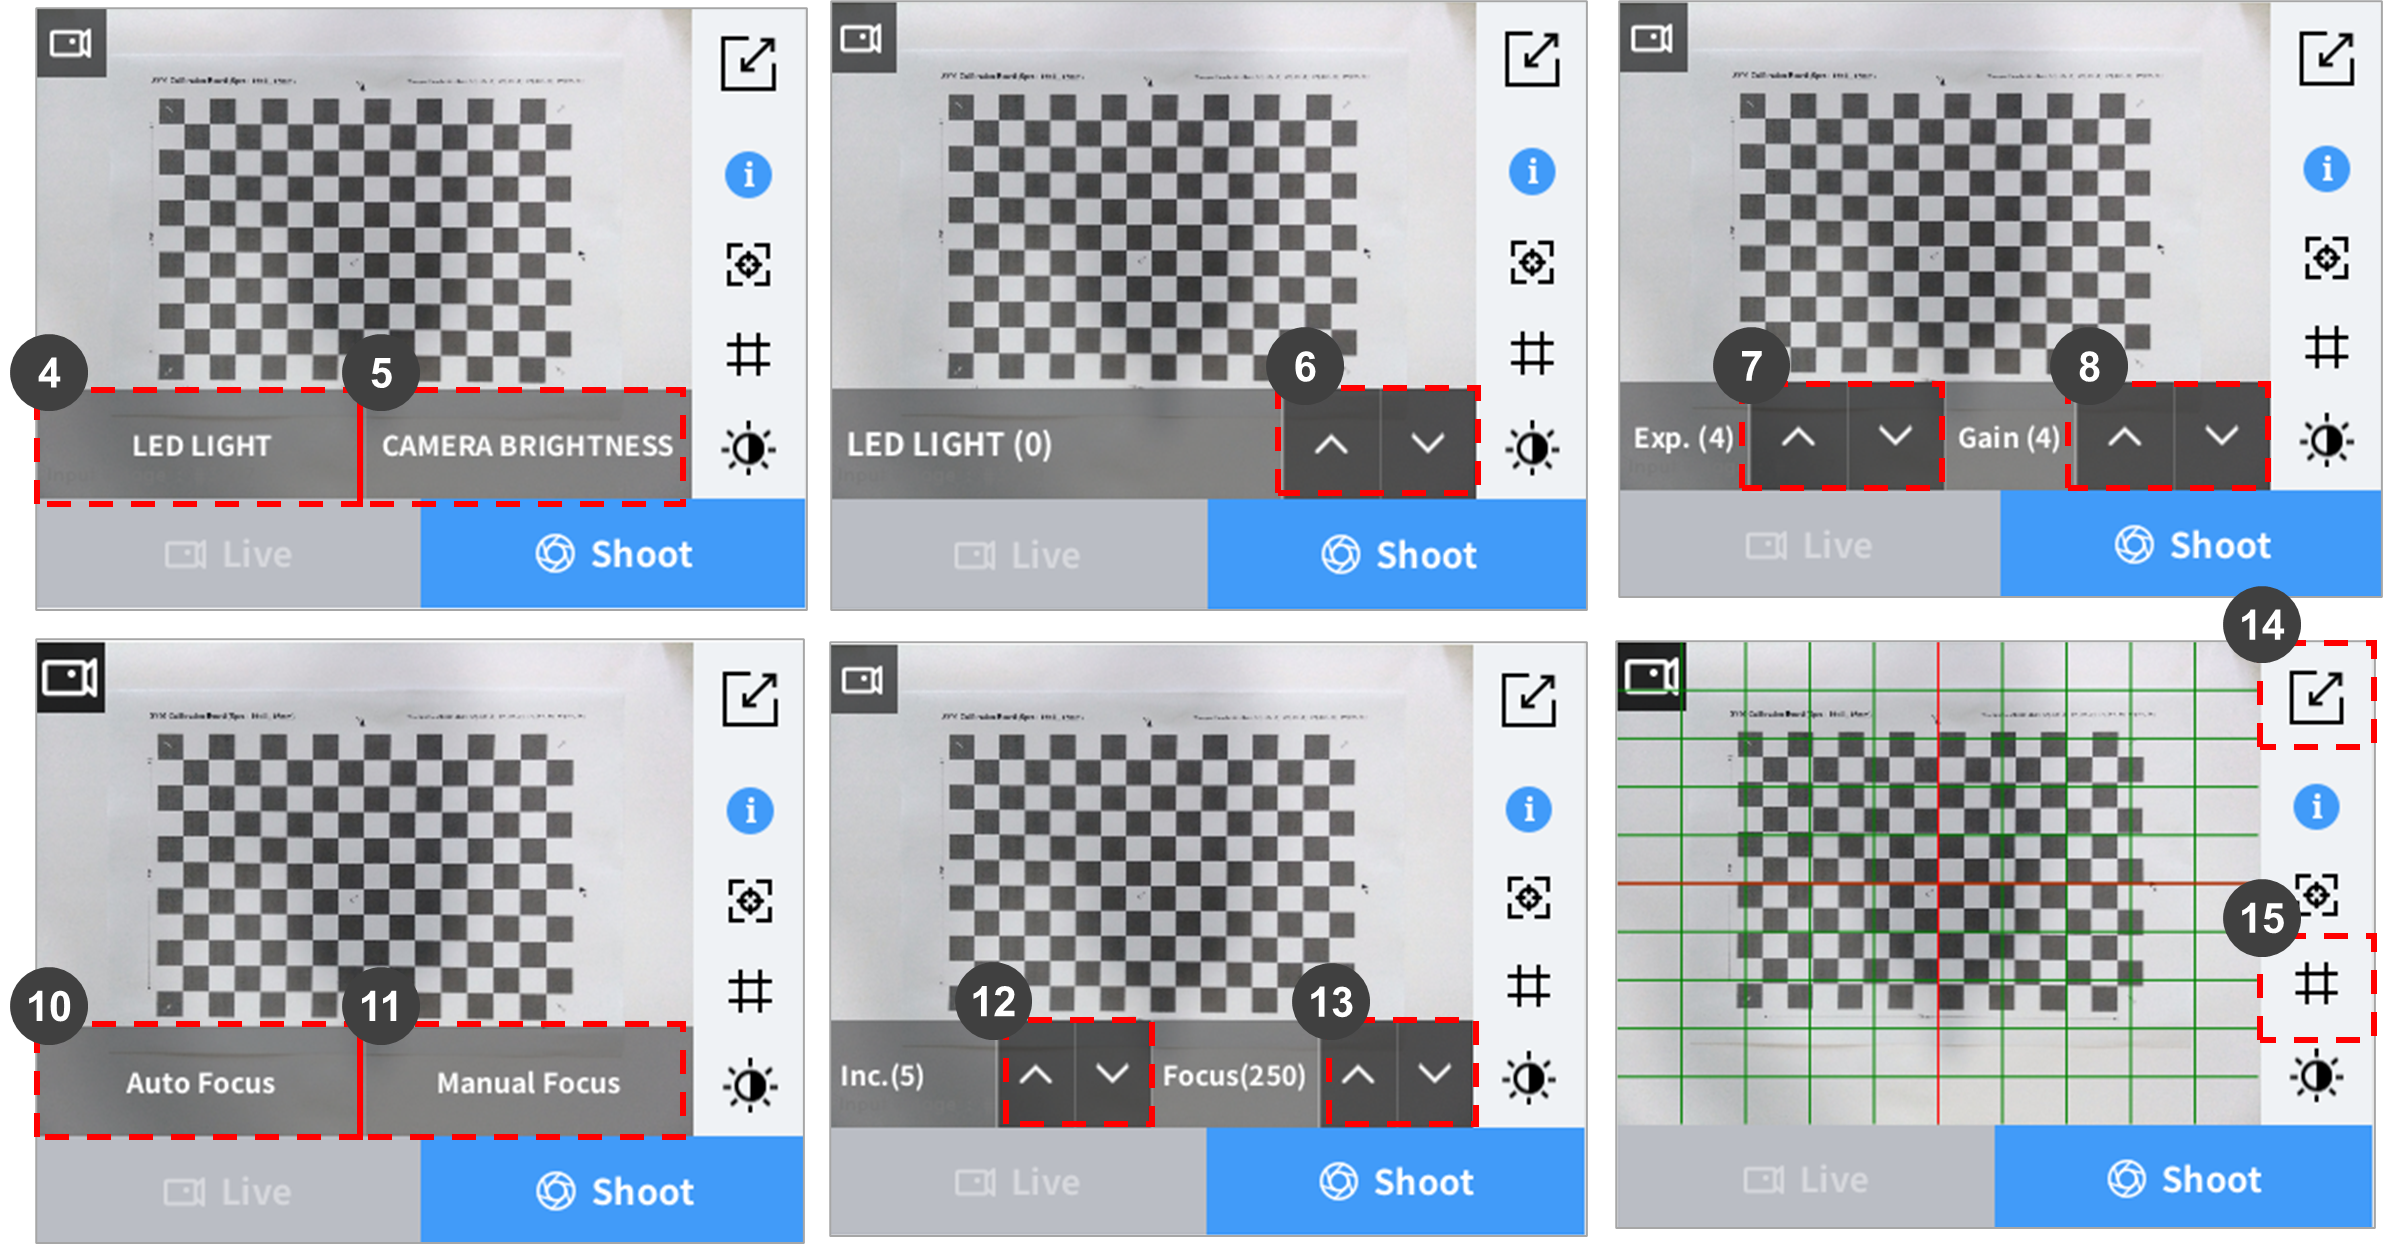
4 | LED Light |
|
5 | Camera Brightness |
|
6 | Lighting Brightness Setting |
|
7 | Exposure Time Setting |
|
8 | Gain Level Setting |
|
9 | Focus Control | Camera focus can be adjusted in a range from 0 to 500. The focus must be set clearly prior to Robot-Vision Calibration. |
10 | Auto Focus | The focus of the camera is adjusted automatically. |
11 | Manual Focus | Camera focus can be adjusted in a range from 0 to 500. |
12 | Inc | The value changes in the order of 1, 5, 10, 50, and 100. |
13 | Focus | The focus increases or decreases by the amount of Inc. |
14 | Full Screen | Displays the image in the full screen. |
15 | Grid | Displays a grid on the image. Each grid represents 10% of the screen. |
Camera Brightness Adjustment (Exposure / Gain)
- It is recommended to start with Gain set at level 1, adjust the Exposure to set the desired brightness, and then adjust Gain to make minor adjustments.
Conditions for a Good Reference Image
- The edge information of the item to detect must be clear.
- The size of the item to detect must be within 5%-70% of the overall screen size. It is recommended to set the size of the item to detect to 20%-40%. Use the grid pattern to check the size.
- The item to detect must be positioned in the center of the screen.
- Items/patterns other than the item to detect must not be on the screen.
- The background must have a clear difference in color from the item to detect, and it must not have patterns.