
Pallet
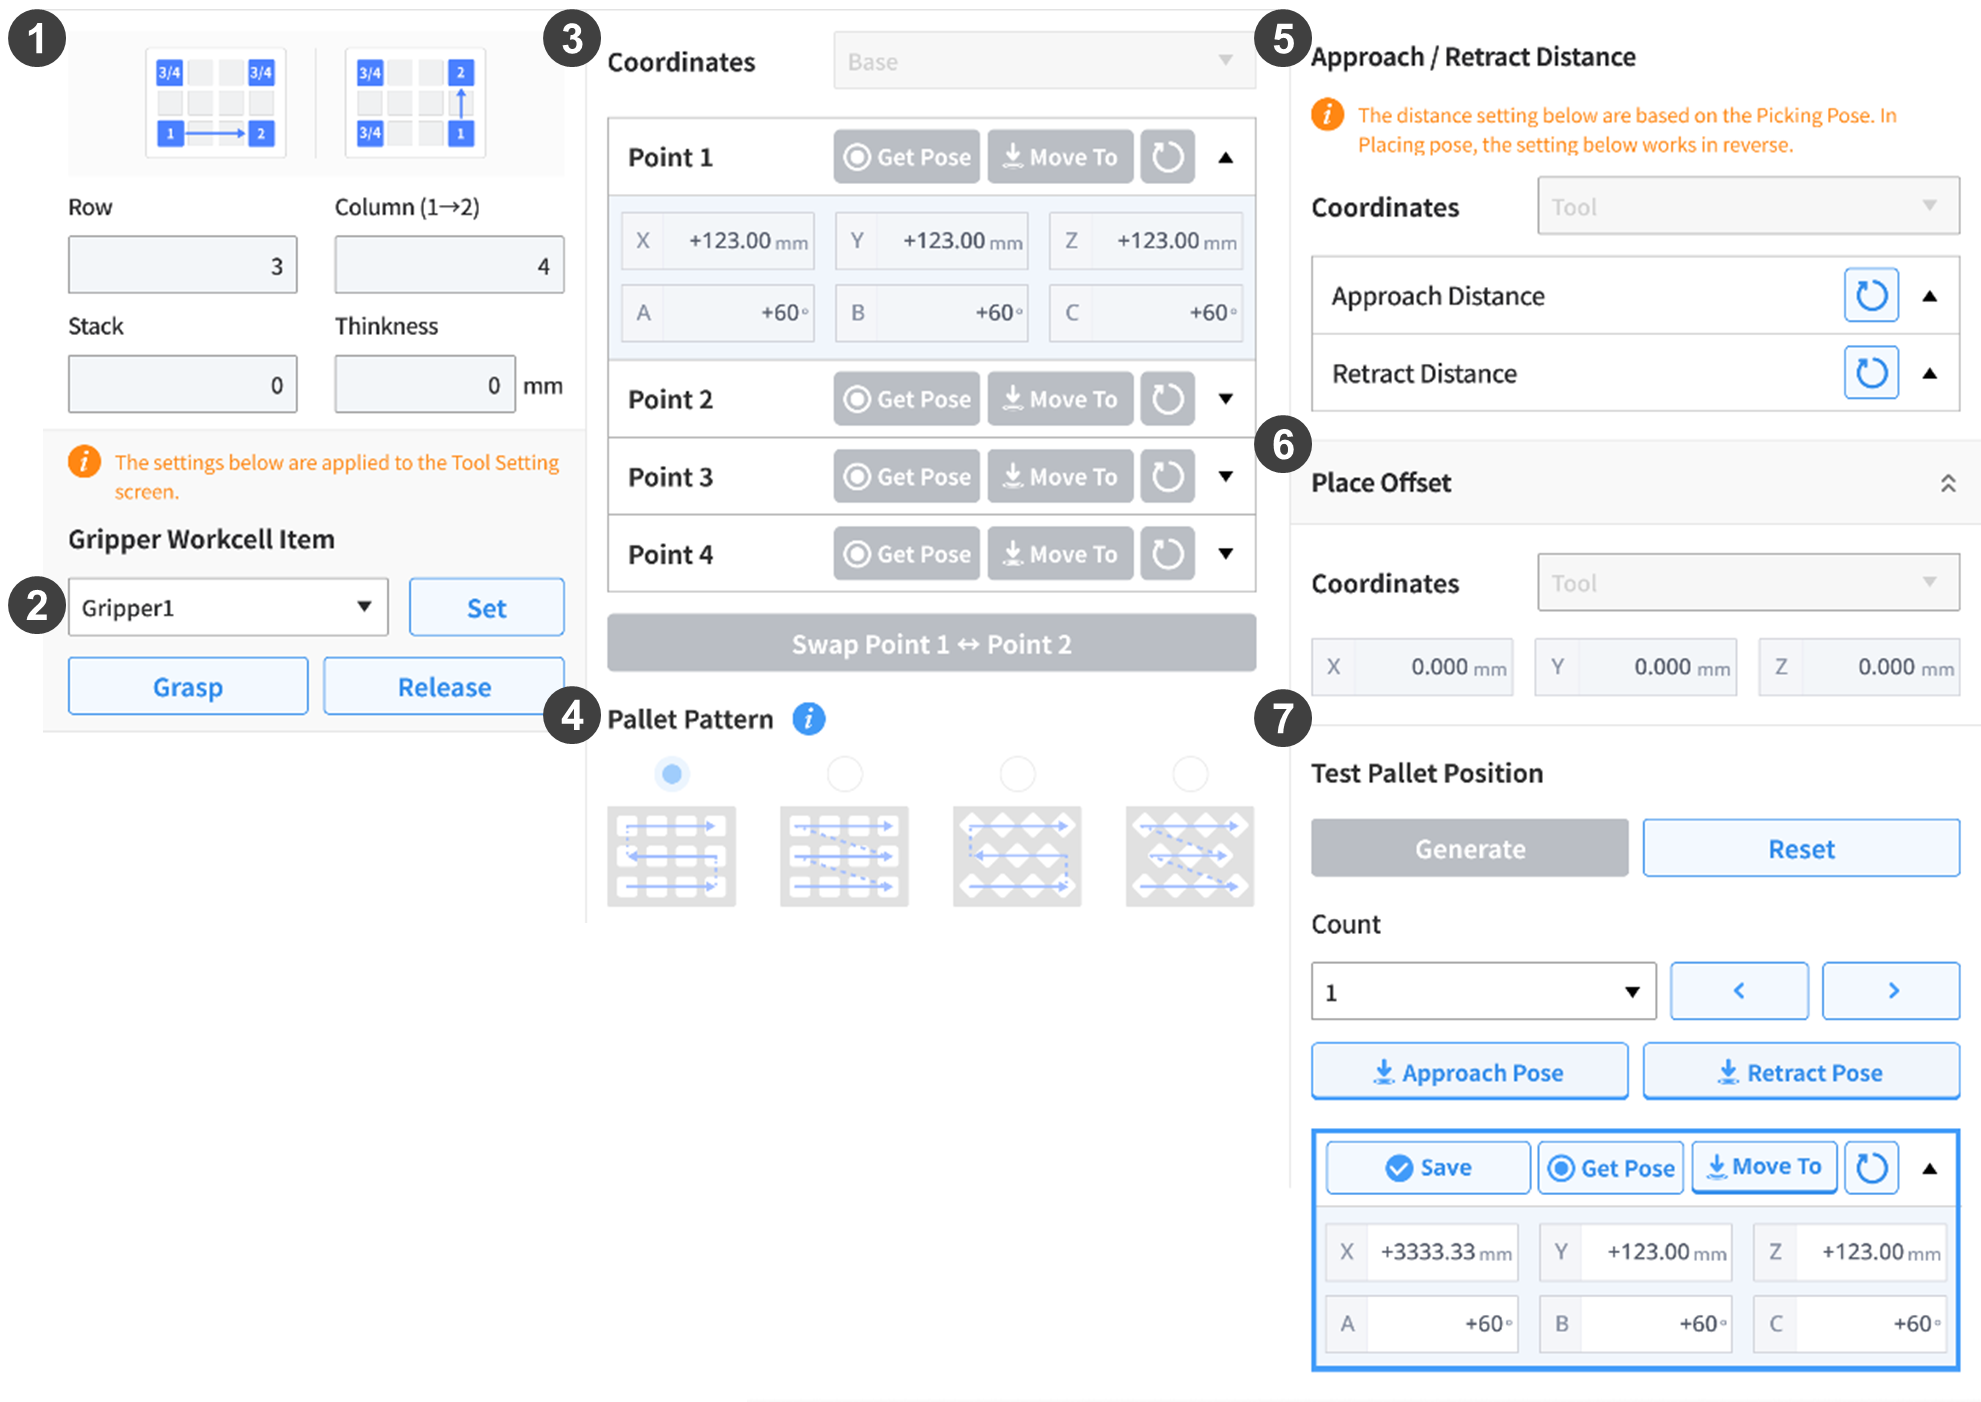
This is a type of cradle that allows the target to be placed in a set formation. All targets on a pallet can be handled with minimum (4-point) instructions. Workpieces can be approached sequentially by entering the row, column, stack and thickness.
| No. | Item | Description |
|---|---|---|
1 | Pallet Row/Column/Stack/Thickness | This is for entering the number of the row/column/stack and the stack height. Row: default 3 / range 1-200 Column: default 4 / range 1-200 Stack: default 1 / range 1-9999 Thickness: default 0 / range 0-10000 [mm] |
2 | Select/Operate Gripper | This is used to select and operate the gripper to be used on the pallet. |
3 | Save Pose | This selects a reference coordinate and saves a reference point. The pattern starts in the direction of Point 1->Point 2. (If necessary, Point 1/2 can be swapped) Point 3 and Point 4 do not affect the order. |
4 | Pallet Pattern | This selects the robot’s movement pattern. Snake, zigzag, rhombus snake, rhombus zigzag |
5 | Approach/Retract Distance | This is for entering the approach/retract distance in x, y and z values from the tool. In general, to retract 100 mm in the z-direction, “0, 0, -100” must be entered. |
6 | Release Offset | This enters the offset values to apply to the points created based on the 4 poses (positions). |
7 | Pallet Point Test | Generate can be used to check the created pallet point. Reset can be used to reset modified values. Enter/select the count or select the point to check using < or >. The order of points is created based on the selected pattern information. Use the Approach Pose button to move to the approach pose. Use the Retract Pose button to move to the retract pose. Use the Move To button to move to the calculated pallet point. Use the Get Pose button to load the current position. Use the Save button to save the position loaded using the get pose (including the cockpit) or manually entered position information in the current count. |