
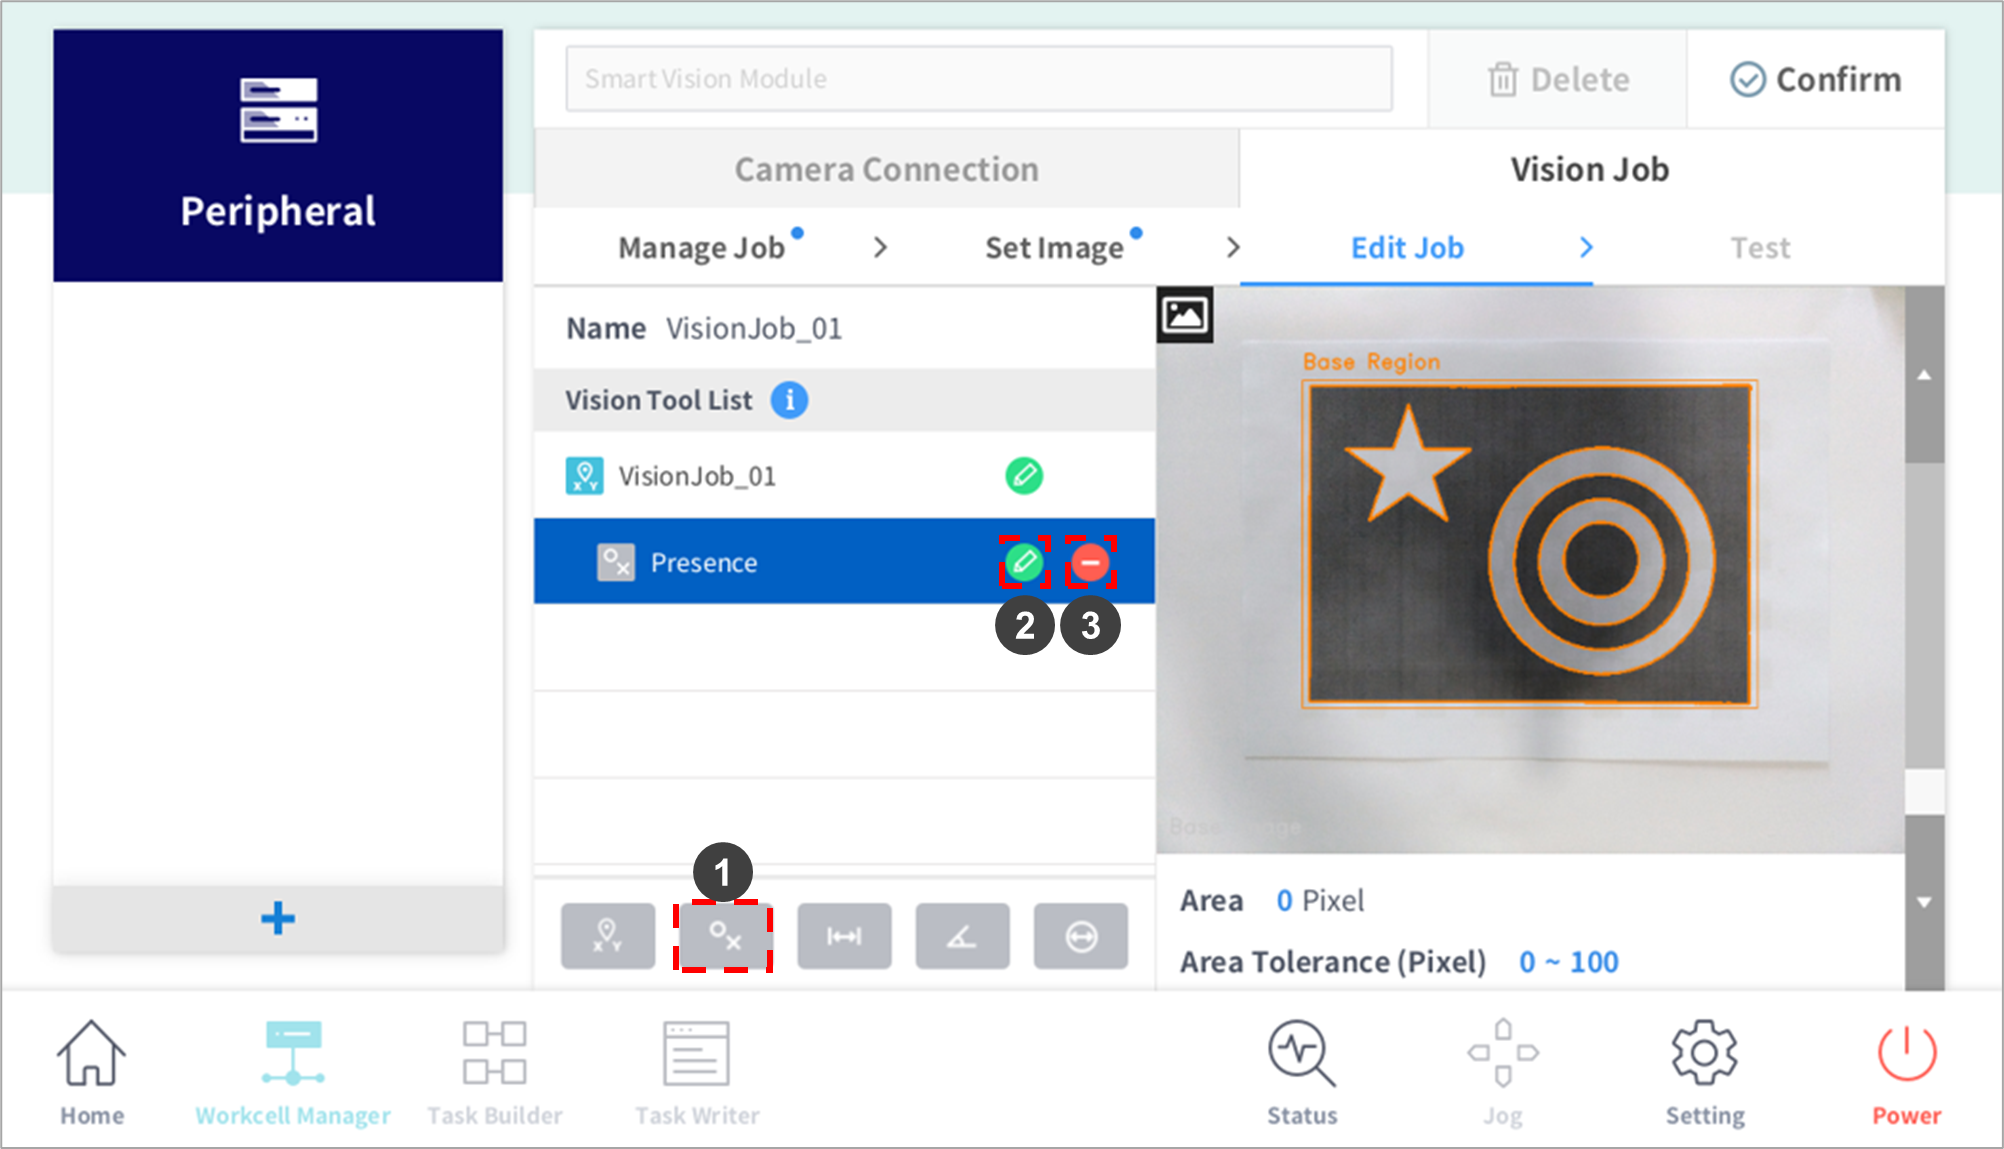
Create Presence Tool and Set Teaching Area
The Presence Tool checks the histogram of shapes. The histogram of brightness (level 1-256) of each pixel in the teaching area is calculated (frequency table) to be used as default information for the presence check. Set the brightness range corresponding to the shape to check and press the Calculate button to measure the area of the shape (Pixel Count) by detecting pixels corresponding to the set brightness range. Adjust the acceptance range (Tolerance) of the check based on measured area values to set the presence check.
| No. | Item | Description |
|---|---|---|
1 | Add Presence Tool | Adds a Presence Tool to the Vision Tool List. |
2 | Edit | A setting window of the job selected from the Vision Tool List is displayed. |
3 | Delete | The selected job from the Vision Job List is deleted. |
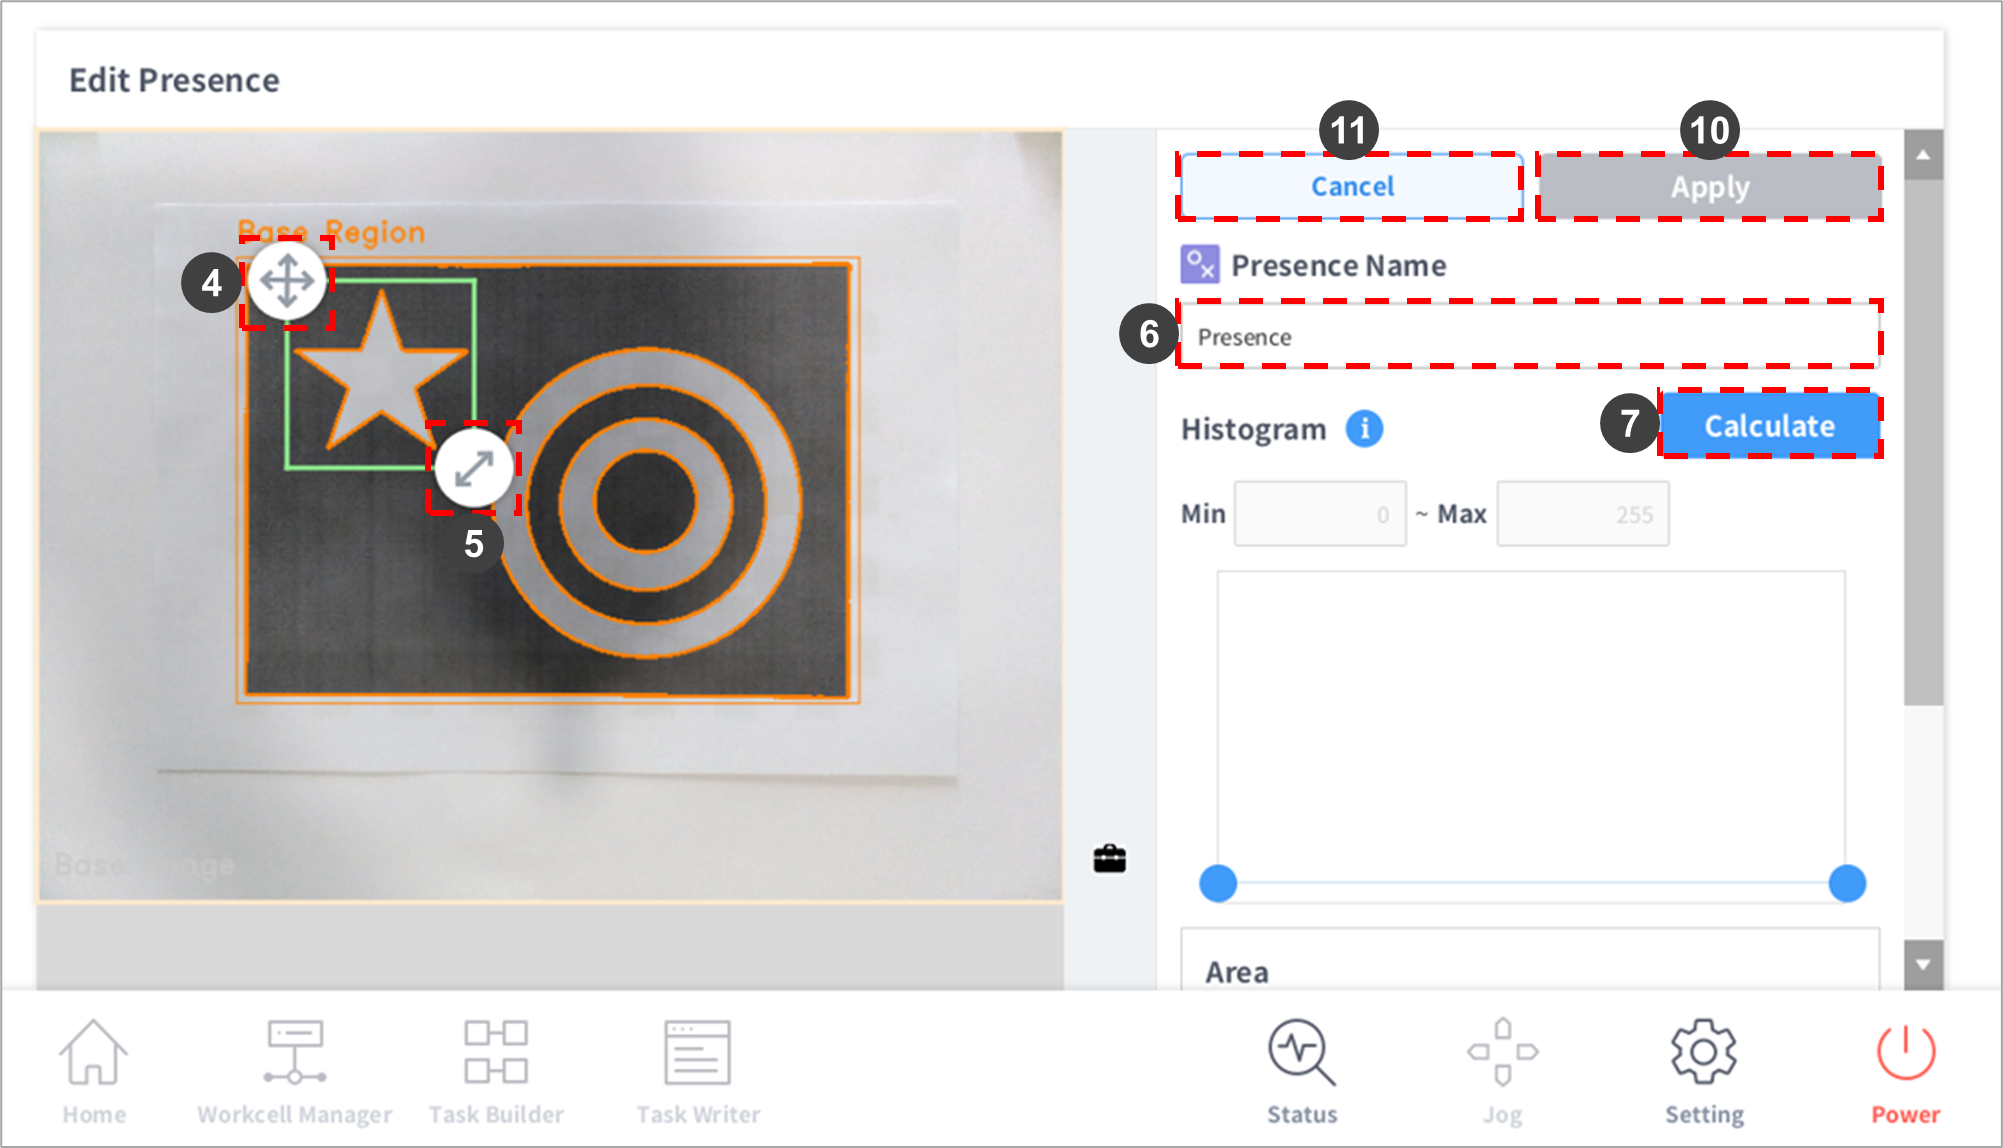
4 | Move Teaching Area | Press and hold the arrow to move the teaching area. |
5 | Adjust Teaching Area Size | Press and hold the arrow to adjust the teaching area size. |
6 | Edit Job Name – Edit Window | A virtual keyboard is displayed, and the job name can be edited.
|
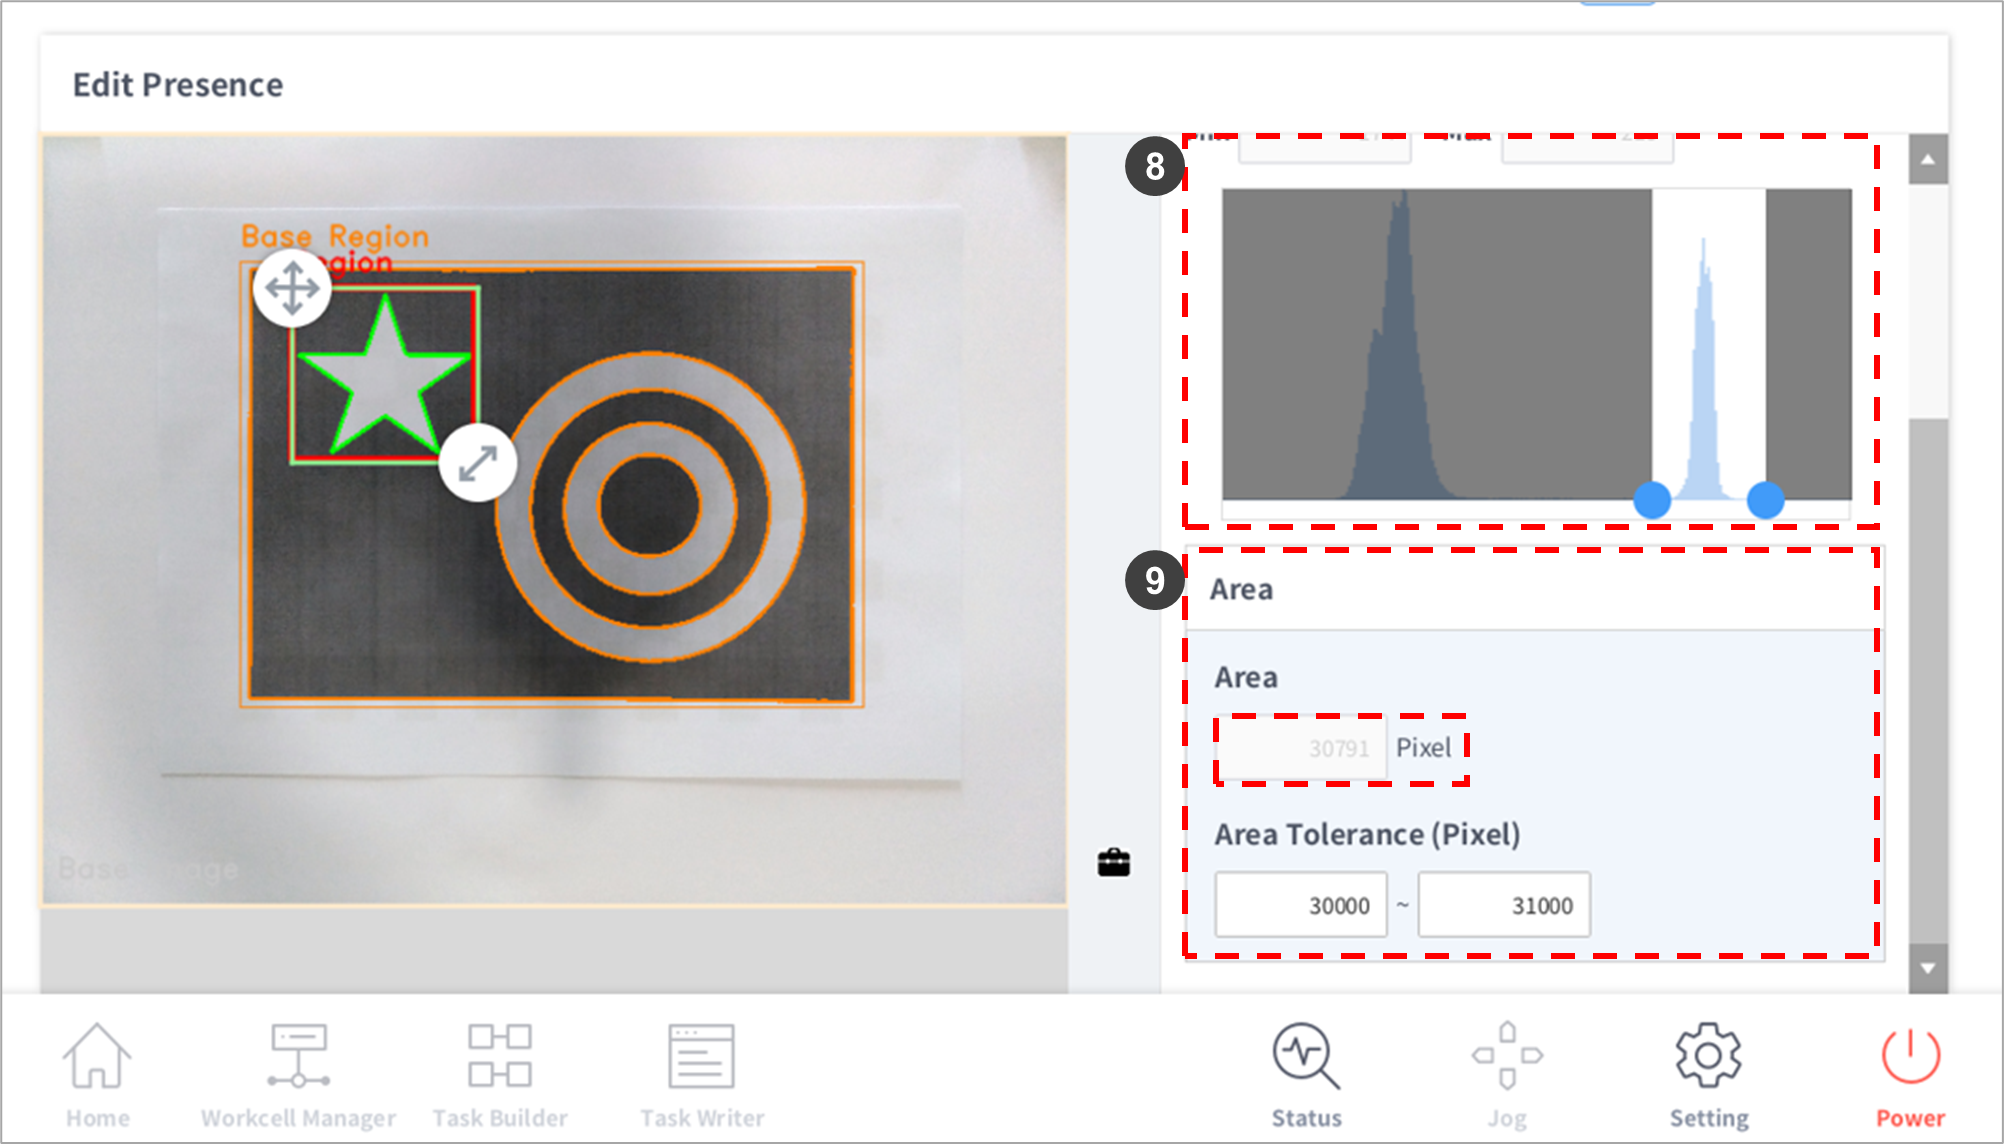
7 | Calculate | Checks the histogram distribution of edges within the Presence Tool teaching area. |
8 | Histogram Min/Max Setting | Slide the horizontal Histogram Min/Max bar to adjust the detection level of desired edges.
|
9 | Area Tolerance Limit Setting | Enter the pixel value allowed within the detected area in the edit window. Values exceeding the value range entered are not detected.
|
10 | Apply | Applies Vision Job settings. |
11 | Cancel | Cancels Vision Job Tool settings. |